


Thrustworthy
Today of all times, most people long for security on the Internet. It is important that the sources used are trustworthy. This also applies to source code. So there is a need to mark the source code and the changes to the source code as trustworthy.
The code repository GitHub supports the option of signing changes to the source code by the contributor. This is made possible by commit signature verification.
What are signed commits
A LinuxJournal article describes pretty well why signed commits are helpful:
When you sign a Git commit, you can prove that the code you submitted came from you and wasn't altered while you were transferring it. You also can prove that you submitted the code and not someone else.
Being able to prove who wrote a snippet of code isn't so you know who to blame for bugs so the person can't squirm out of it. Signing Git commits is important because in this age of malicious code and back doors, it helps protect you from an attacker who might otherwise inject malicious code into your codebase. It also helps discourage untrustworthy developers from adding their own back doors to the code, because once it's discovered, the bad code will be traced to them.
The following describes what must be done so that signed commits can be created in order to mark source code changes as trustworthy in GitHub.
How to enable signature verification
Github describes what needs to be done pretty well. I've compressed the instructions and added pictures to make them more compact.
Prerequisites
I am using Windows, but since for the key creation GPG is used, it should also work for other operating systems, as long GPG is available for it!
If not already done, Download GnuPG and GIT and install them.
I am using GPG from within the GIT bash to create my key pair.
Step 0 - Preparation
It is helpful to have a few tools at hand in order to be able to complete some tasks faster.
- Your favourite editor for storing temporary data
- Your password manager (why: the generation of a GPG key pair requires a passphrase. If you are using a password manager I suggest to already create a new entry for your future GitHub PGP key pair in order to save time later.)
- Your GitHub email address (or no-reply alias, if activated)
- open a browser and log in to GitHub
Step 1 - generate a GPG key
- Open your terminal of choice where you have access to git
- Enter and execute
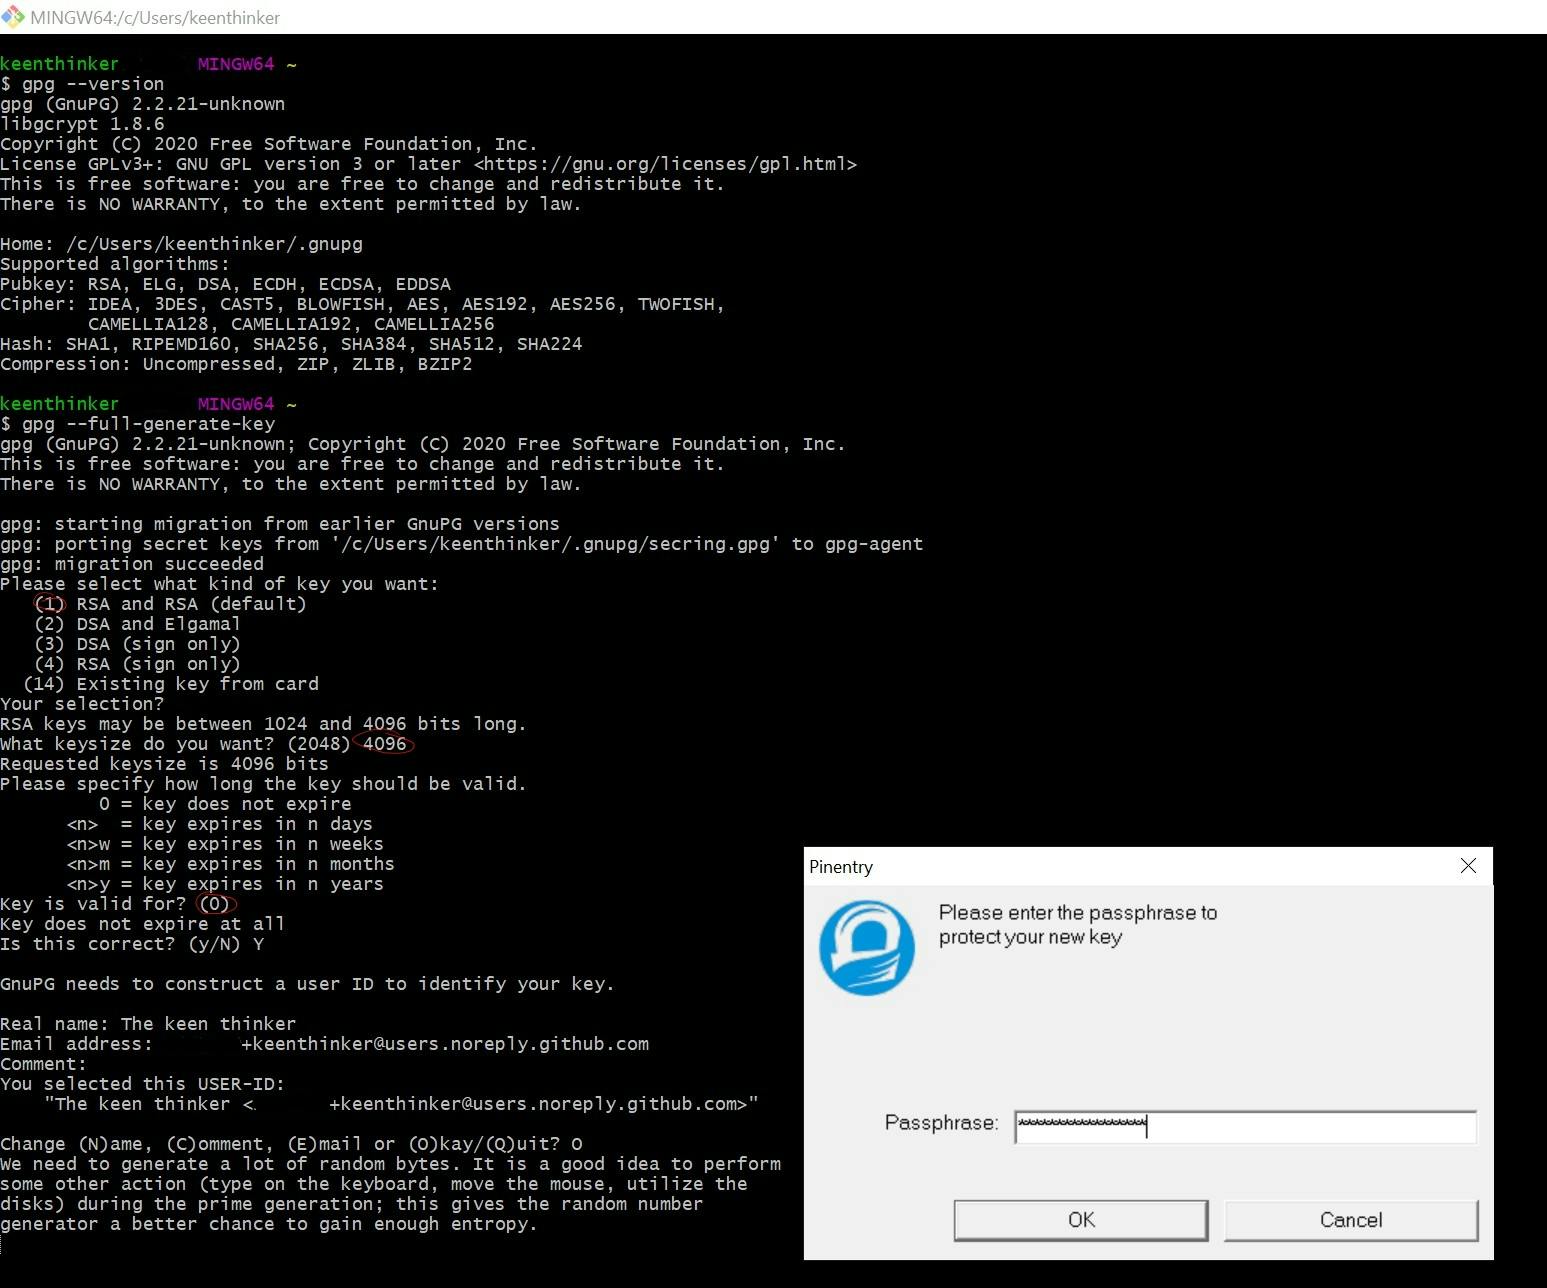
$ gpg --full-generate-key - Optional: if your GPG version is <
2.1.17(check with$ gpg --version) then the command is$ gpg --default-new-key-algo rsa4096 --gen-key
Now a few details have to be entered. Some are mandatory, some are recommendations:
- Your key must use
RSA(GitHub requirement) - Add length:
4096(it is not recommended to choose a larger size) - Add expiration:
never - Enter your Id information (Name and verified email. If your email is set to private, then use the
no-replyemail) - Enter your new GPG password (twice)(from your password manager)
- Perform some operations like moving the mouse a bit, typing on the keyboard while bytes are generated
It looked like this for me:
Step 2 - check
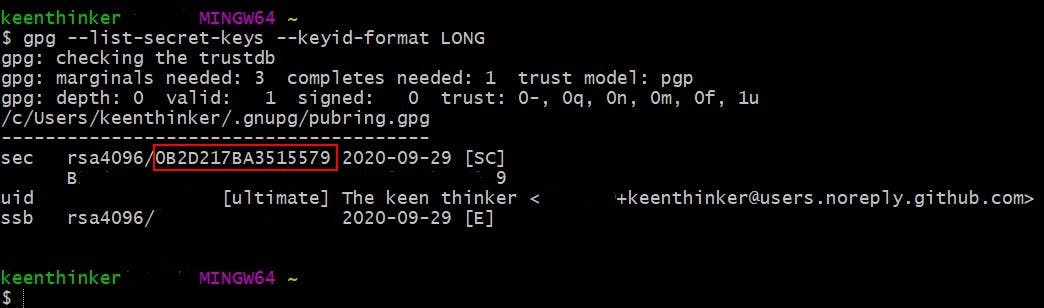
- Execute
$ gpg --list-secret-keys --keyid-format LONG - This should show the newly generated key. In my case it is
0B2D217BA3515579 - Copy the value in the editor - you will need it several times later
Step 3 - extract the needed GPG data
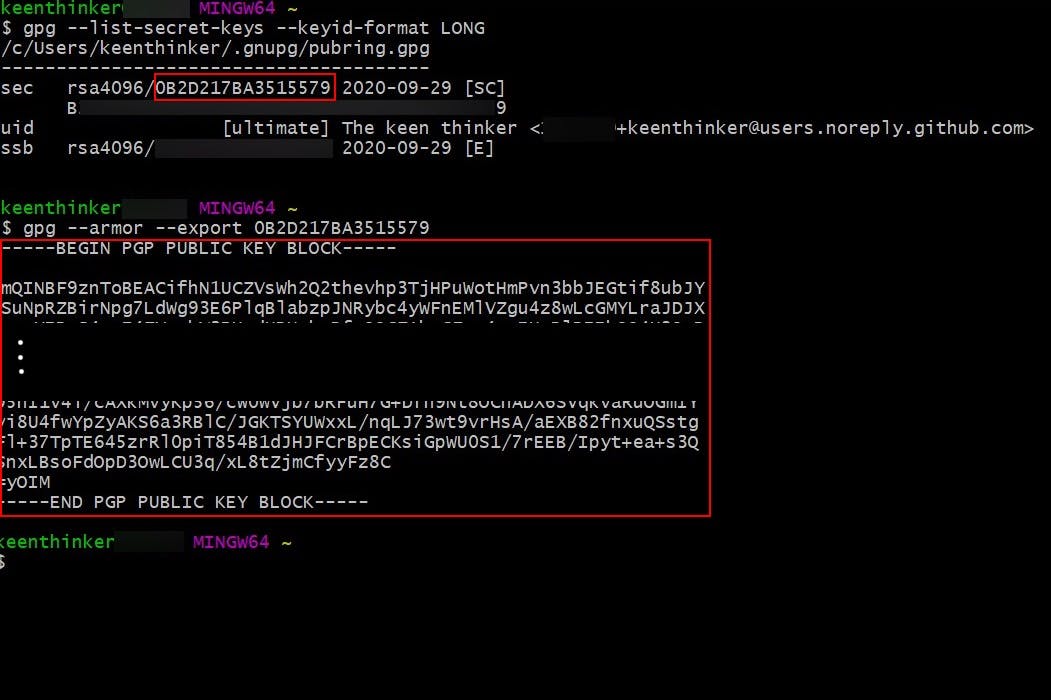
- Id - you will need the key id from step 2 (found on the line starting with
sec) - You will need the GPG key. This can be exported with the following command:
$ gpg --armor --export [insert id from step 2] - Copy the GPG key with the two lines at the beginning and the end
-----BEGIN ...
...
-----END PGP ....
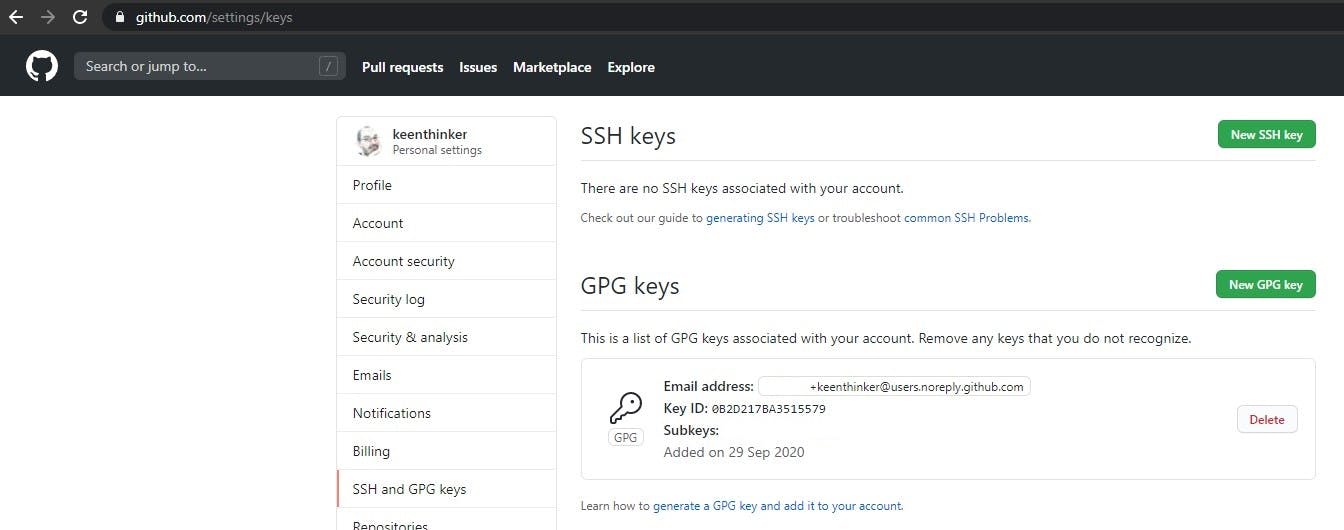
Step 4 - add the GPG key to your GitHub account
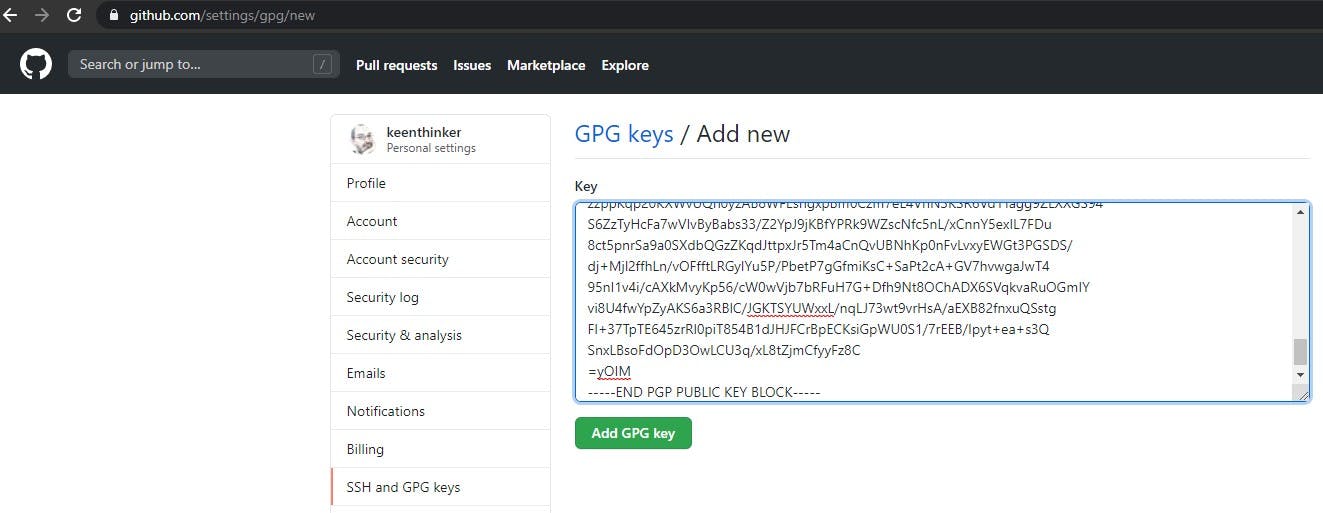
- Go to your GitHub settings page. There is a SSH and GPG keys entry
- Click New GPG Key
- Paste the GPG key text here and save
Step 5 - tell your local GIT about your signing key
- Enter and execute:
$ git config --global user.signingkey [insert id from step 2]
Step 6 (optional) - activate sign commits with GPG by default
- Enter and execute this command
$ git config --global commit.gpgsign true
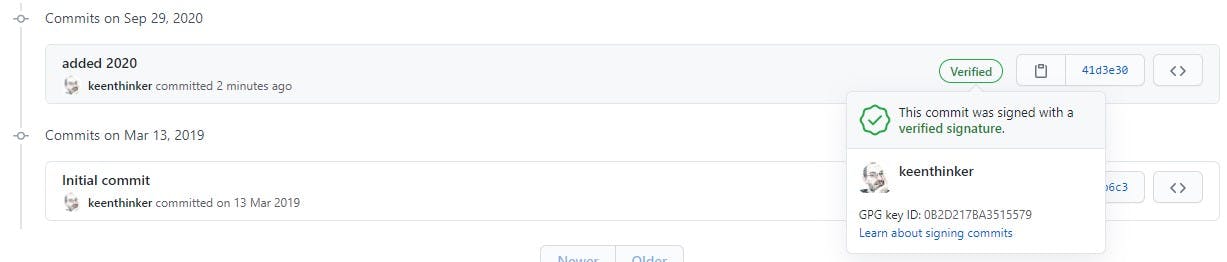
Step 7 - sign your commits
$ git commit -S -m "added 2020"
Enter your PGP password when asked.
Your commits in GitHub are now signed and thus verified.
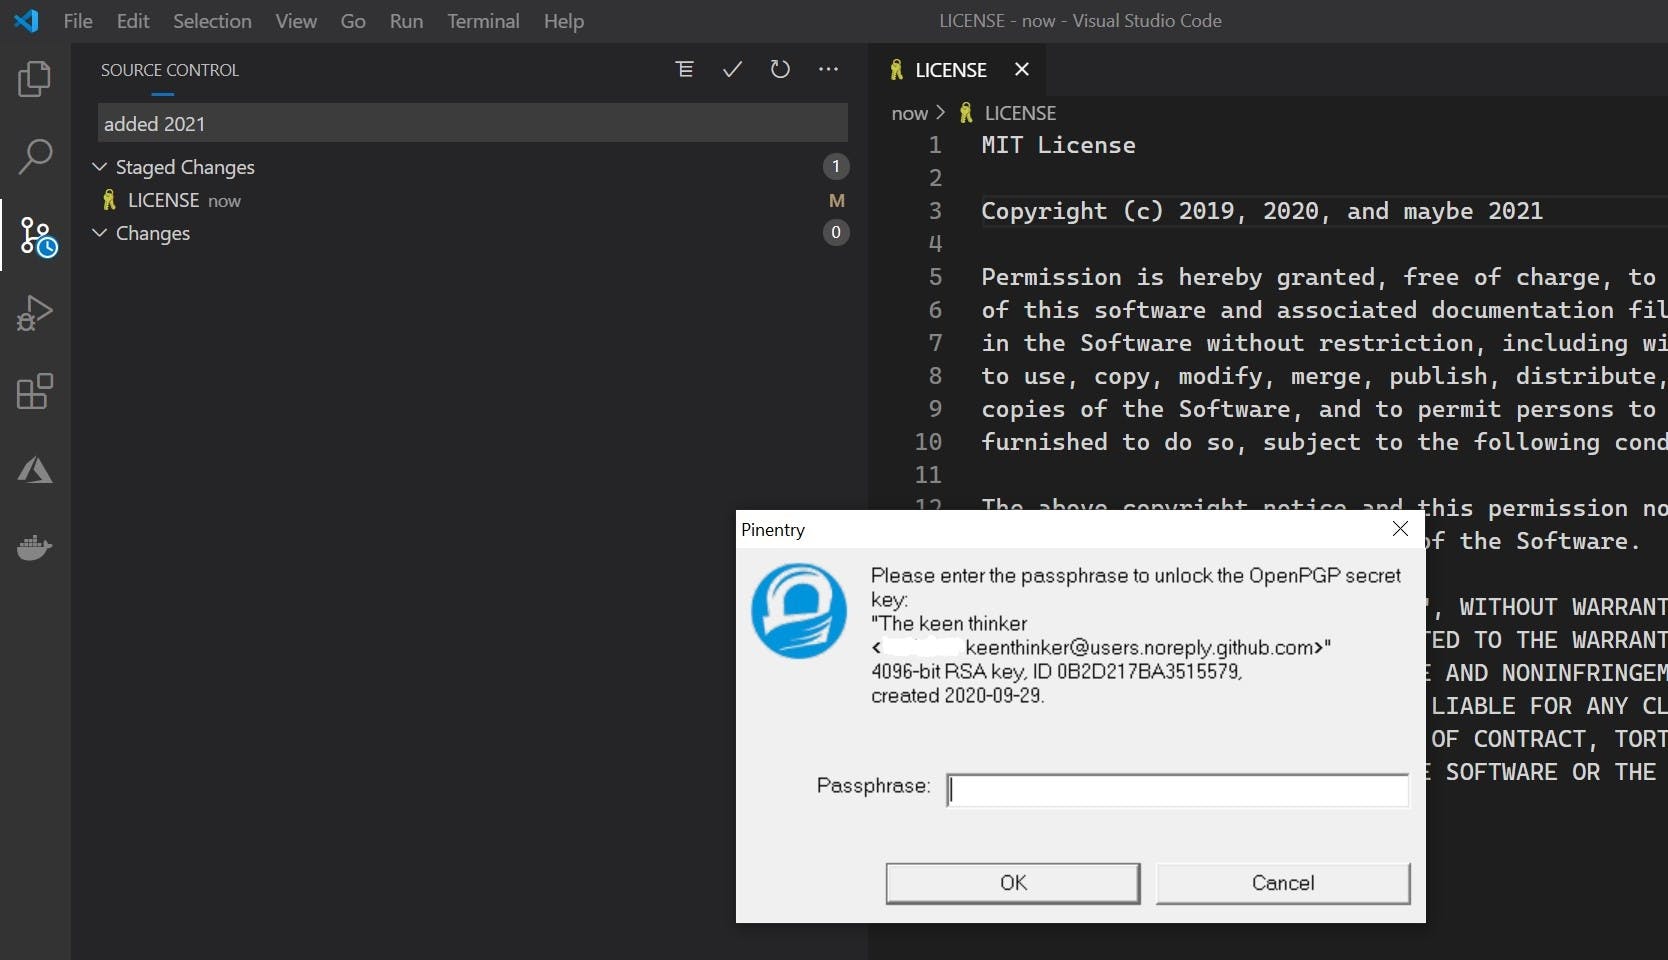
Step 8 (bonus) - VSCode
VSCode is smart and it takes the global GIT settings into account and commits triggered from VSCode are also signed. If you want to commit without signing, you need to do so explicitely.
Conclusion
Now all commits can be trusted. 😀
If you have any questions, don't hesitate to ask me using the comments section.