


Introduction
This is part 2 of the series Video recording and streaming with 0 investments.
In this article you will see how to show yourself with the camera to your audience using the free OBS Studio software.
I’ll show you how to add and use the build-in camera (if you have a laptop with a video capture device), a USB camera and also how to use your mobile phone as a webcam.
All articles from the series can be found here:
- Introduction.
- Part 1 discusses desktop recording.
- Part 2 discusses how to show yourself with the camera. This article.
- Part 3 discusses streaming.
- Part 4 will be about some nice features of the OBS software - scenes, transitions, static images, and so on.
Let’s start.
Recap OBS basics
A very short recap of the OBS basics.
OBS stands for Open Broadcaster Software – a free and open source software for live streaming and screen recording available for Windows, Linux and macOS. It can be downloaded from here: obsproject.com.
In order to record something, you need to configure the output and the video settings first.
The layout consists of different panels like:
- Captured content
- Capture sources
- Control panel
- Audio
- and so on
You can ignore for now the Scenes and Scene Transitions panels.
For this article only the Capture sources panel is relevant.
You can find more details about the OBS basics in Part 1 – desktop recording
Prerequisites for this part
If you want to see / show yourself in OBS you need to have
- either some sort of camera (build-in or webcam)
- and/or an android mobile phone
- and Wireless network access point to which both the computer and the mobile phone are connected (only needed when the mobile device is used as a webcam)
Add a camera as a video capture device
This option works for any normal camera. In this case normal means a camera that is build-in, or connected using a standard connector like USB (for example a webcam) or HDMI (for example a digital camera).
You can add such cameras as video input very easily in OBS:
- Go to the Capture sources panel
- Add a Video Capture Device
- Choose the available camera
And you are ready to go.

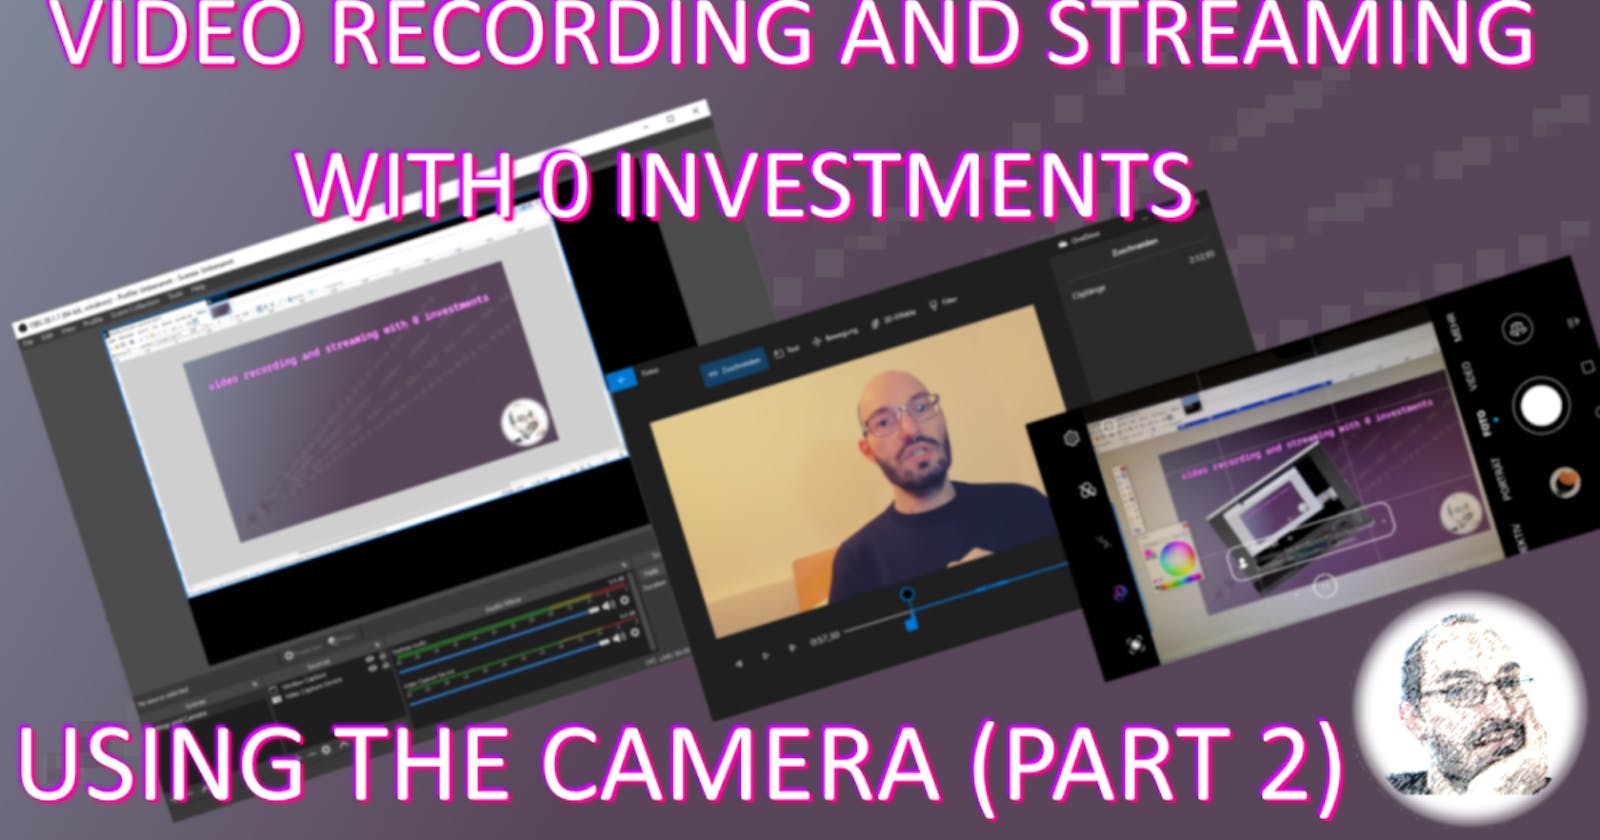
Normally OBS uses when possible default values and they match the most use cases. You can of course change a lot of settings if you wish too. Two configuration options are worth mentioning:
- Resolution/FPS type
- Use custom audio device
Resolution/FPS type
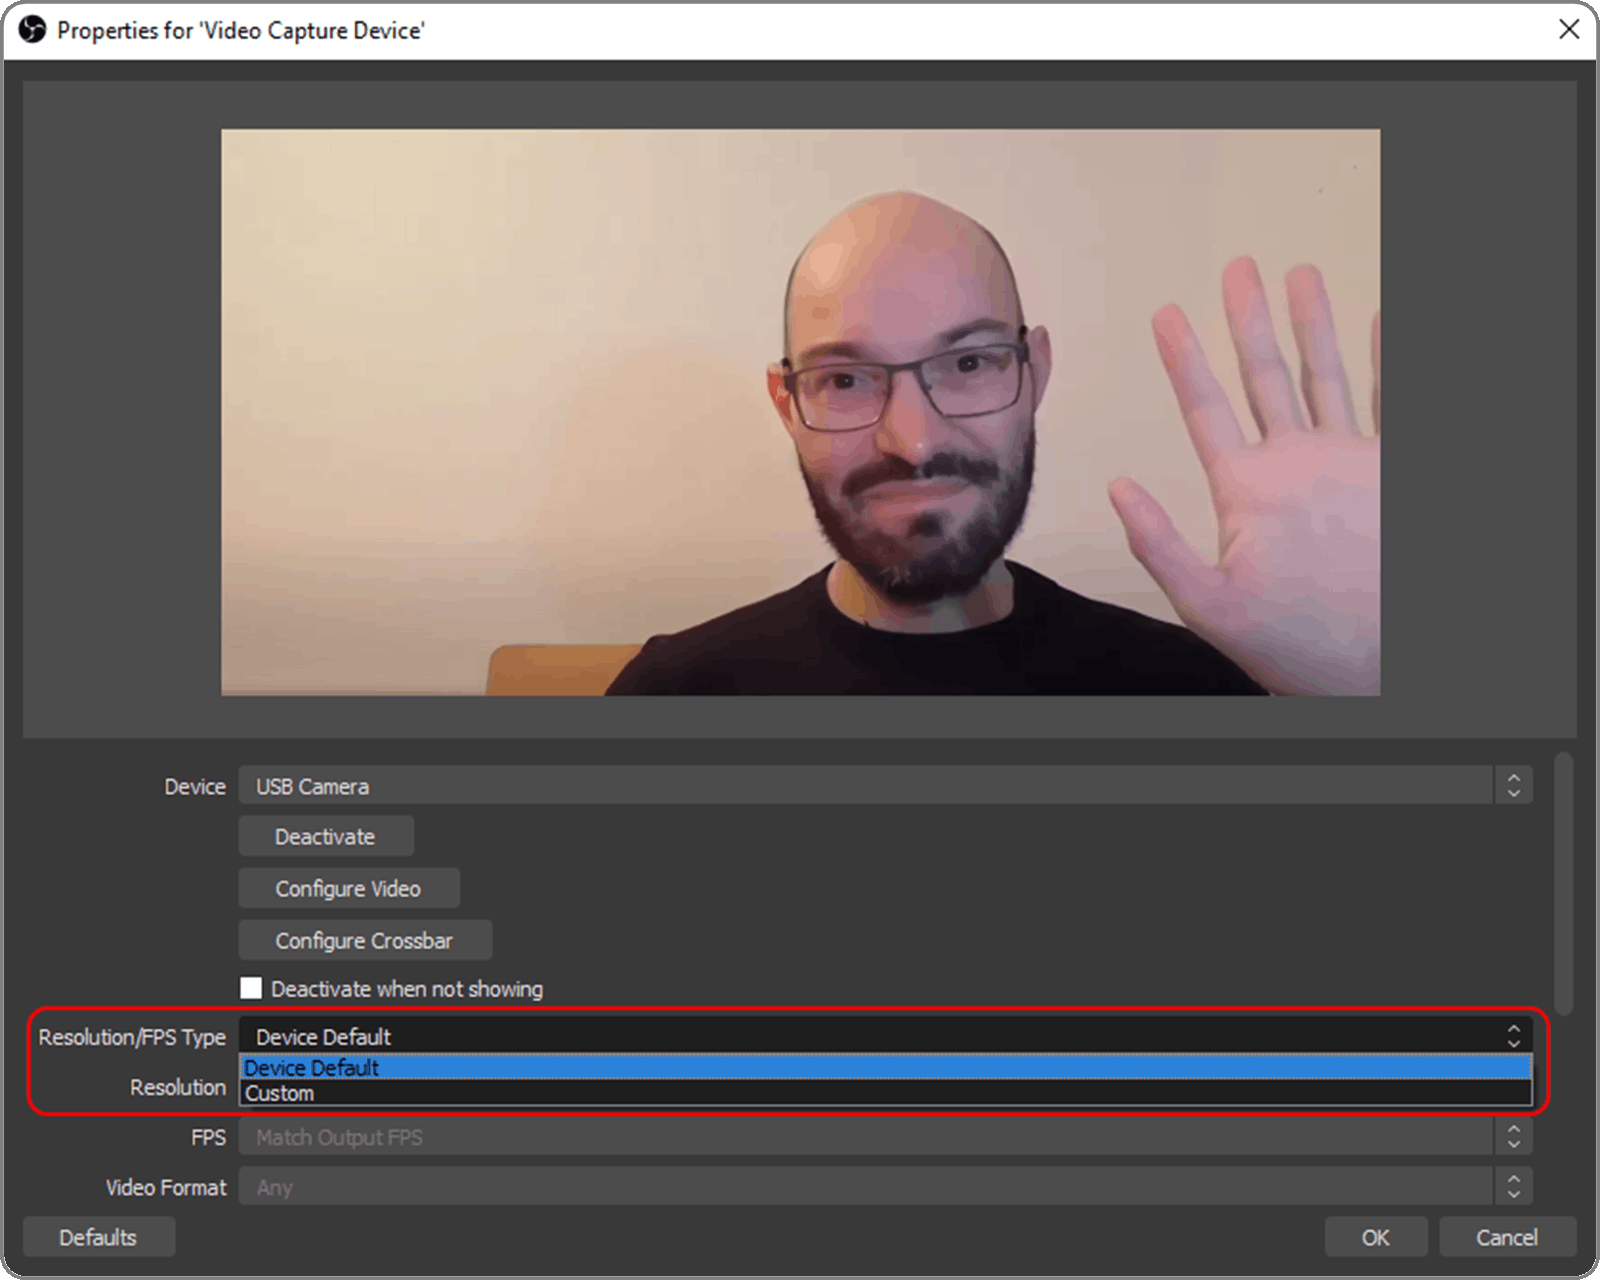
OBS uses the device default resolution. If for some reason you want to change the camera resolution, you need to set this option to Custom in order to be able to change:
- Resolution predefined resolution combinations
- FPS predefined frame rate values
- Video Format
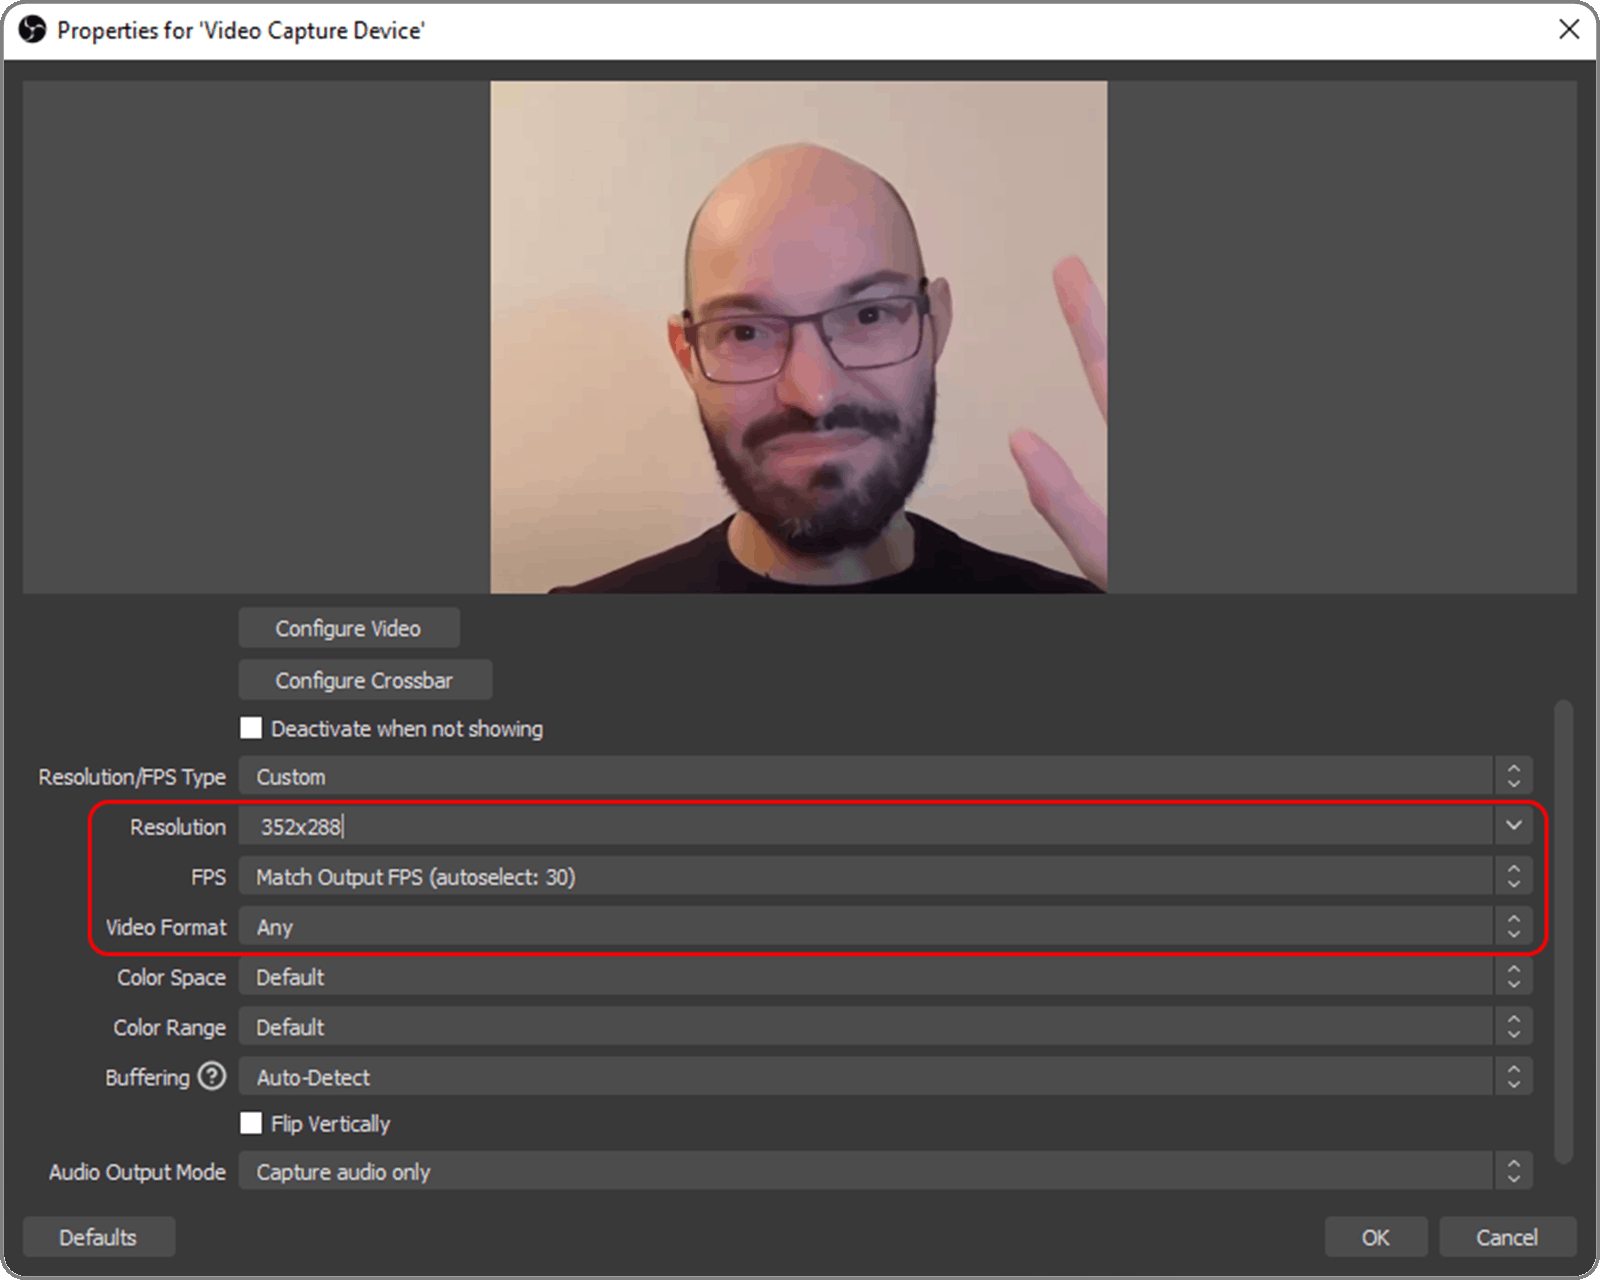
Use custom audio device
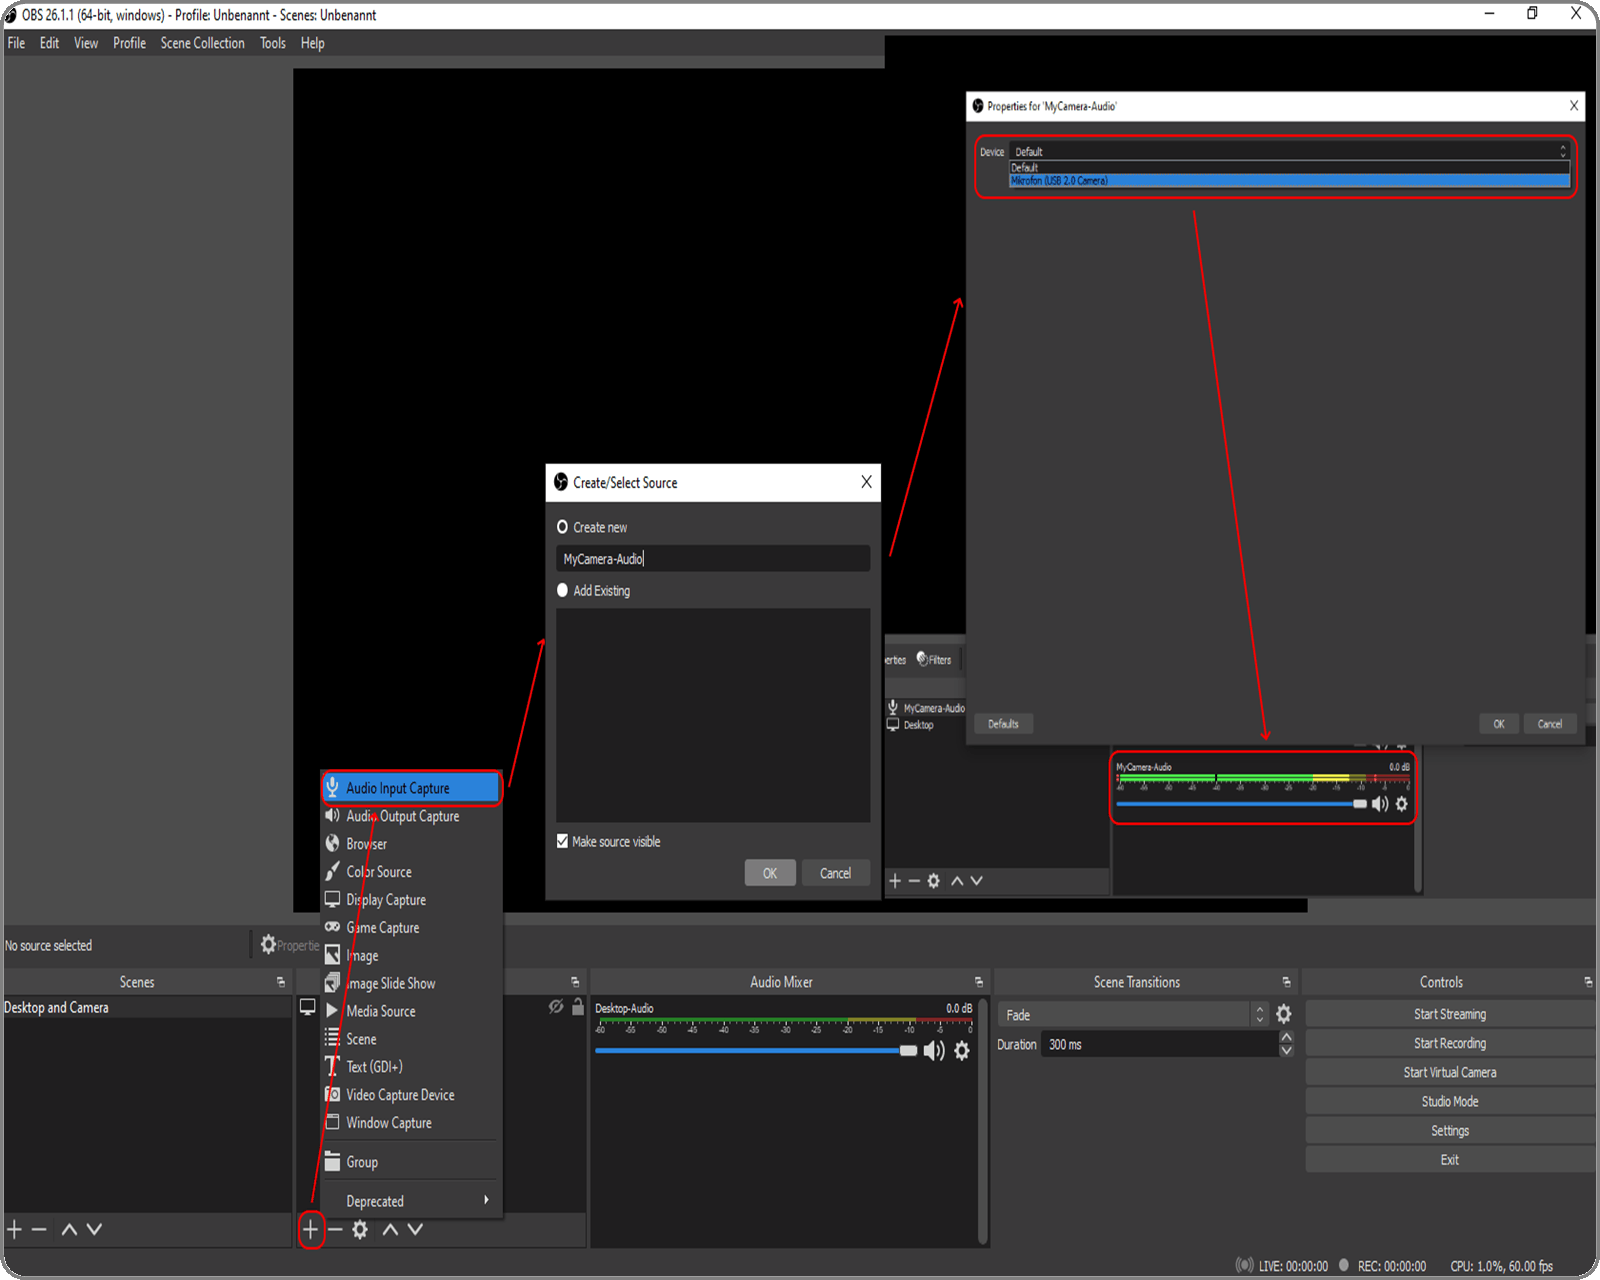
My webcam has a build-in microphone. In order to select it from the video capture source configuration, the option Use custom audio device needs to be selected. This way there is no need to add a separate audio capture source.
Of course, you can add the audio input later as a separate capture source of type Audio Input Capture and select there the microphone you wish to use.
Use your mobile phone as a video capture device
Now we come to the interesting part. I didn’t have a webcam for a long time and I still don’t want to buy an adapter to use my digital camera for recording or pay for an android app. I searched for alternatives and found the option described below.
IP Webcam
There are a lot of applications that can turn your android mobile phone into a web camera. I tried IP Webcam and it worked seamlessly so show how to use it with OBS.
The application is free and can be installed from the Google Playstore : play.google.com/store/apps/details?id=com.p..
Disclaimer: no, I am not the developer, although my name is also Pavel 😉
Once installed, run it and you will land on the start screen which is just a list of menu items. You can change the video capture settings (similar to OBS, for example resolution) from the Video preferences. The audio is enabled by default.
I suggest for the beginning to leave the settings as they are. Experimenting and fine tuning can be done at any time later.

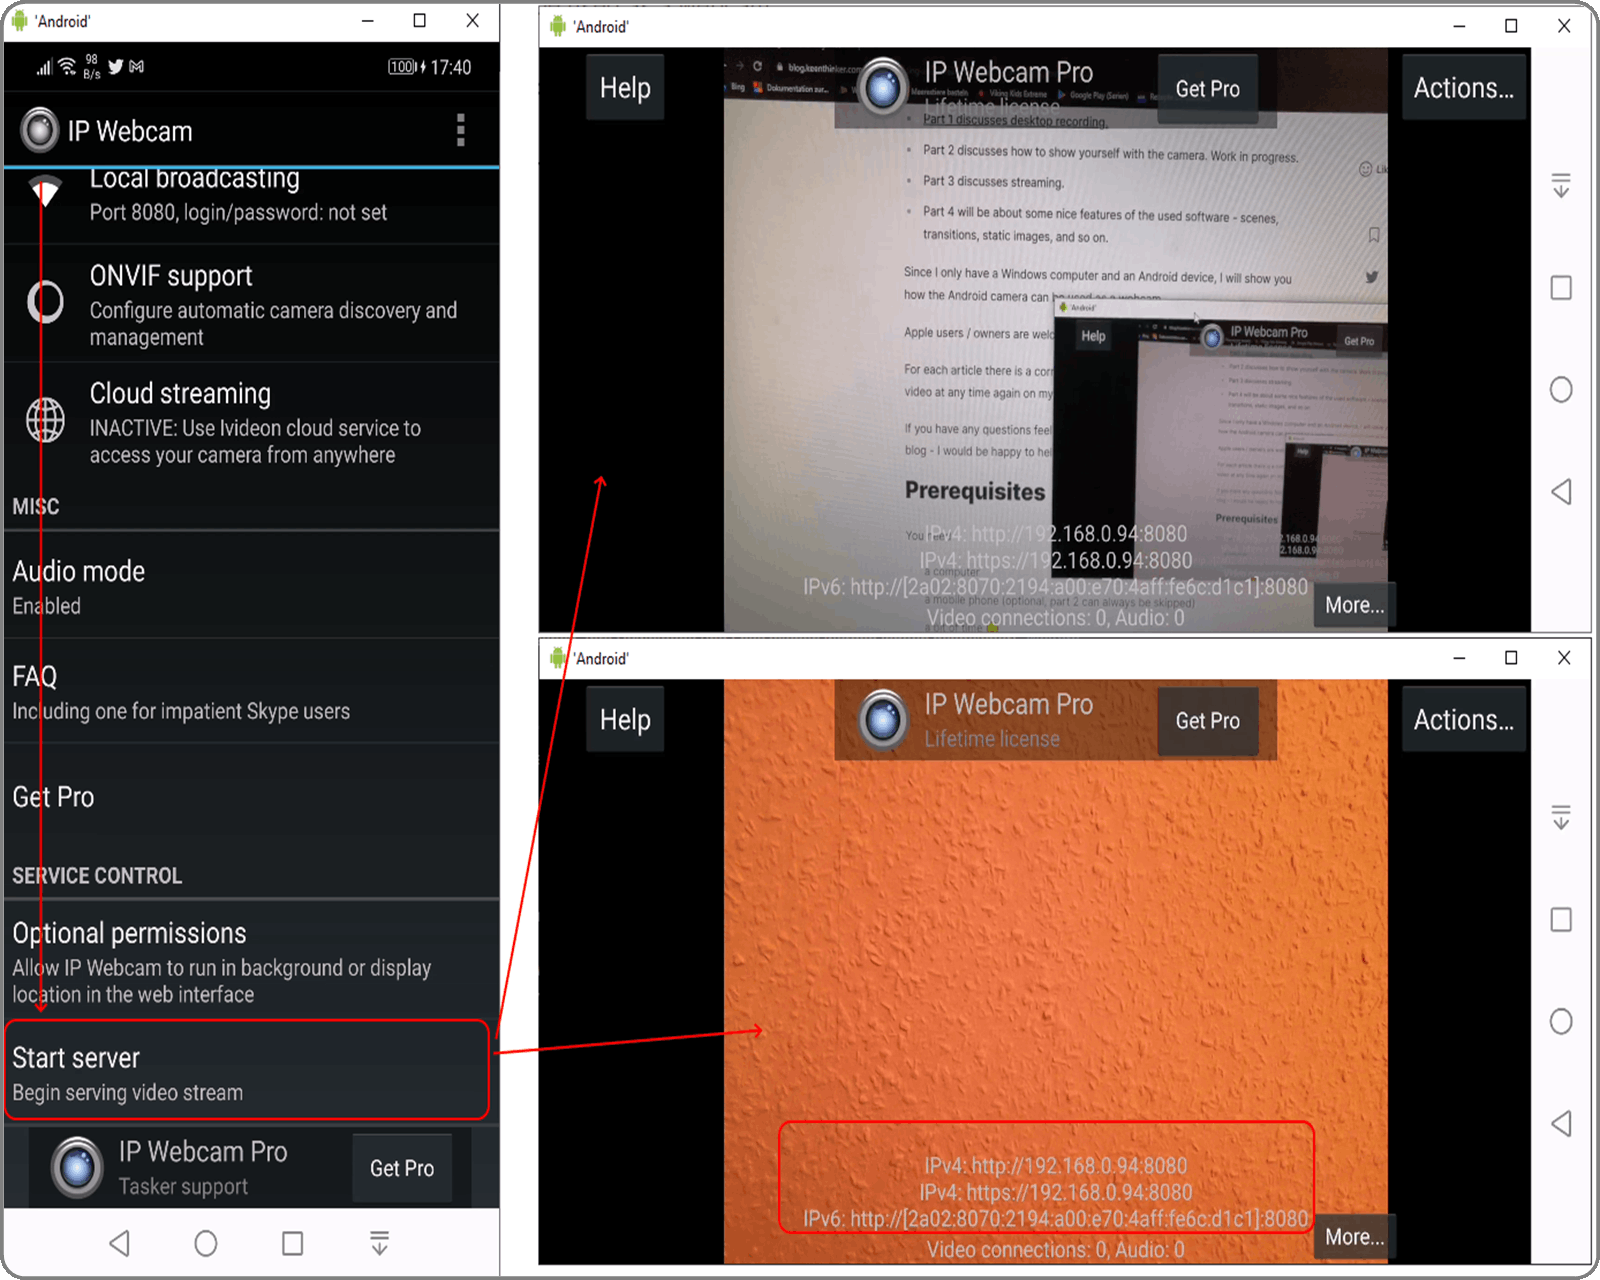
What actually IP Webcam does behind the scenes is to start a server, that transmits the camera stream.
In order to use the mobile phone’s camera, go to the Start server menu item at the bottom of the list on the start screen and press it. The view goes in landscape mode and your camera is turned on (on my screenshot you see my orange wall 😊).
At the bottom of the screen the local IP address is shown, in my case – my internal IP is 192.168.0.94 and it is accessible over port 8080.
Make a note of your IP address and port number - you'll need them in OBS to connect the camera.
Before connecting with OBS you can preview and configure your webcam in a web browser. Open one and navigate to https://[ IP address]:[port number] (in my case https://192.168.0.94:8080):
This is a tiny camera control center. Press the Video renderer – Browser button to see the streamed image (in my case my jawbone jambox with mr. smiley on top 😊)
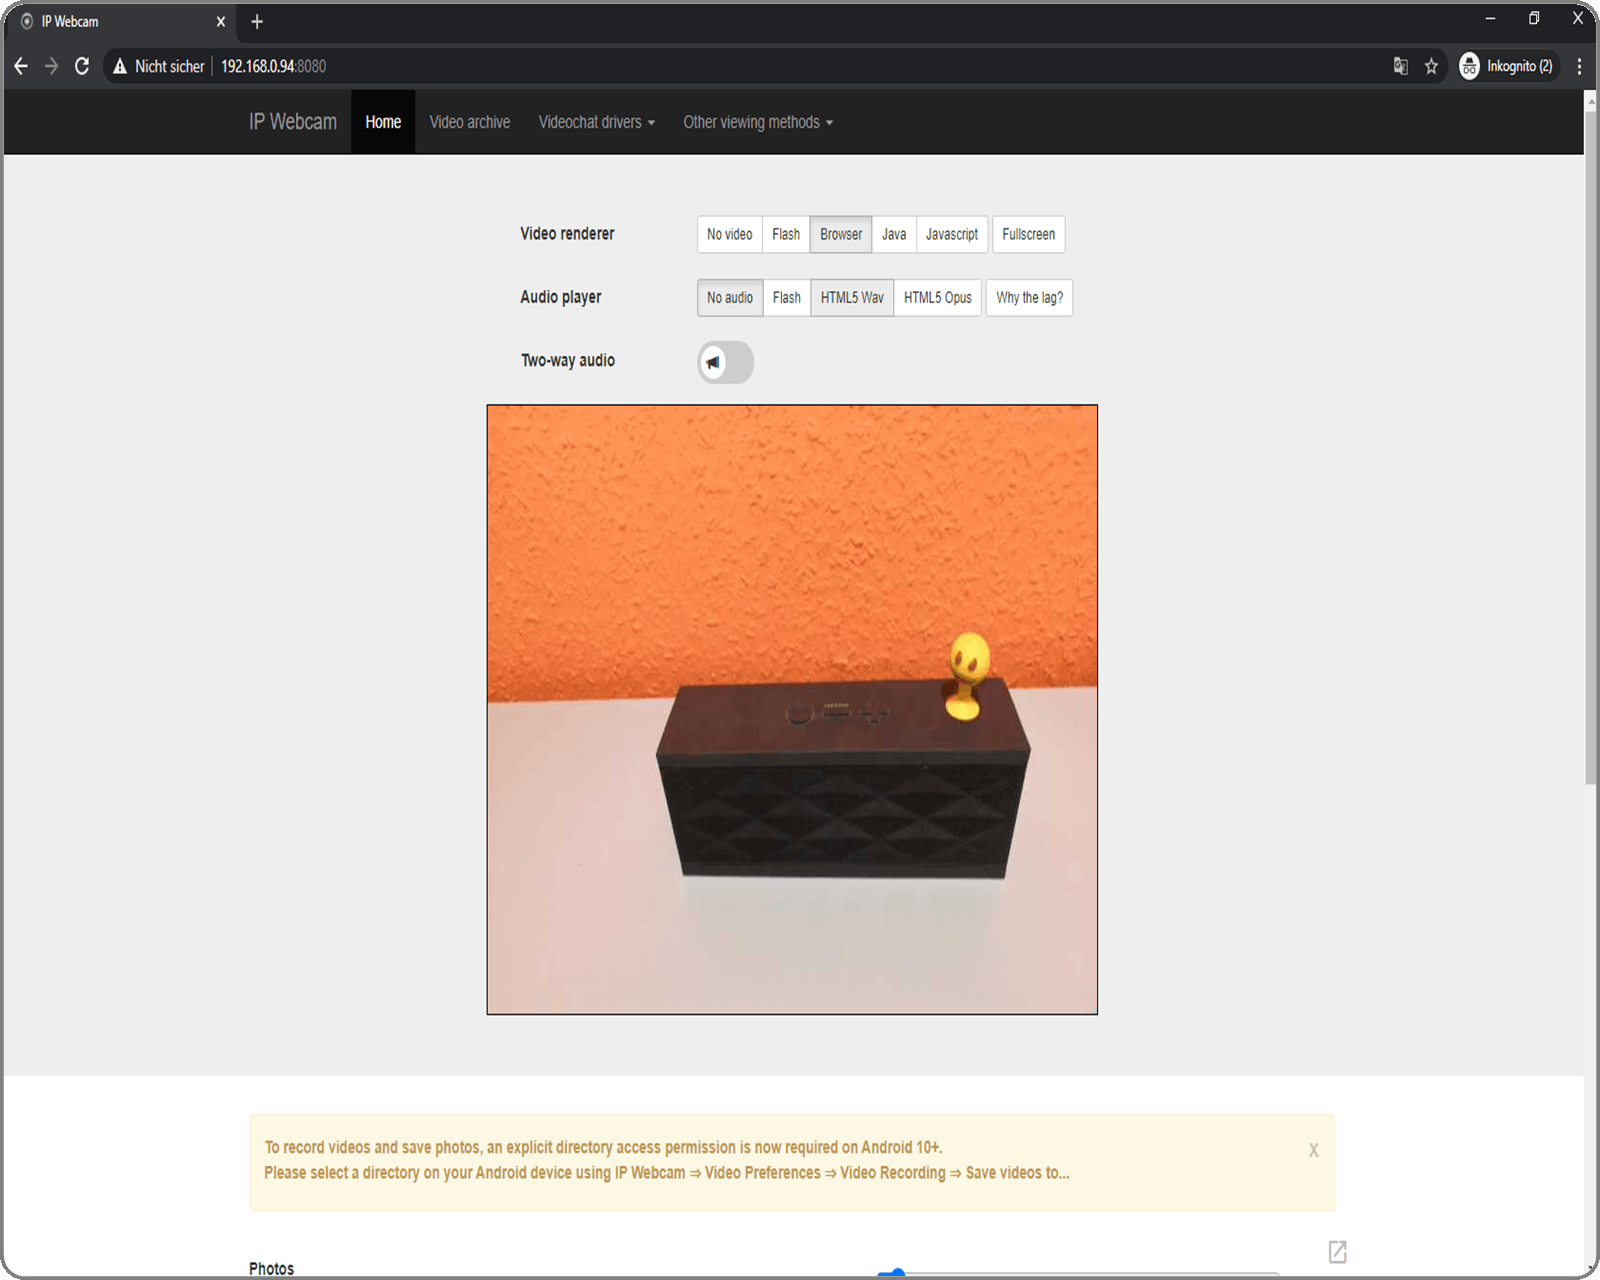
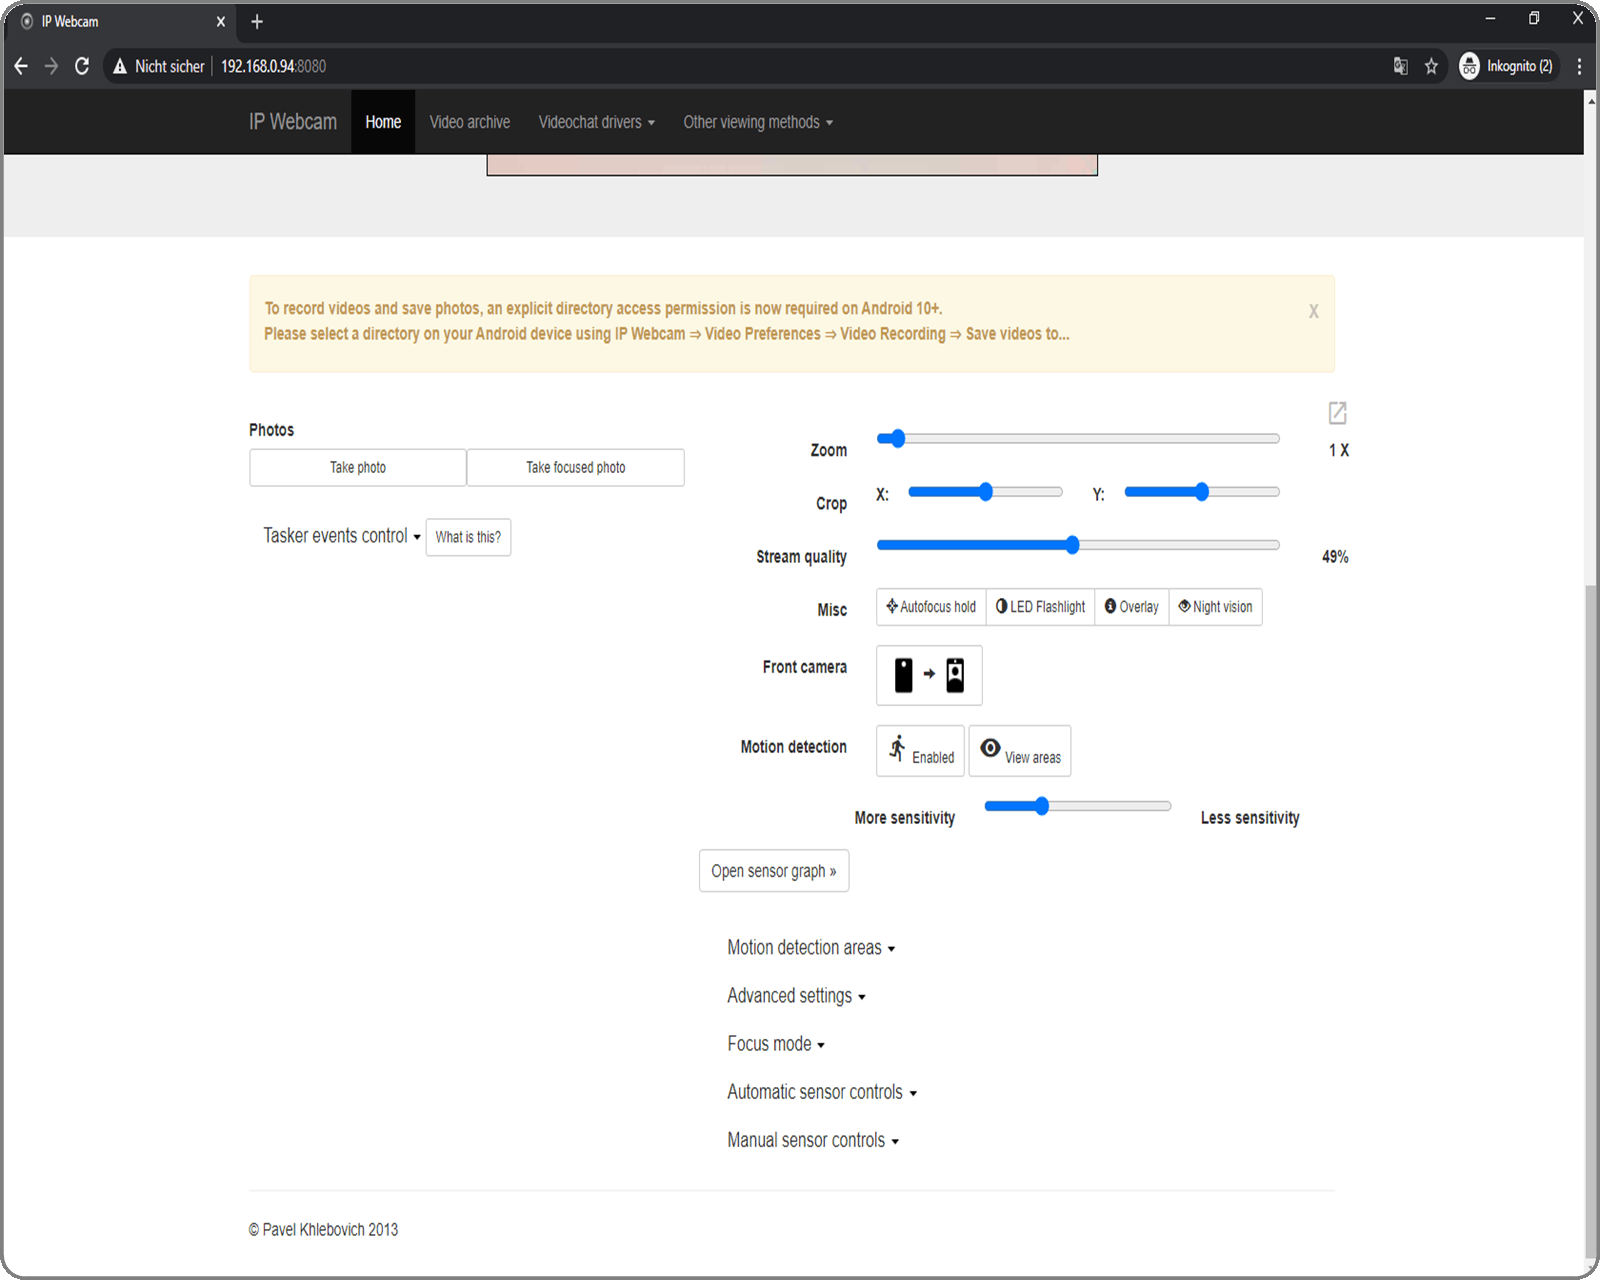
Below the preview window you will find different camera options (focus, quality, zoom, camera to use – front or back, and so on).
We have now seen, that the mobile device is streaming correctly, we can use it in OBS.
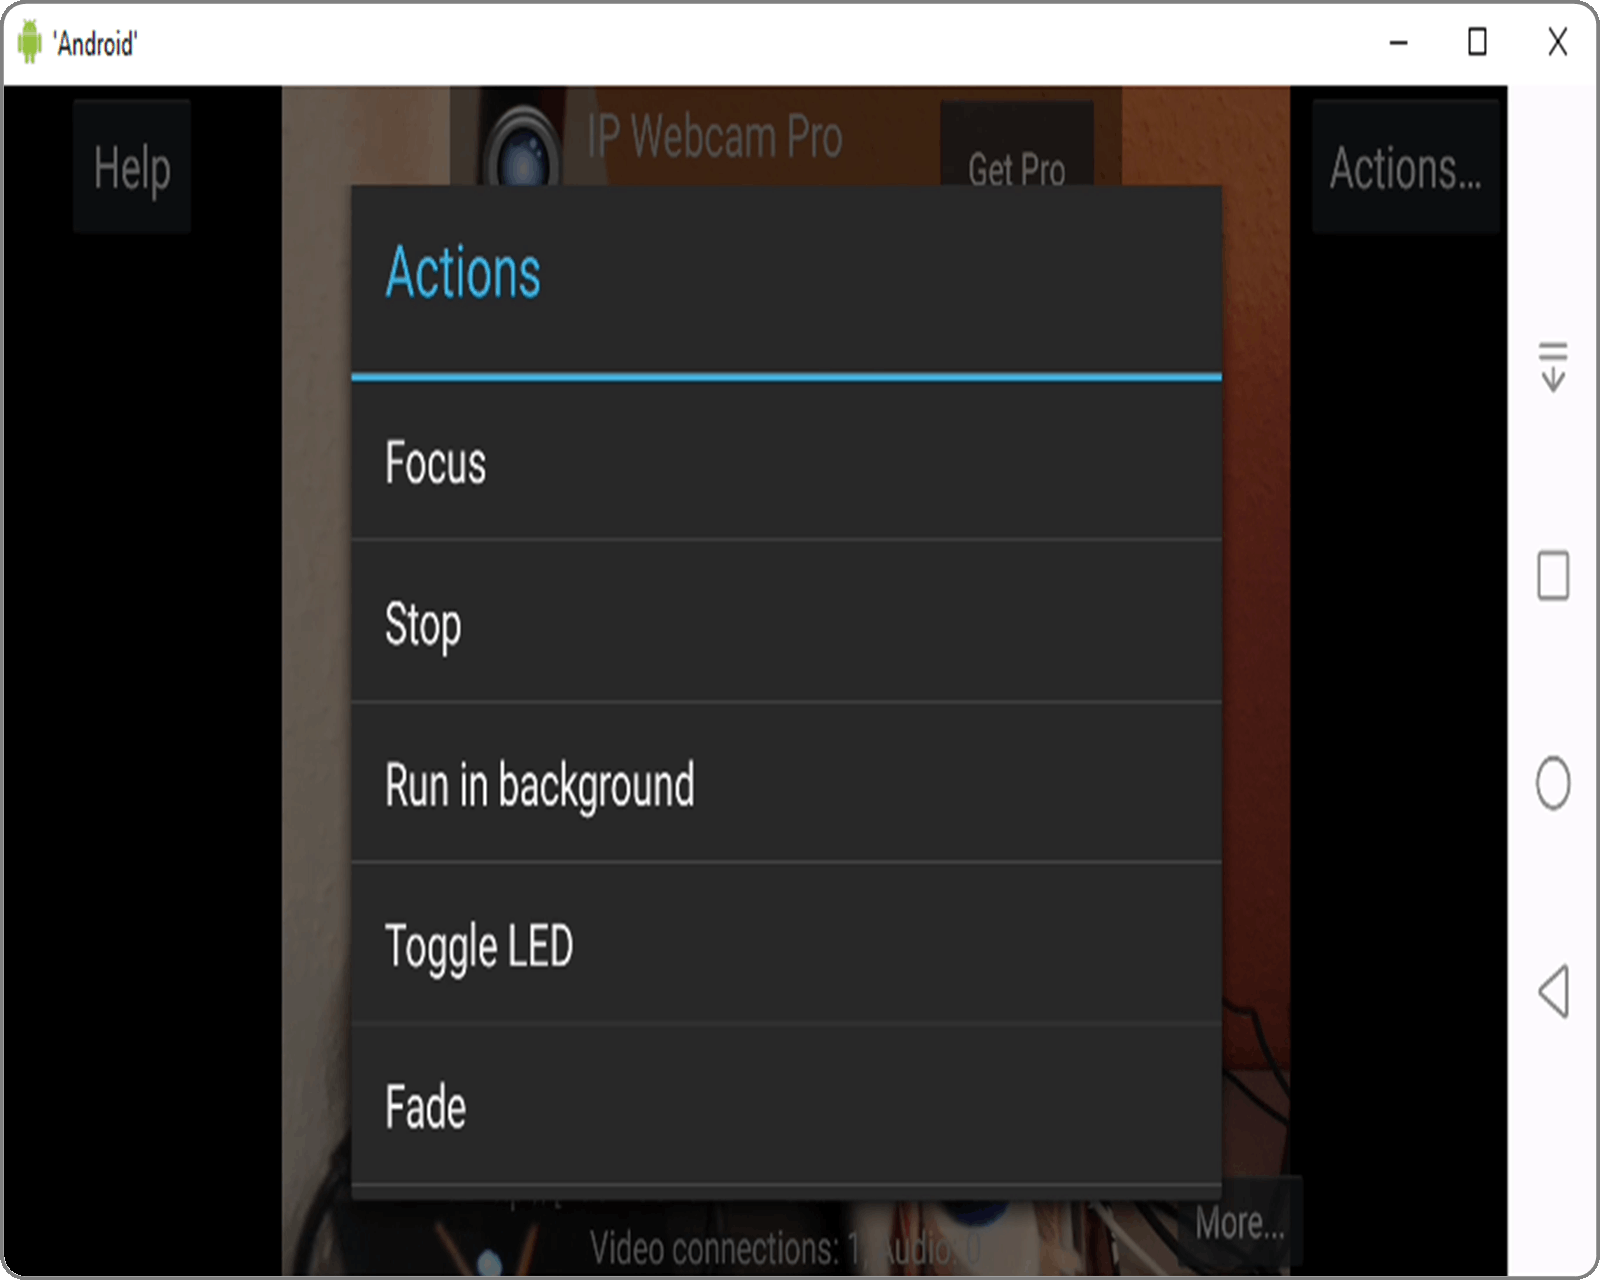
To stop the server and thus the camera, press the Actions… button in the upper right corner on your mobile device and then press Stop.
OBS Settings to use the camera of the mobile phone
There are apparently different ways to connect the mobile camera once IP Webcam is started, but only the one I am presenting here worked for me.
In order to connect the camera, you will need to
- add a Media Source instead of a Video Capture Device.
- uncheck the Local file box
- in the Input field enter your ip and port and add /videofeed at the end – in my case it looks like this: https ://192.168.0.94:8080/videofeed
- press OK to add the media source
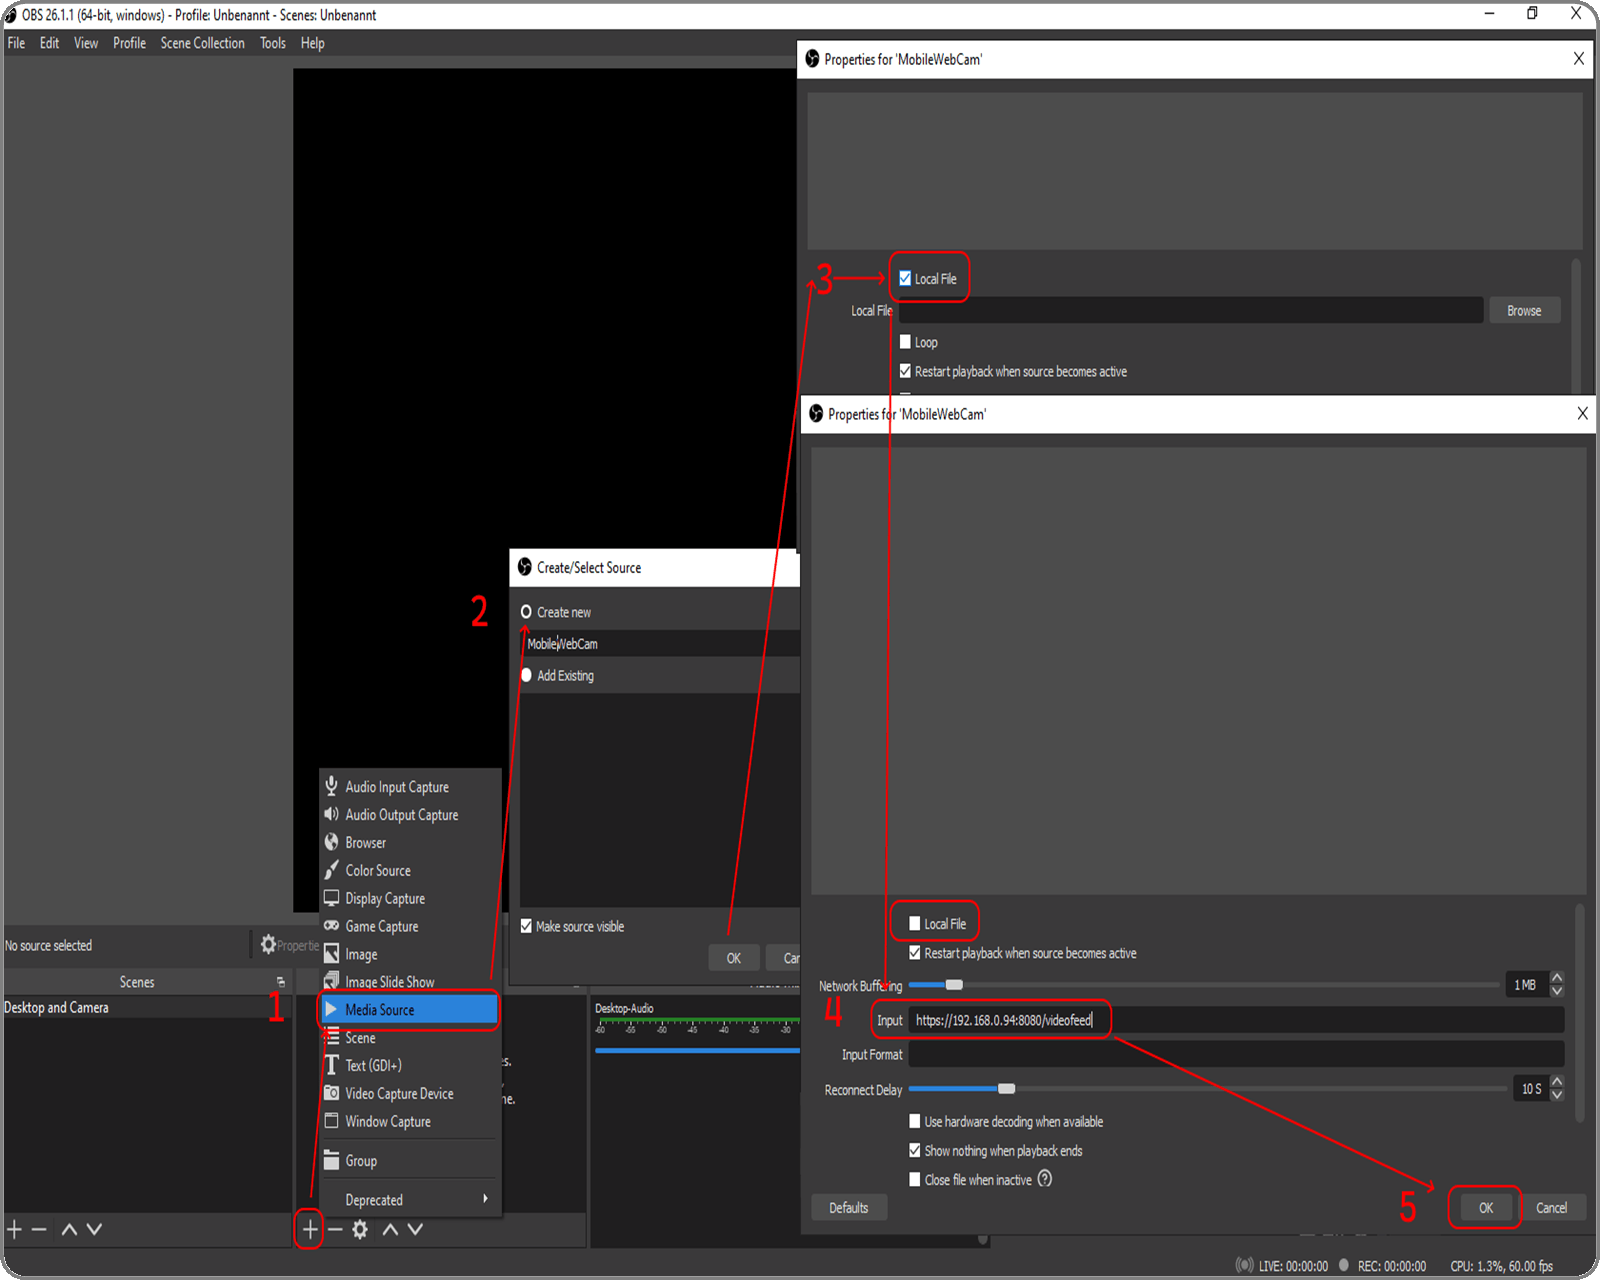
You should see your camera image

The microphone of the mobile device can be enabled from the control center and it will work directly.
And that was it.
Alternatives
I mentioned, that there are alternatives to the IP Webcam application. For example:
- There is also a paid version, without ads, of IP Webcam and it costs around $5.
- DroidCam (also free and paid version) play.google.com/store/apps/details?id=com.d..
- NDI – a professional company, that is specialized in software connected to recording and streaming (ndi.tv). The app costs around $20 play.google.com/store/apps/details?id=com.n..
- … others that I don’t know 😊
Conclusion
That was the second part from the series Video recording and streaming with 0 investments.
Now you know how to show yourself while recording your desktop or a specific application.
Part 3 will be about live streaming.
If at any point you get stuck and need help or you have any questions in general or you have a suggestion for an article on a specific topic - don’t hesitate to reach out - leave a comment and I'll help gladly.
Happy recording and enjoy watching yourself in your video. ;-)