A simple image processor with .NET Core

Motivation
Each of us has our own perception of estethics and our own taste when it comes to design or UI / UX.
Personally, I think it's nice when the pictures in my articles have rounded edges. I find the rounded corners and the color border elegant - my very own perception. Like this:
I know that Hashnode gives us the ability to control the styling of the blog with CSS.
Since I am more familiar with back-end programming than front-end programming, I was of the opinion that I would create a program for image transformations faster than using CSS to do the styling the way I want it.
And so I wrote a small tool to automatically transform my screenshots so that I don't have to deal with CSS. 😀
My thoughts on what I need
Most of the articles I write have lots of pictures. I prepare the pictures in advance if I can, then write the text and add the pictures in the right place.
This means that when I start writing, I will need the finished images. Sometimes, of course, new images emerge while writing.
This means that it would be most practical if it were possible to just copy the images somewhere and they should be transformed automatically. It will not be convenient to start the transformation program for a single image each time.
So some kind of transformation service was needed.
The simple image processor
The program consists of two main parts:
The first part is the service that monitors a directory and processes new image files that occur there.
The second part is the actual image transformation or processing: image file as input and modified image file as output. The original file remains unchanged.
My preferred language to implement the service is C# with .NET Core (so the service and the transformation can be used under Windows, Linux and macOS).
The service
The service is a FileSystemWatcher that monitors a directory for new files and processes them. The directory and the file extensions that are monitored are configurable.
<configuration>
  <appSettings>
    <add key="baseDirectory" value="c:\temp\resize"/>
    <add key="fileFilter" value="*.jpg"/>
    <add key="cornerRadius" value="25"/>
  </appSettings>
</configuration>
The service monitors the configured (main) directory for new files with the configured extension. Within are two subdirectories done and original. The changed files are saved in done and the unchanged original files in original.
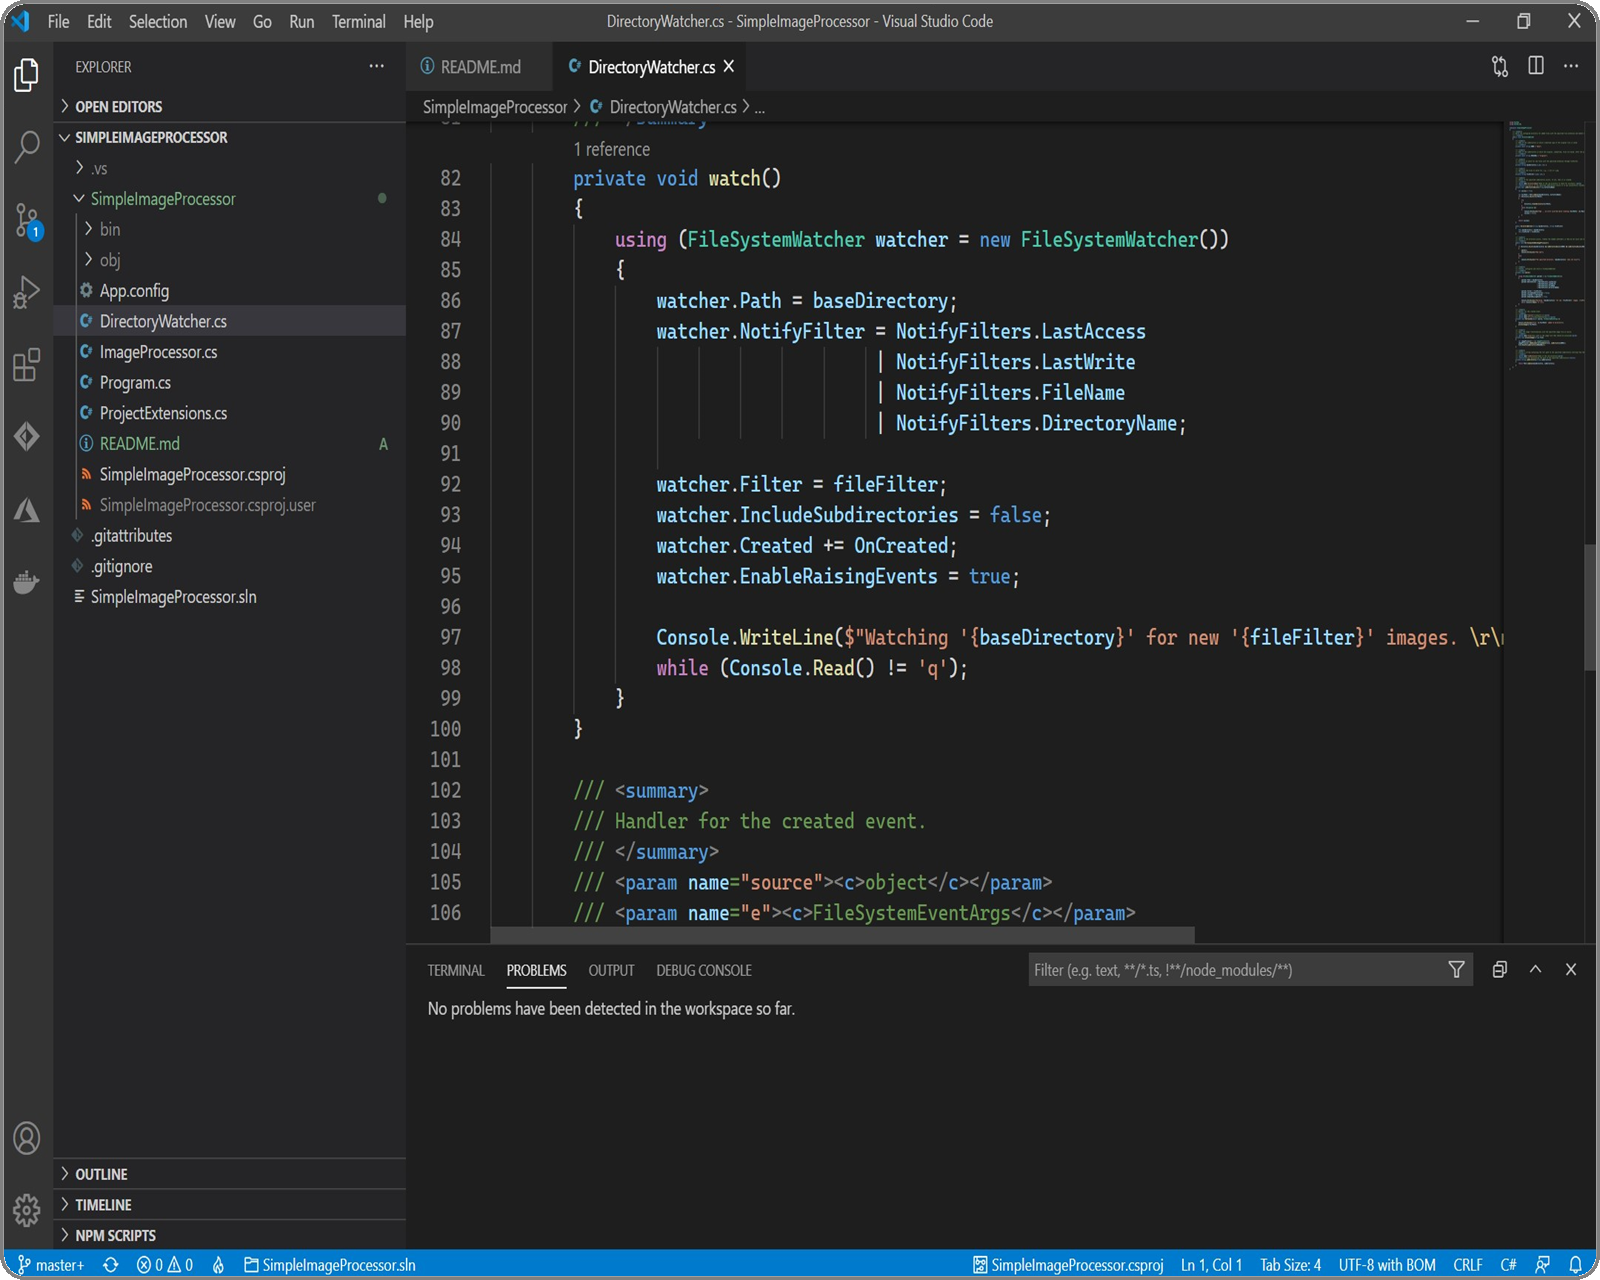
private void watch()
{
    using (FileSystemWatcher watcher = new FileSystemWatcher())
    {
        watcher.Path = baseDirectory;
        watcher.NotifyFilter = NotifyFilters.LastAccess
                             | NotifyFilters.LastWrite
                             | NotifyFilters.FileName
                             | NotifyFilters.DirectoryName;

        watcher.Filter = fileFilter;
        watcher.IncludeSubdirectories = false;
        watcher.Created += OnCreated;
        watcher.EnableRaisingEvents = true;

        Console.WriteLine($"Watching '{baseDirectory}' for new '{fileFilter}' images. \r\nPress 'q' to quit.");
        while (Console.Read() != 'q') ;
    }
}
The watcher has just one handler - when a file is added to the directory. This handler has only one job and that is to process the file.
private void OnCreated(object source, FileSystemEventArgs e)
{
    Console.WriteLine($"File '{e.FullPath}' added to directory");
    processImage(e.FullPath);
}

private void processImage(string file)
{
    var imageProcessor = new ImageProcessor();
    imageProcessor.AddRoundCornersAndSave(file, subDirectory(DONE), cornerRadius);
    file.MoveTo(subDirectory(ORIGINAL));
}
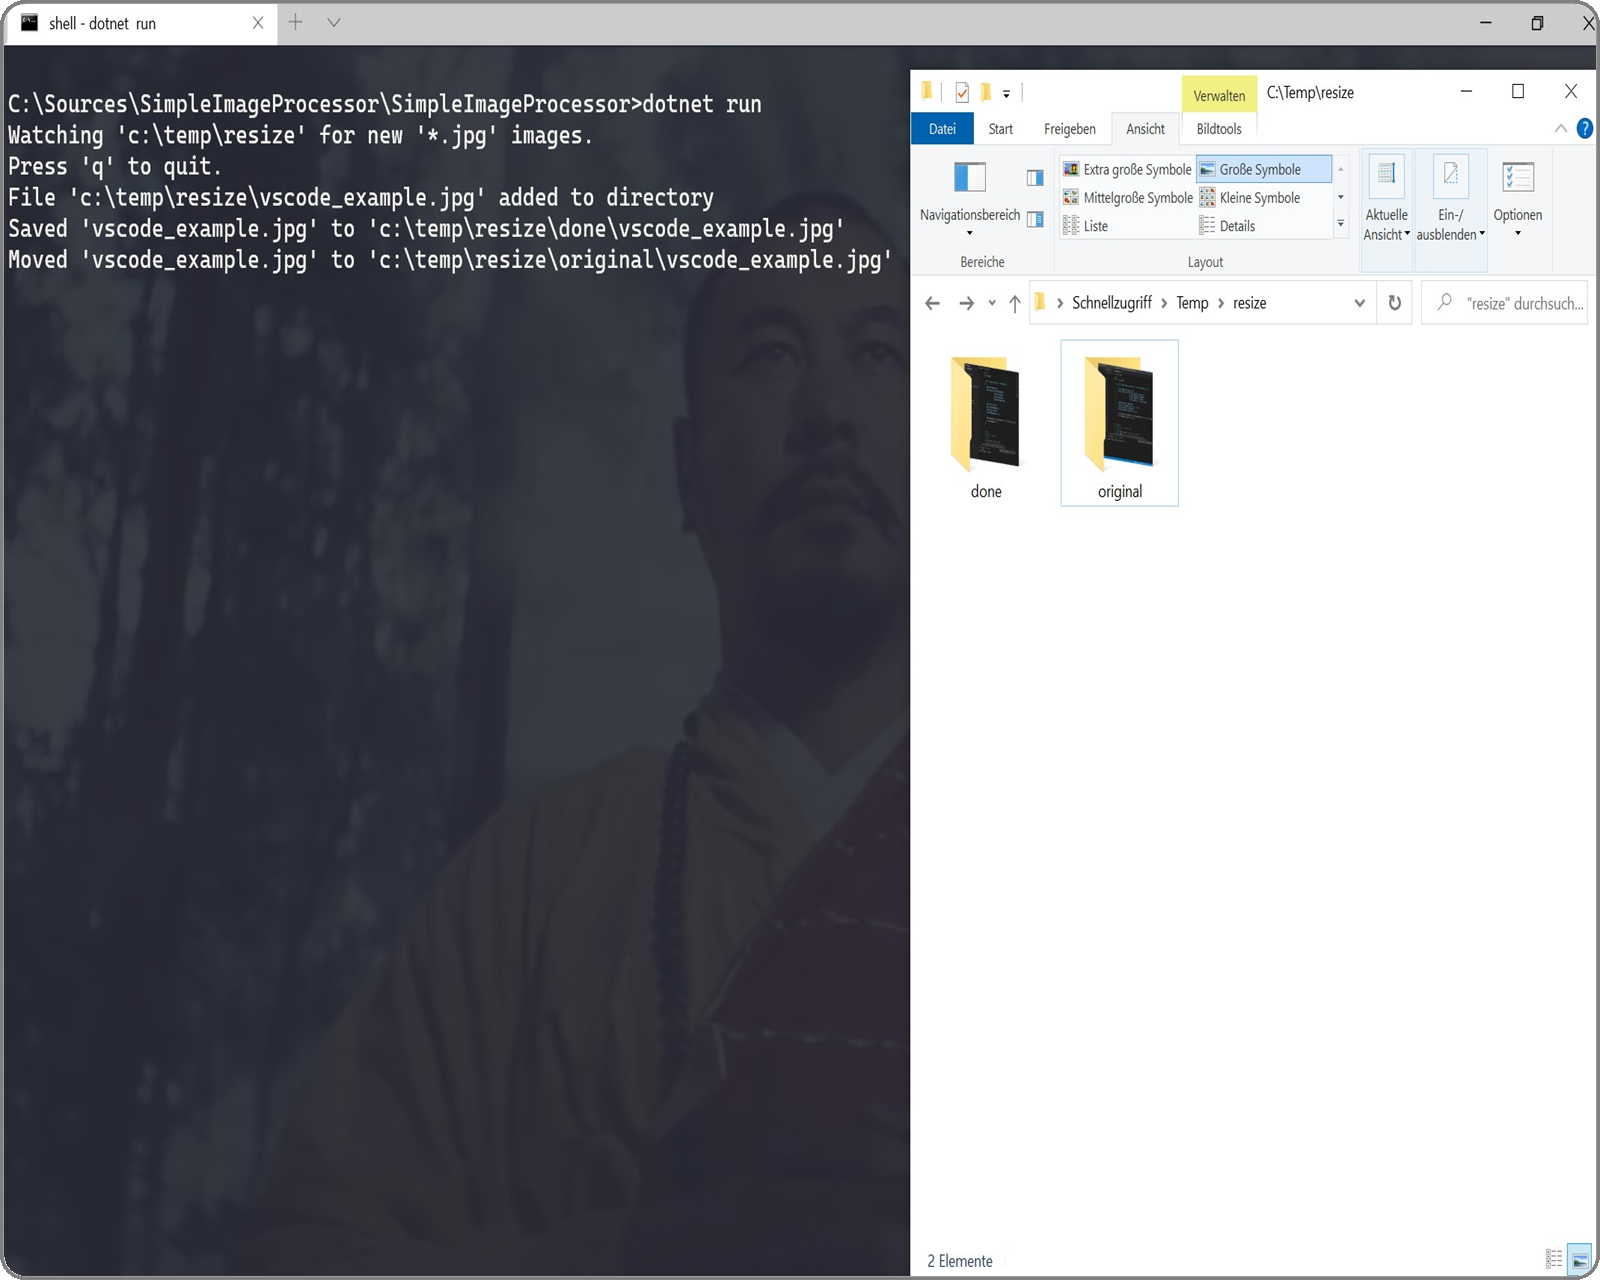
When the service is started with dotnet run and is running, it looks like this:
The solution with the FileSystemMonitor is acceptable as long as you have a few files every now and then. If you have a lot of image processing to do, it may be better to create your own custom directory monitor. Have a look at the FileSystemWatcher.InternalBufferSize property.
The image processor
The image processor uses the Graphics class to draw the desired look.
At this graphics level you can do literally everything.
The image processor
- creates a graphics object from the original image in order to be able to draw
- clips the image using a GraphicsPath to create the rounded corners (basically makes the image at the corners transparent)
- draws a border around the image with a custom color, in this case gray, using again a graphics path object
// ...
var imageSize = stretch(image.Width, image.Height);
var destinationRectangle = new Rectangle(0, 0, imageSize.Item1, imageSize.Item2);

Bitmap roundedImage = new Bitmap(imageSize.Item1, imageSize.Item2);
roundedImage.SetResolution(image.Width, image.Height);
// ...
using (Graphics g = Graphics.FromImage(roundedImage))
{
    g.CompositingMode = CompositingMode.SourceCopy;
    // more code here, cutted for clarity ...

    // create transparent corners
    g.SetClip(gp);
    using (var wrapMode = new ImageAttributes())
    {
        wrapMode.SetWrapMode(WrapMode.TileFlipXY);
        // add the original image
        g.DrawImage(image, destinationRectangle, 0, 0, image.Width, image.Height, GraphicsUnit.Pixel, wrapMode);
    }
    // draw a gray border
    g.DrawPath(penGray, gpBorder);
}
And that's all. 😎
Now all I need to get images in the way I want them, is to start the application, put new screenshots in the configured directory and get the result from the done directory.
If you have questions about the code in detail, don't hesitate to ask.
Further development and source code of the service
The source code is available on GitHub - https://github.com/keenthinker/SimpleImageProcessor.
The project is constantly being developed. Currently the followig is planned:
- create documentation regarding usage and how to build the project
- create release package
- extend the ImageProcessor class so that multiple transformations can be provided as input at the same time and applied in sequence using the same graphics object
- extend the configuration with the rounded corner radius
- extend the configuration with the desired resolution - remove fixed resolution (width and height)
- add aspect ratio
The source code can be used as the basis for other applications, for example image transformation website.
You are more than welcome to try the software. Any feedback is greatly appreciated.