Introduction
This is part 1 of the series Video recording and streaming with 0 investments.
This article shows how to create a desktop recording using the free OBS Studio software.
All articles and videos from the series can be found here:
- Introduction
- Part 1 discusses desktop recording. This article.
- Part 2 discusses how to show yourself with the camera.
- Part 3 discusses streaming.
- Part 4 will be about some nice features of the OBS software - scenes, transitions, static images, and so on.
Let’s begin recording.
There are many applications that can record the desktop, but OBS Studio is really professional and has a lot of functionalities that make recording or streaming very easy.
OBS stands for Open Broadcaster Software – a free and open source software for live streaming and screen recording available for Windows, Linux and macOS.
It can be downloaded from here: obsproject.com resp. obsproject.com/download.
Once downloaded - install or unpack or build it and finally run it.
Please do not be afraid by the view when you see the application for the first time. It looks complicated, but in reality, it is designed quite logically and once you know the basics, you can get along very quickly.
When run for the first time, your screen should look like this:
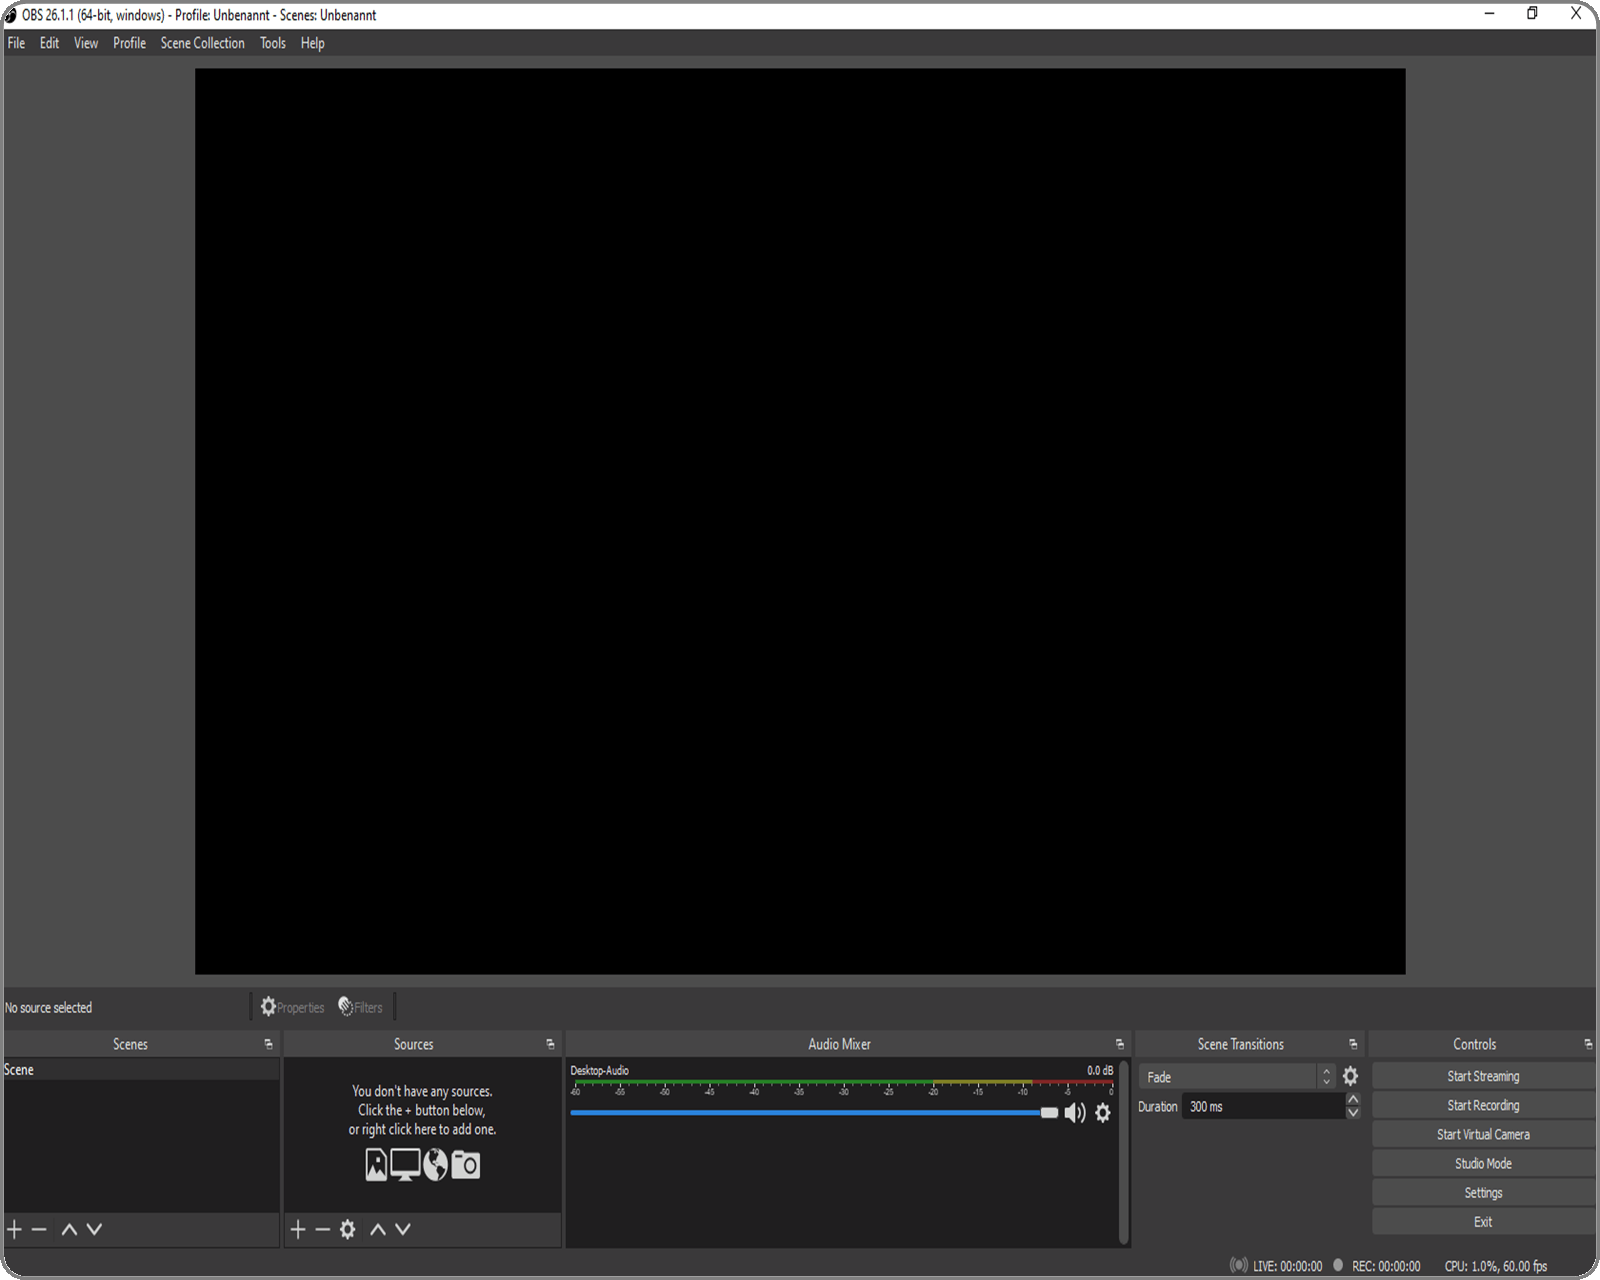
OBS Studio Layout
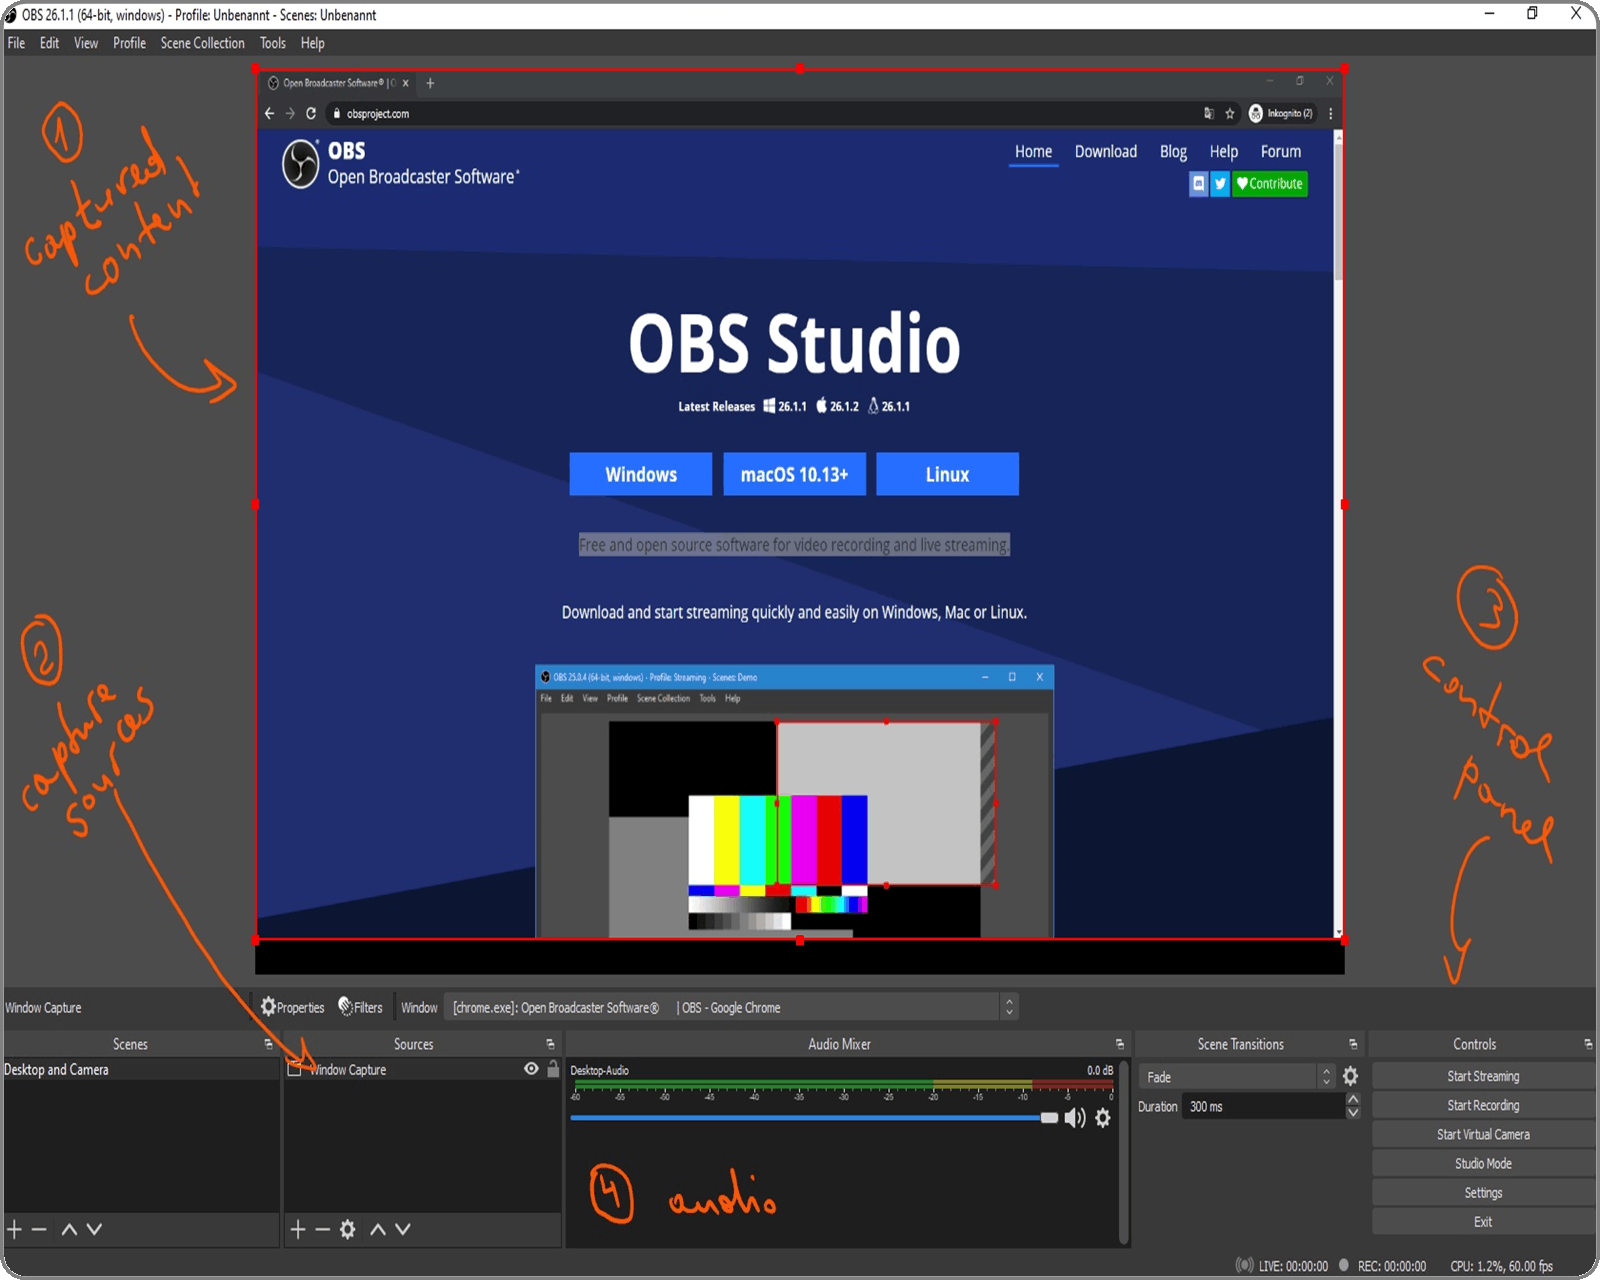
Only the following four panels of the application are relevant to start with:
- Captured content
- Capture sources
- Control panel
- Audio
You can ignore for now the Scenes and Scene Transitions panels.
1. Captured content
This is the area that shows what your audience will see later in the video or sees while you stream. The more capture sources there are, the more windows are shown in this content area.
2. Capture sources
This is the panel where you add the sources you want to record or show. OBS supports a lot of sources, like: the complete desktop, a particular window, already recorded video, static images, remote sources (used in Part 2 for the camera input) and others.
The following fields are of interest for the beginning:
- Display Capture encloses the whole screen in the recording (you need to select which one you want, if you have multiple monitors)
- Window Capture encloses a chosen single window. You can choose the desired window from the drop-down list
The different sources can be added with the + symbol at the bottom of the panel and resp. removed with the - symbol.
Sources are stacked if there is more than one. The order can be changed using the move up 🔼 and move down 🔽 symbols.
3. Control Panel
Here are the controls. For now, of interest are only 2 buttons (in Part 3 and 4 two more will be added):
- Start Recording – starts, pauses and stops the recording
- Settings - opens the settings dialog (basic settings are explained in the section Minimum required settings)
4. Audio
In this area resides the audio mixer that shows the currently configured and used audio input devices and the sound level of each. By default, the desktop sound is always configured and captured. If you have a build-in microphone (the most laptops do), then this one is also configured and captured by default.
Minimum required settings
Now that we've taken apart the layout, let's turn to the settings.
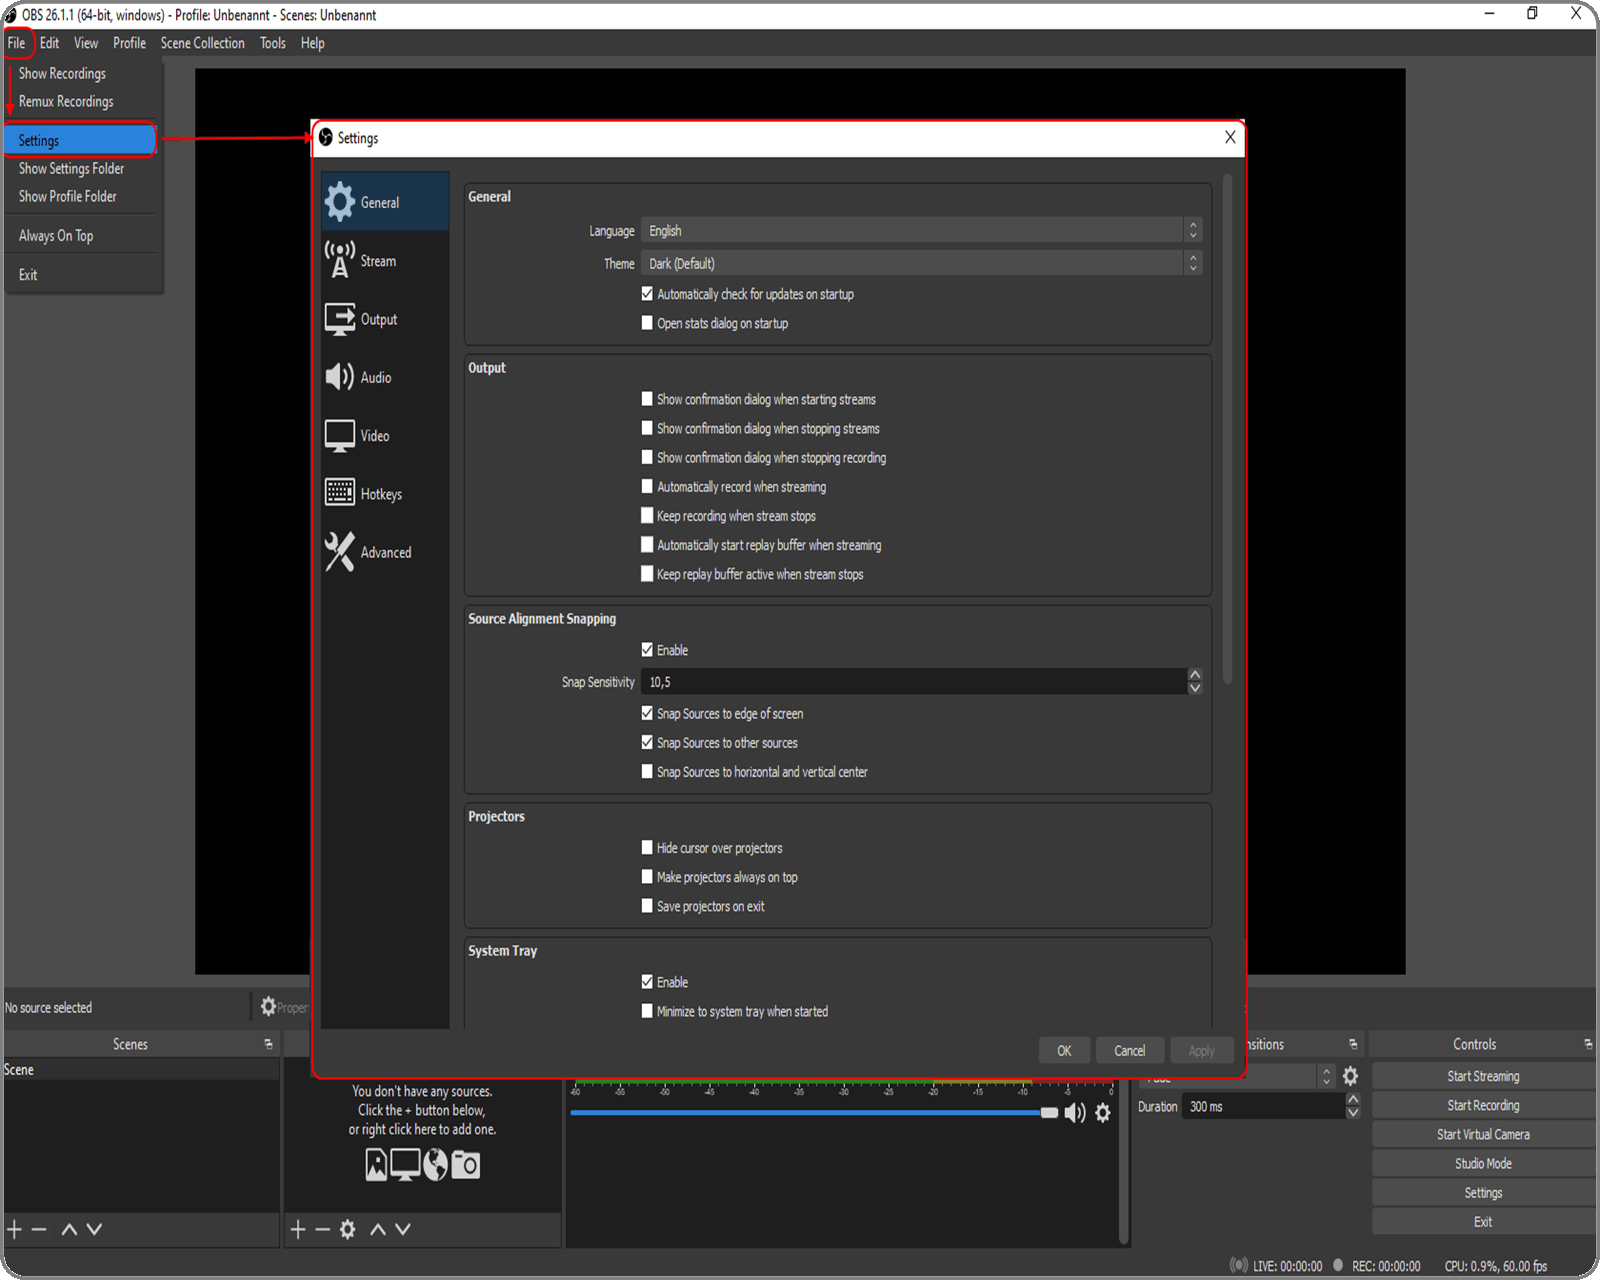
Before you start recording, you need to configure a few settings from at least two sections:
- Output
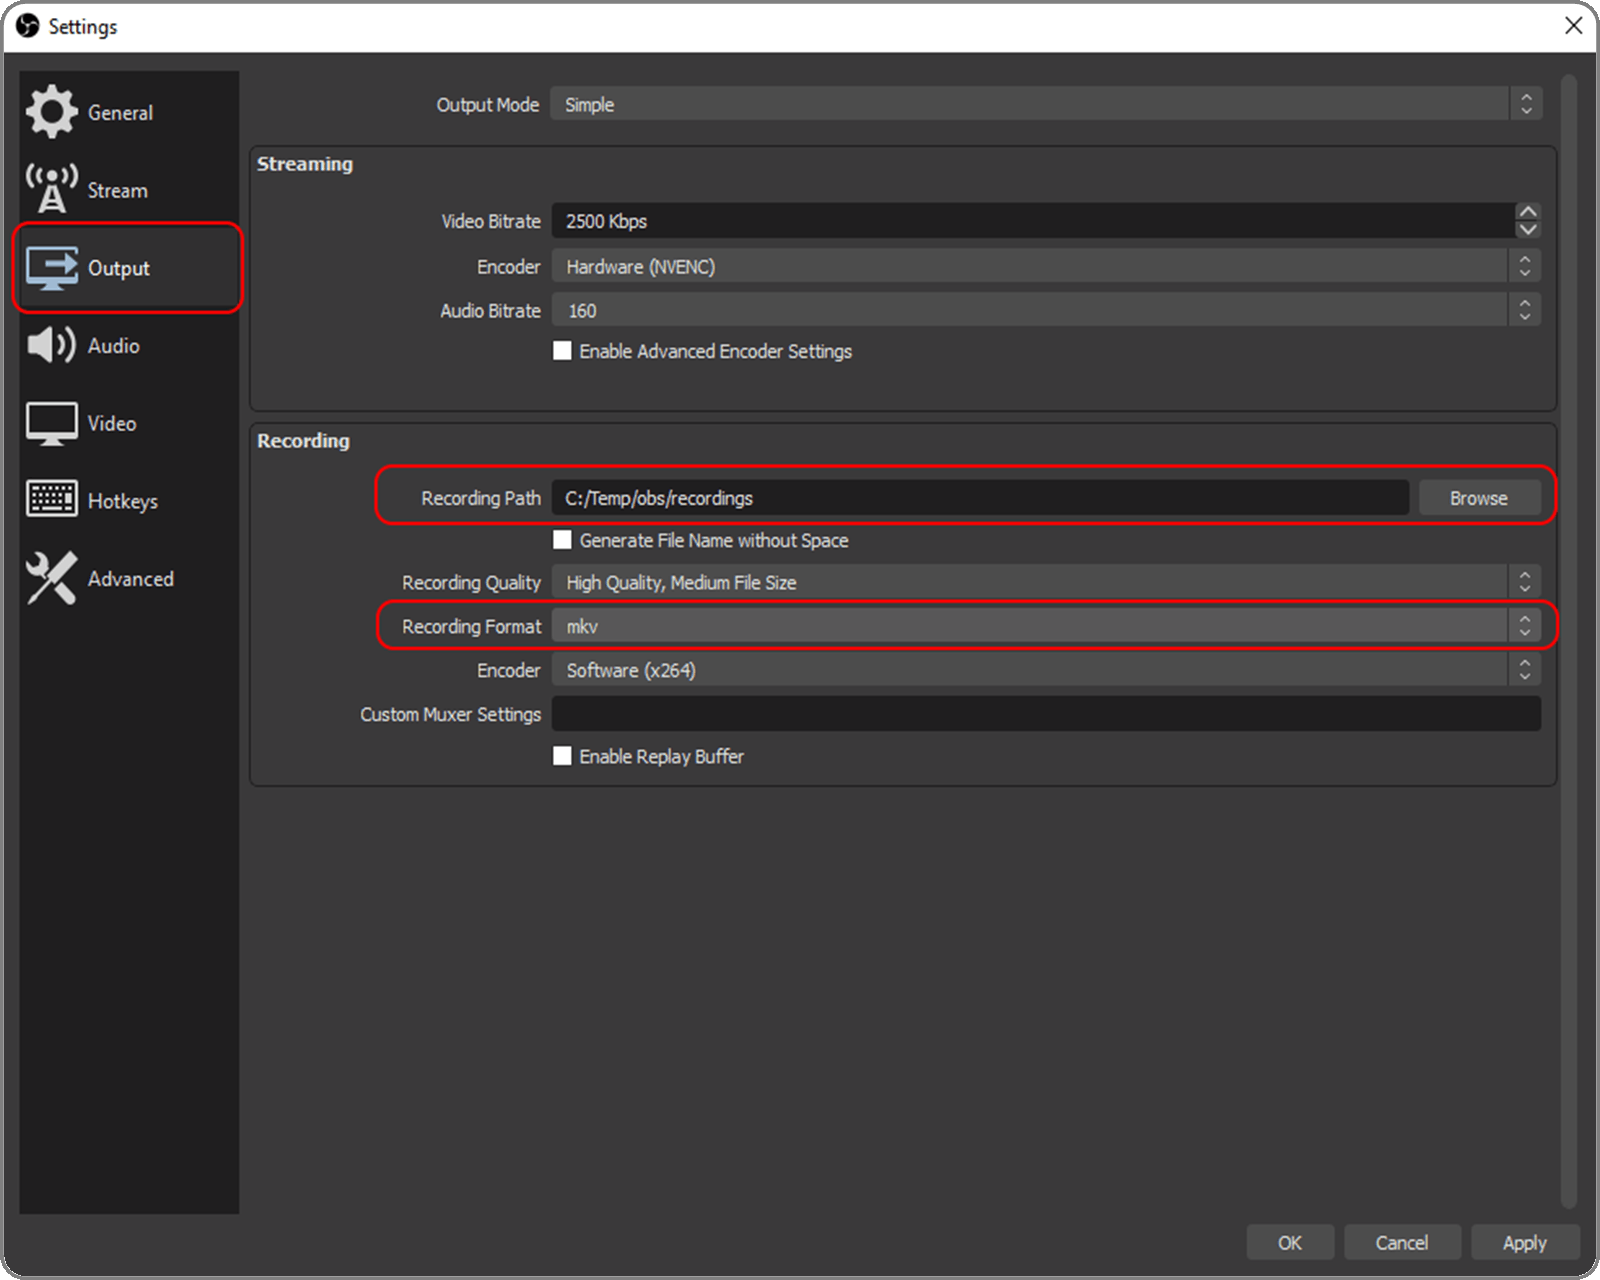
- Recording path where the recording should be stored. Mine are landing in my recordings subdirectory
- Recording quality quality of the recording. I go with medium
- Recording format the format of the recording (mp4, mkv, flv, and so on). Common formats are mp4 and mkv. I save my recordings as mp4, in order to be able to edit them later with the free Windows Video Editor.
- Video
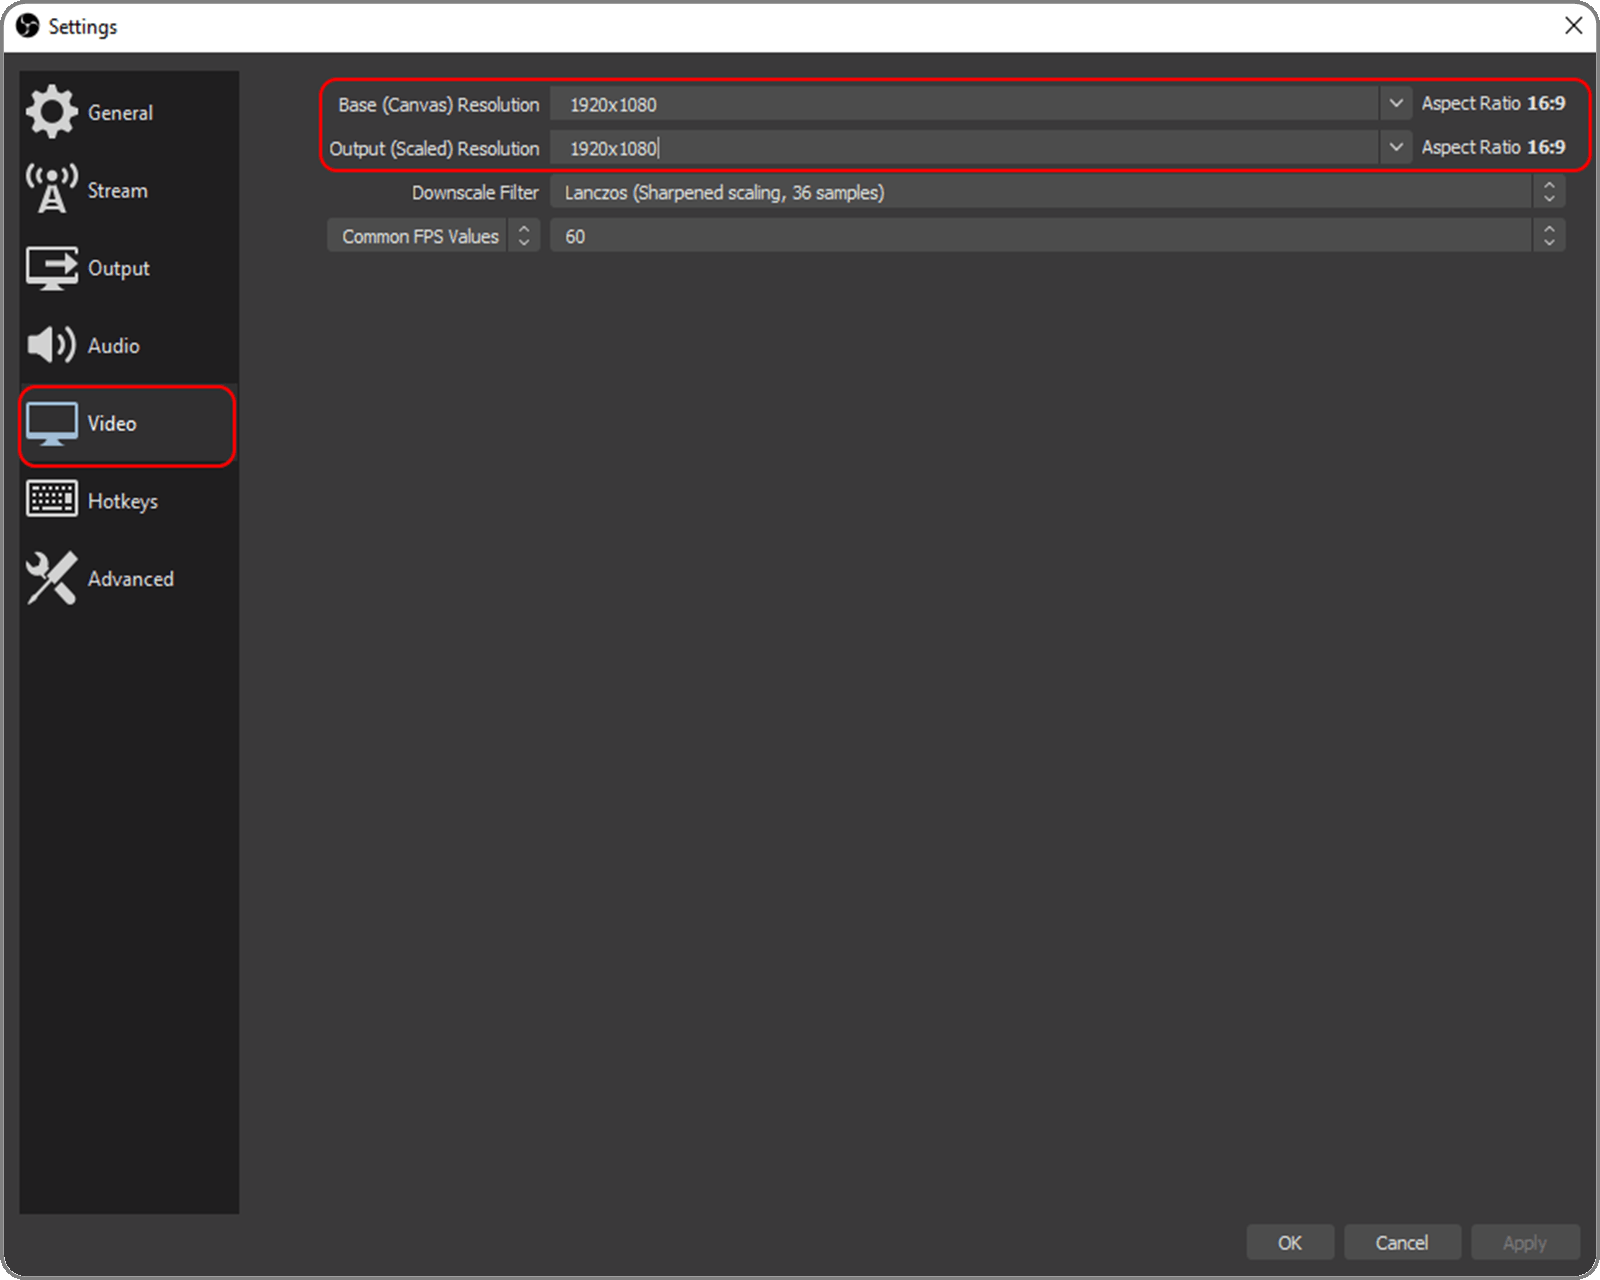
- Base / Output Resolution since monitors have different resolutions, set the canvas resolution to be the same as your monitor resolution in order to prevent black stripes on the right and at the bottom
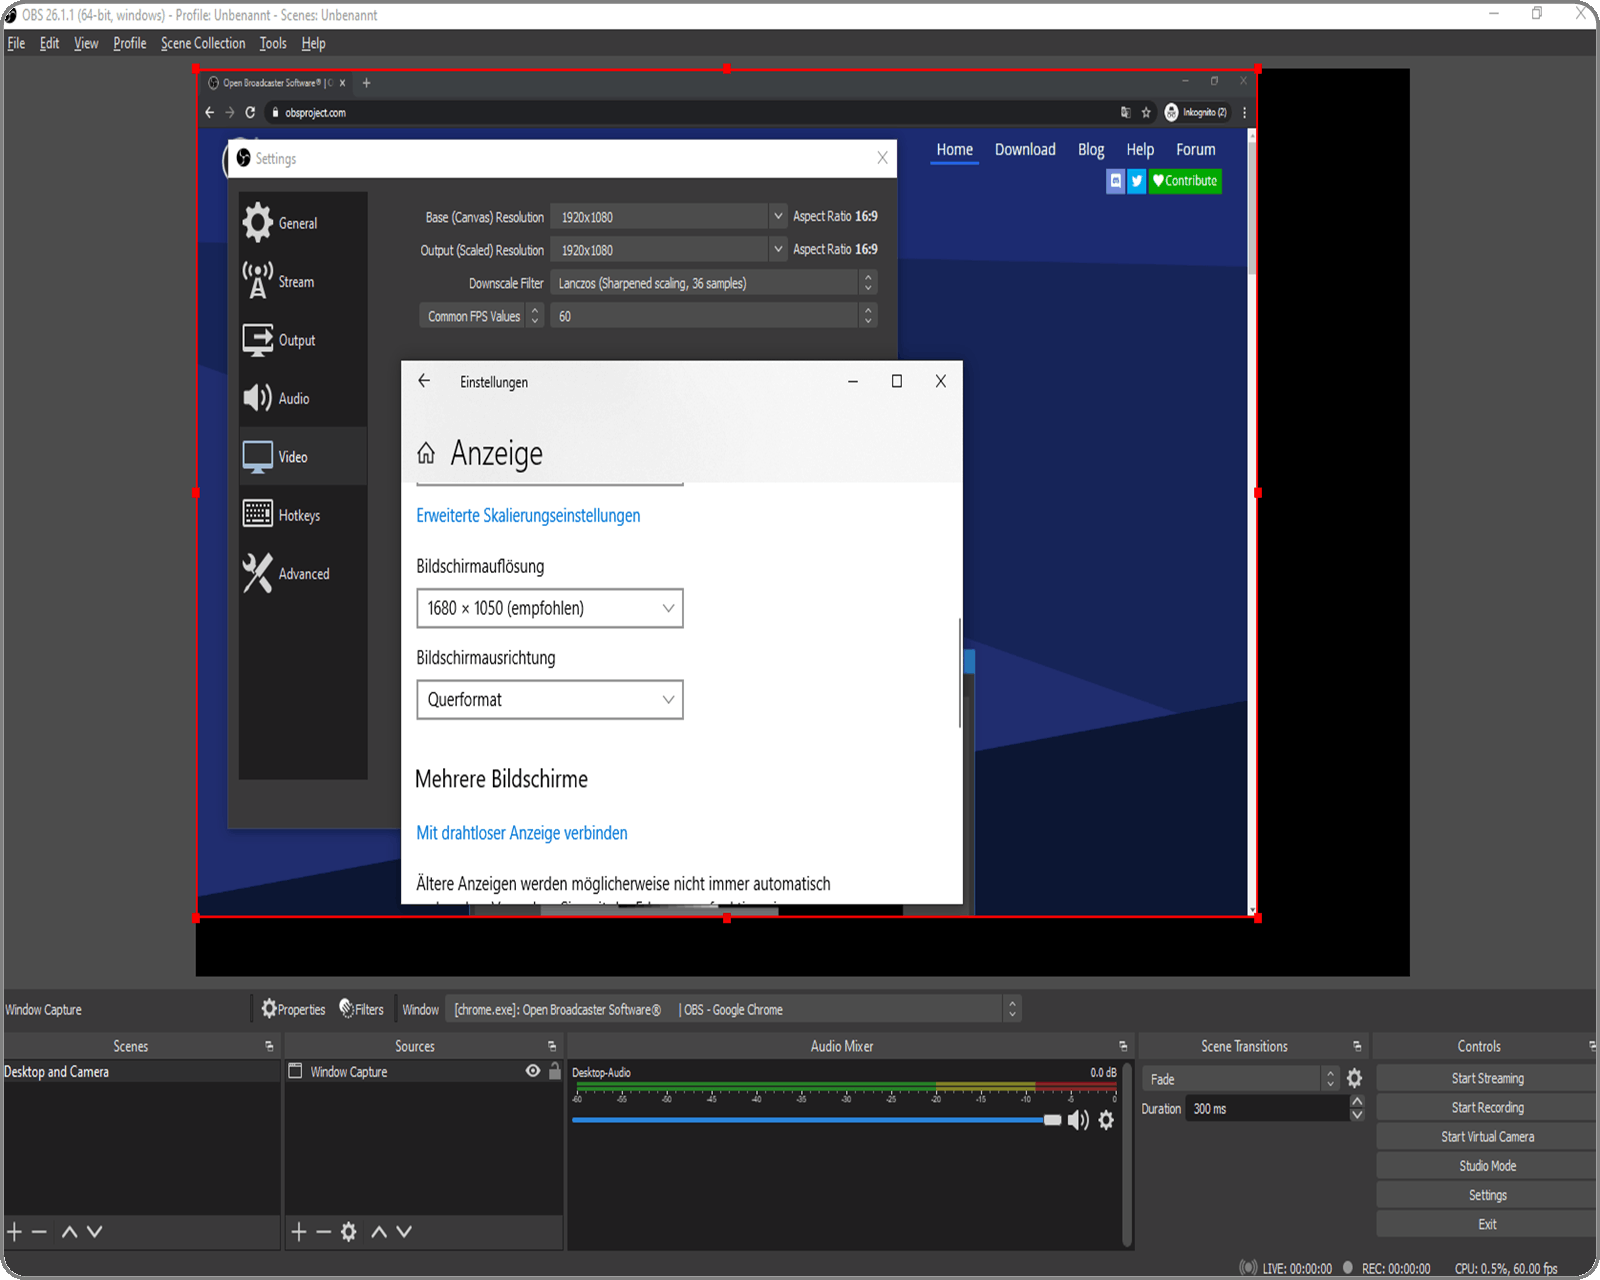
- Base / Output Resolution since monitors have different resolutions, set the canvas resolution to be the same as your monitor resolution in order to prevent black stripes on the right and at the bottom
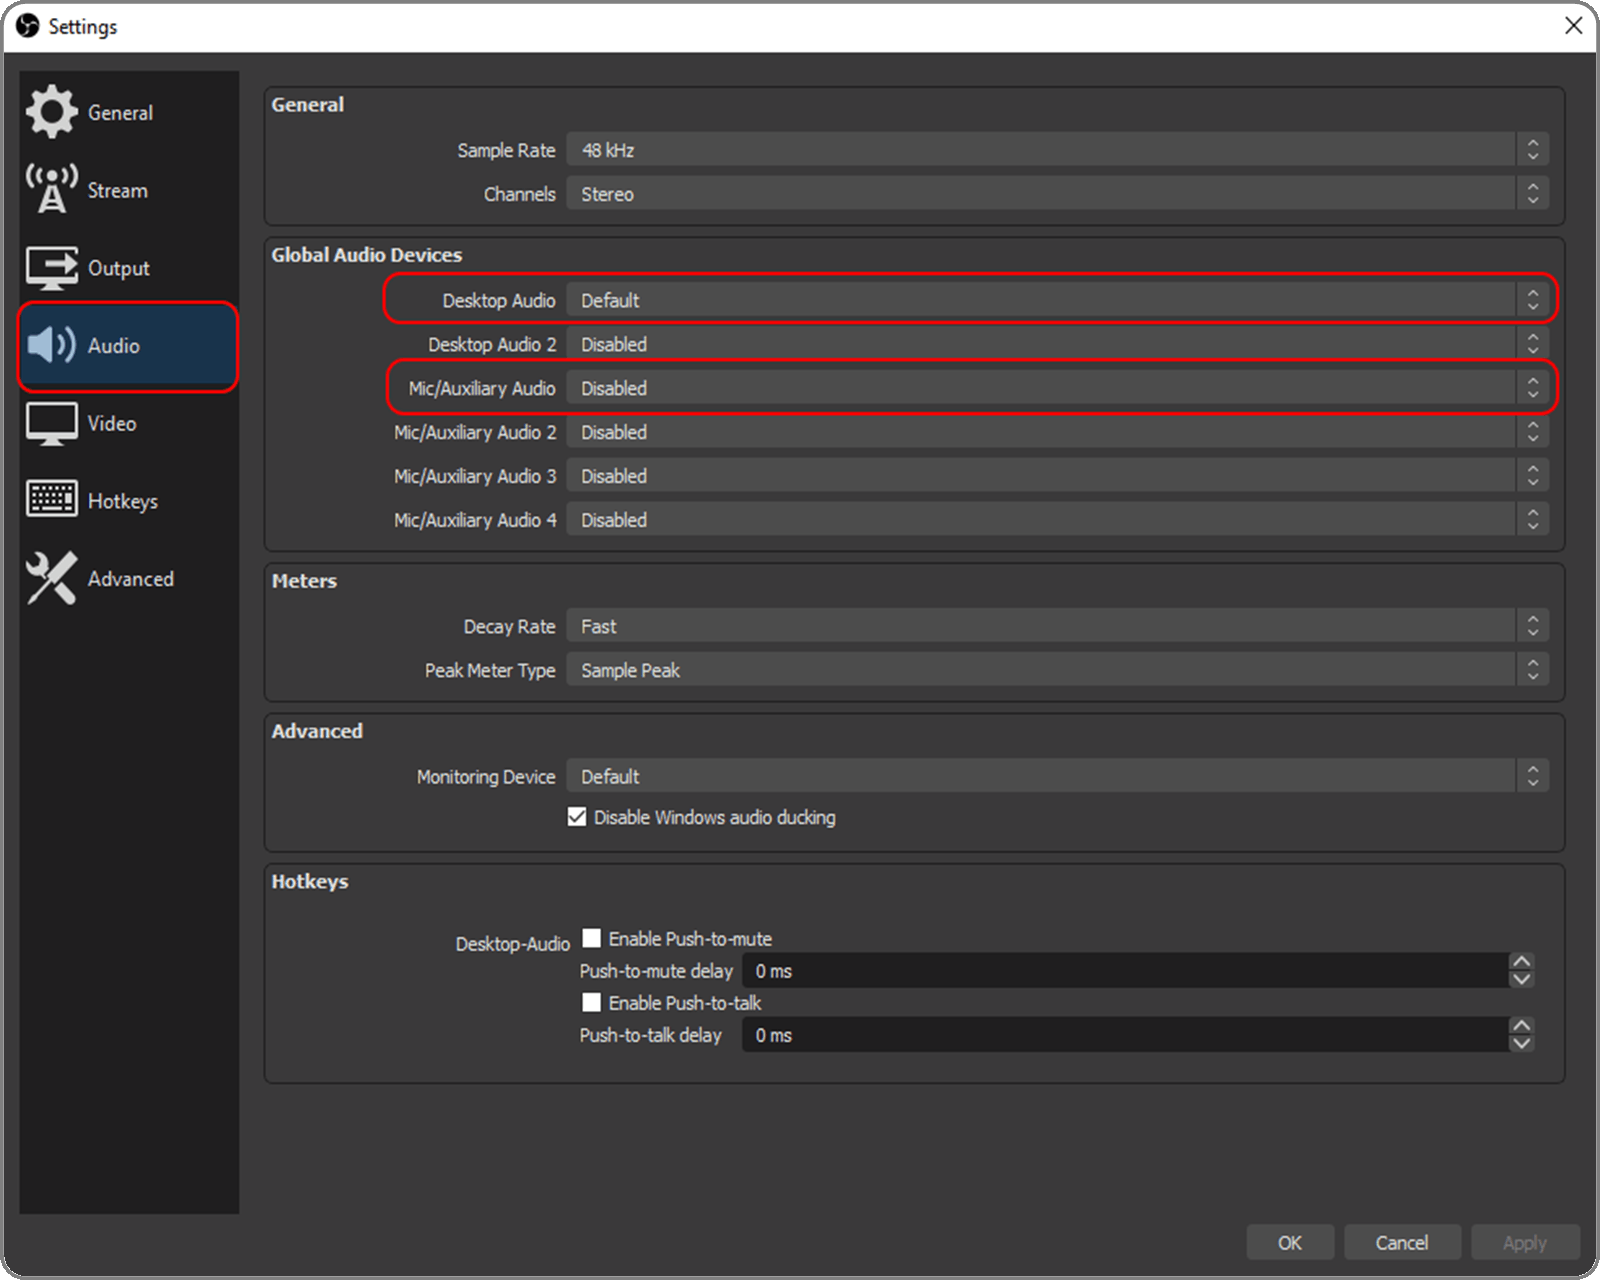
- (Optional) Audio if you want to record your voice, ensure that the Mic/Auxiliary audio setting is set to Default or if you have more than one microphone, select the desired to use. Of course, you can use this section to disable all sounds (desktop and microphone).
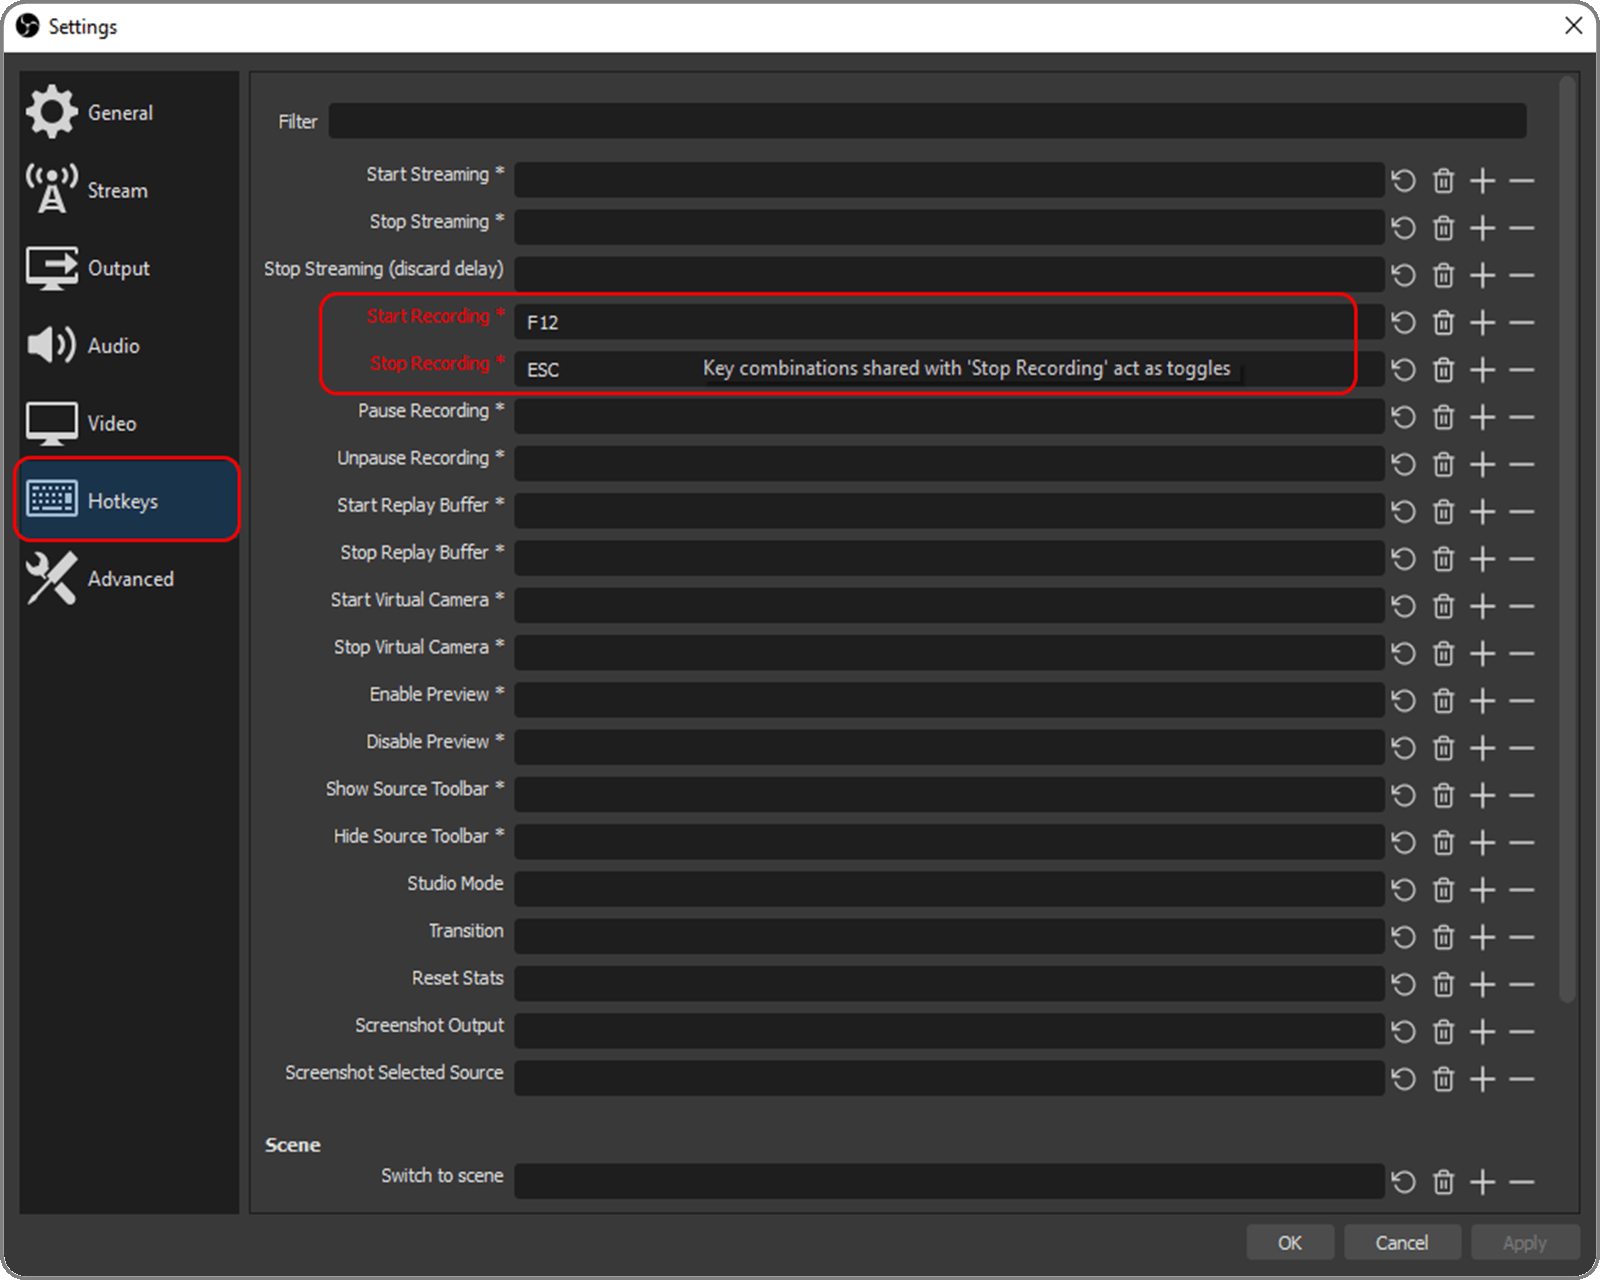
- (Optional) Hotkeys shortcuts are very helpful particularly if you have only one monitor and you don't want to edit your video to remove the start and the end from a desktop recording, because OBS Studio is to see when starting and stopping the recording. Personally, I always configure two hotkeys: Start Recording and Stop Recording. This way I can start and stop recording without showing OBS or edit the video afterwards.
Screen recording
Once the configuration is all set you are ready to go. Select the capture source and press the „Start Recording“ button from the control panel or your selected hotkey. Your video is being recorded and saved under the configured directory in the configured format. You can navigate to the directory and check for the file.

While a recording is running, it can be paused and then resumed. The difference with a stop is, that when the recording is resumed, the same video goes further - if you stop and start the recording again, every time a new video is created.
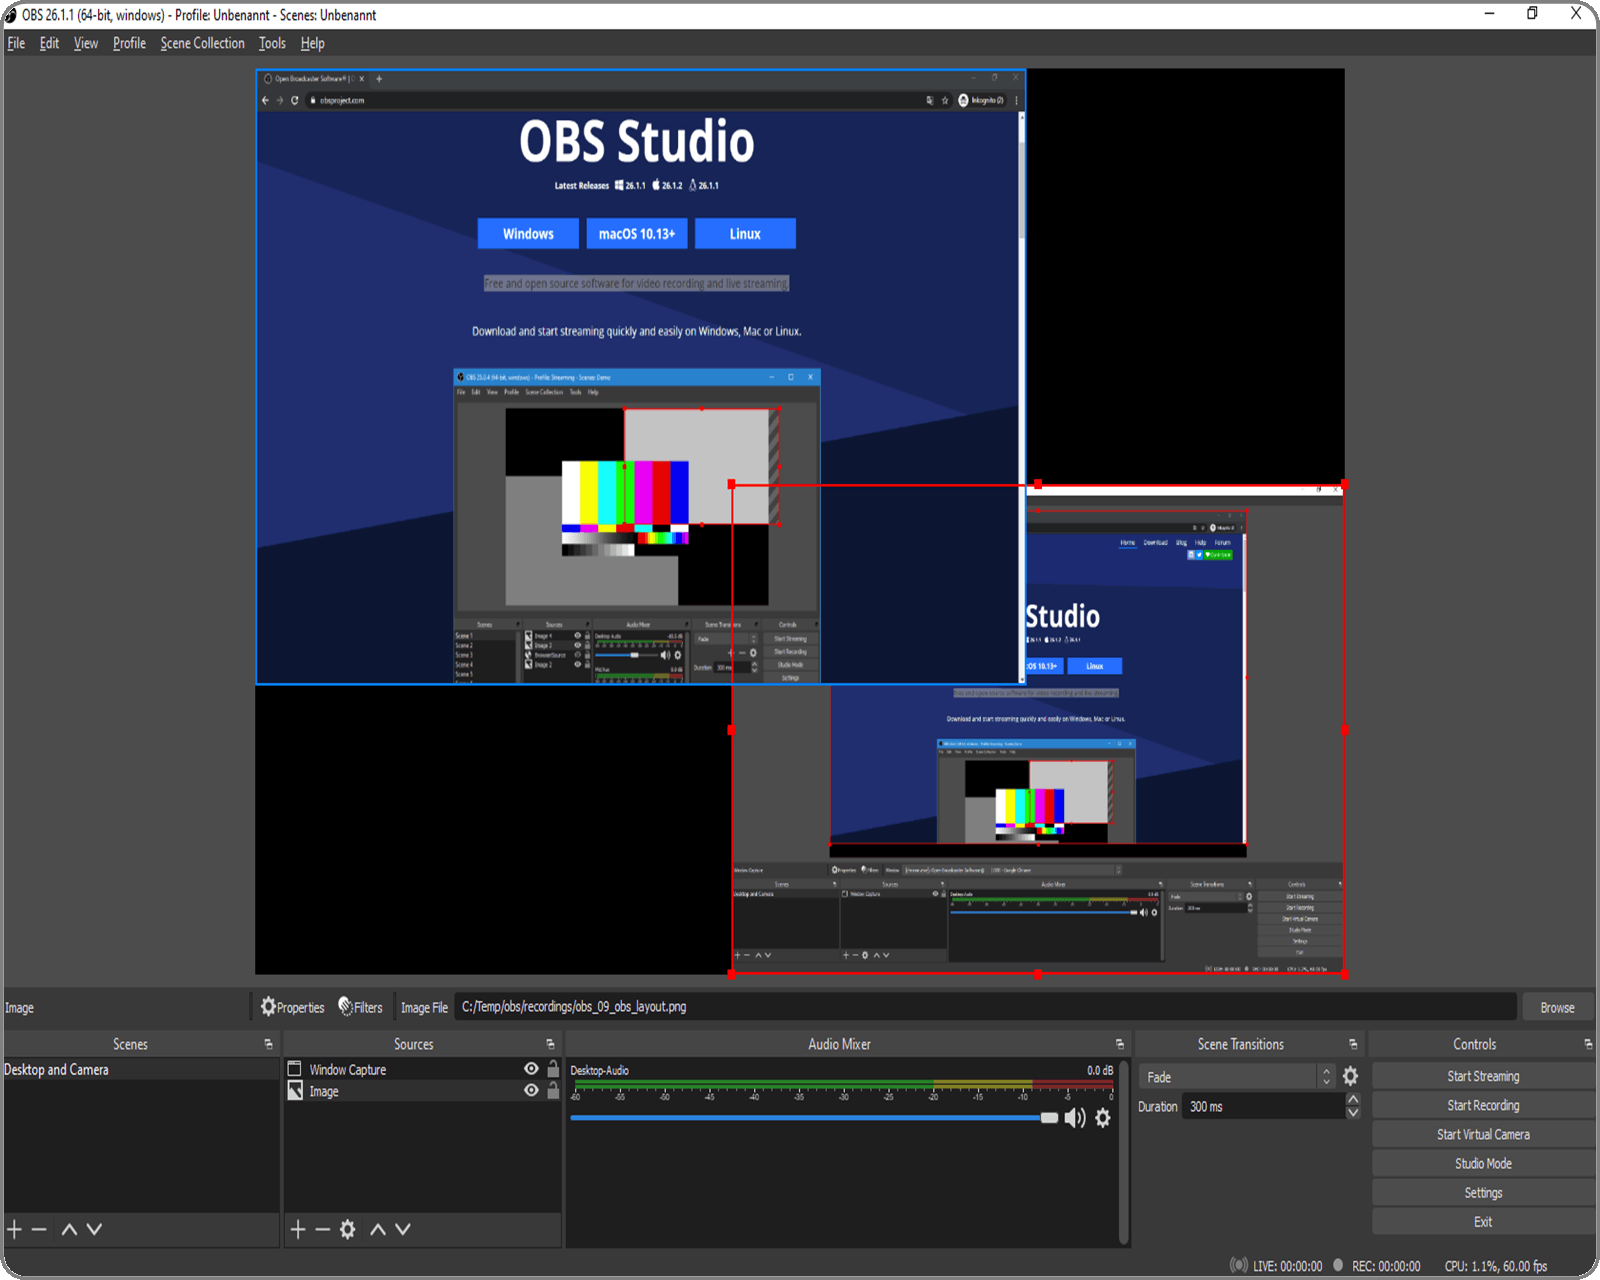
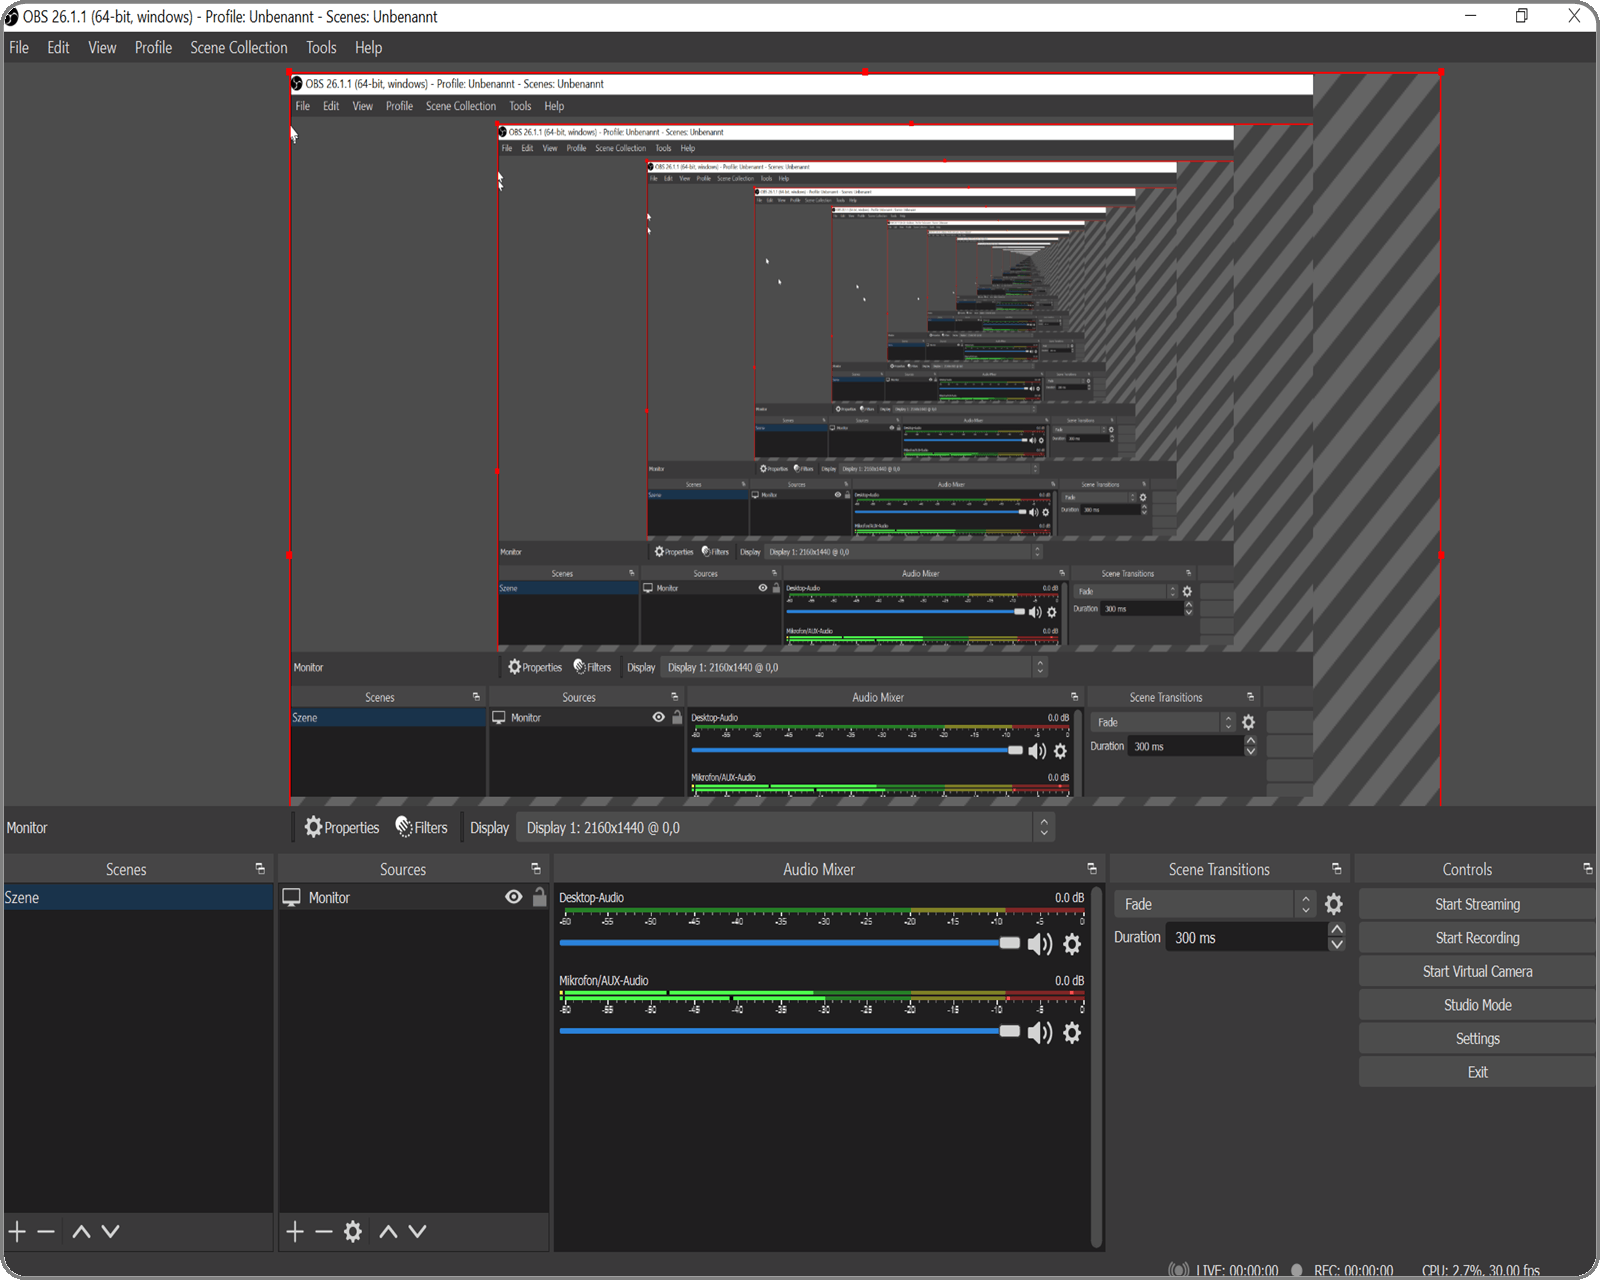
Hint: if you have only one monitor and you configure Display Capture as a capture source, you will see a funny inception image - window in a window in a window and so on. This is normal and your video will look nevertheless fine.
Desktop sounds and microphone
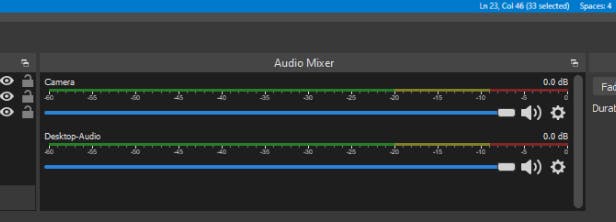
Sometimes you don’t want to record your desktop sound or the audio from the microphone. You can mute the desktop sound and or the microphone from the Audio mixer panel.
Conclusion
That was the first part from the series Video recording and streaming with 0 investments.
Now you know how to record your desktop or a specific application.
Part 2 will be about adding your camera using either your mobile phone or another video input device.
If at any point you get stuck and need help or have any questions in general or have a suggestion for an article on a specific topic - don’t hesitate to reach out - leave a comment and I'll help gladly.
Happy recording and enjoy watching your video.

