Video recording and streaming with 0 investments - OBS features

Introduction
This is part 4 of the series Video recording and streaming with 0 investments.
This article will walk you through some of the OBS features that will make your videos and streams look professional.
All articles and videos from the series can be found here:
- Introduction.
- Part 1 discusses desktop recording.
- Part 2 discusses how to show yourself with the camera.
- Part 3 discusses streaming.
- Part 4 is all about some nice features of OBS - scenes, transitions, static images, and so on. This article.
Let’s start.
Recap OBS basics and prerequisites
A very short recap of the OBS basics
OBS stands for Open Broadcaster Software – a free and open source software for live streaming and screen recording available for Windows, Linux and macOS. It can be downloaded from here: https://obsproject.com/.
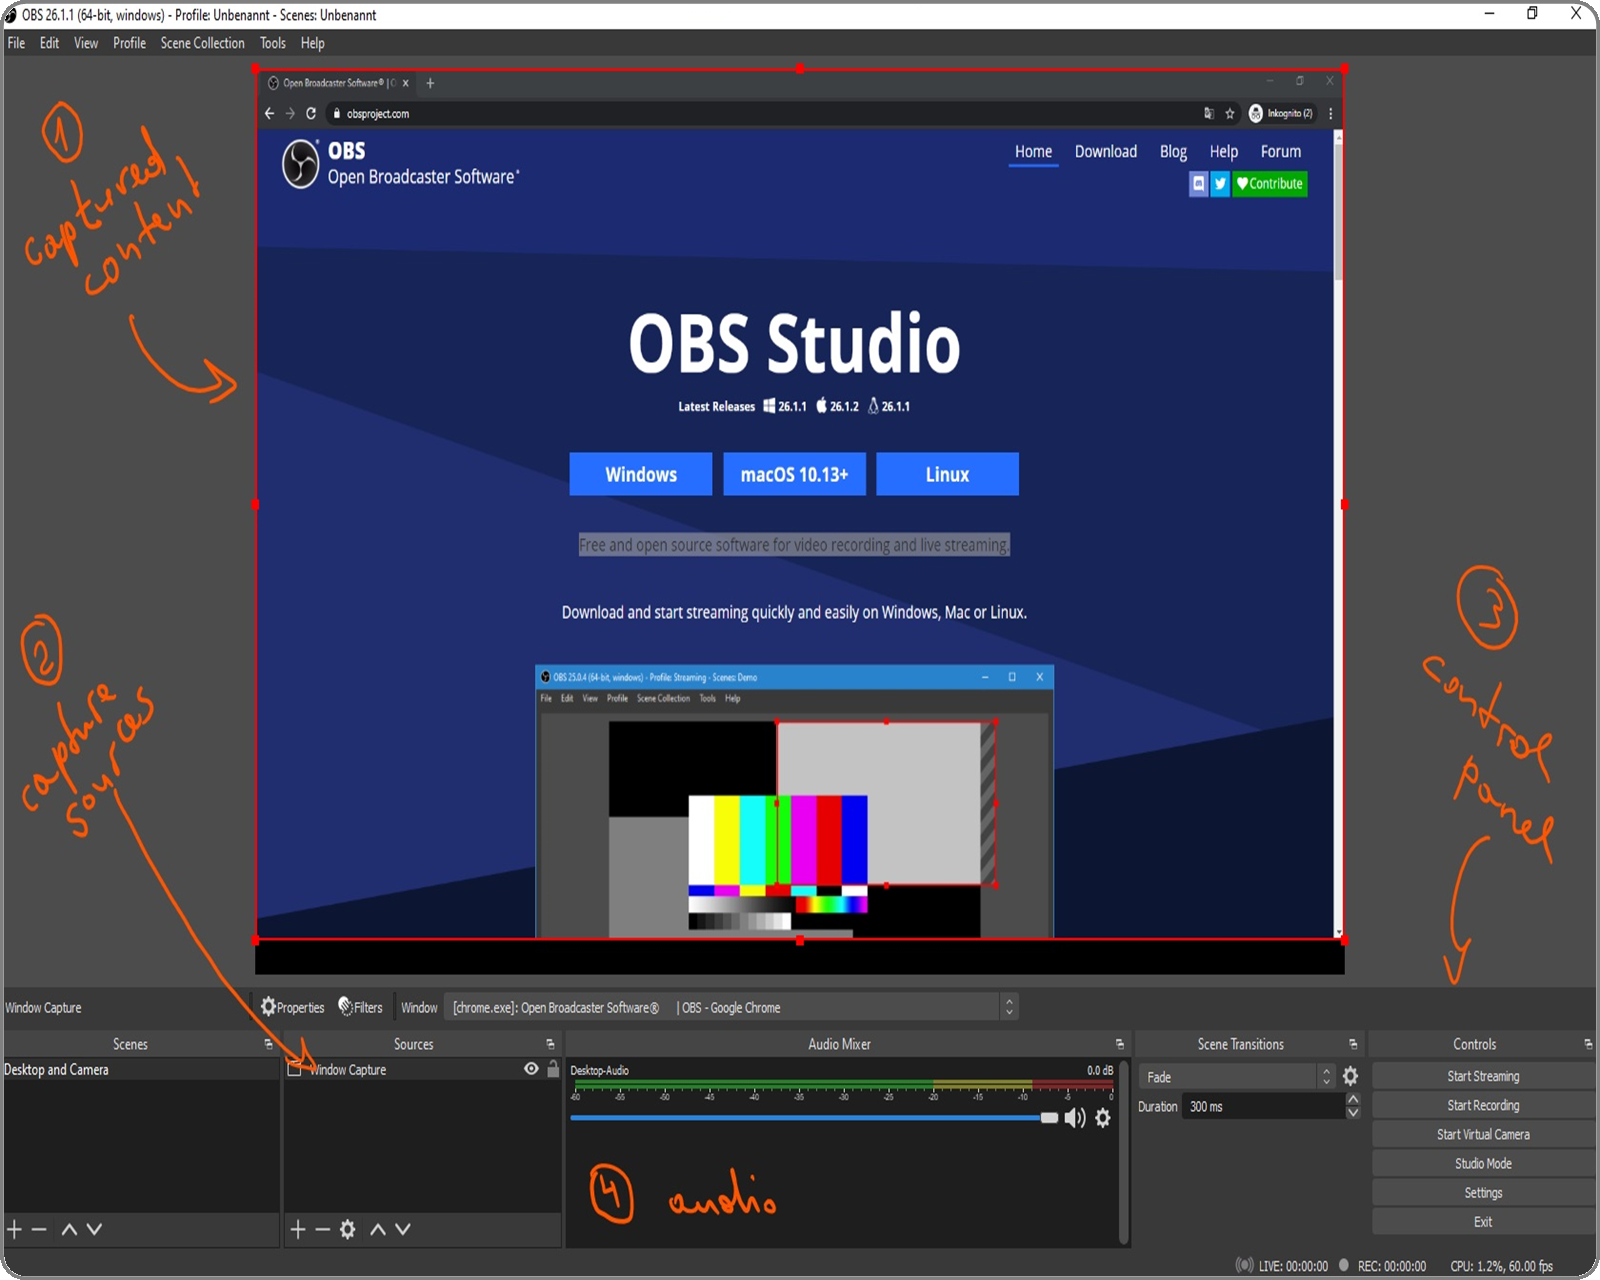
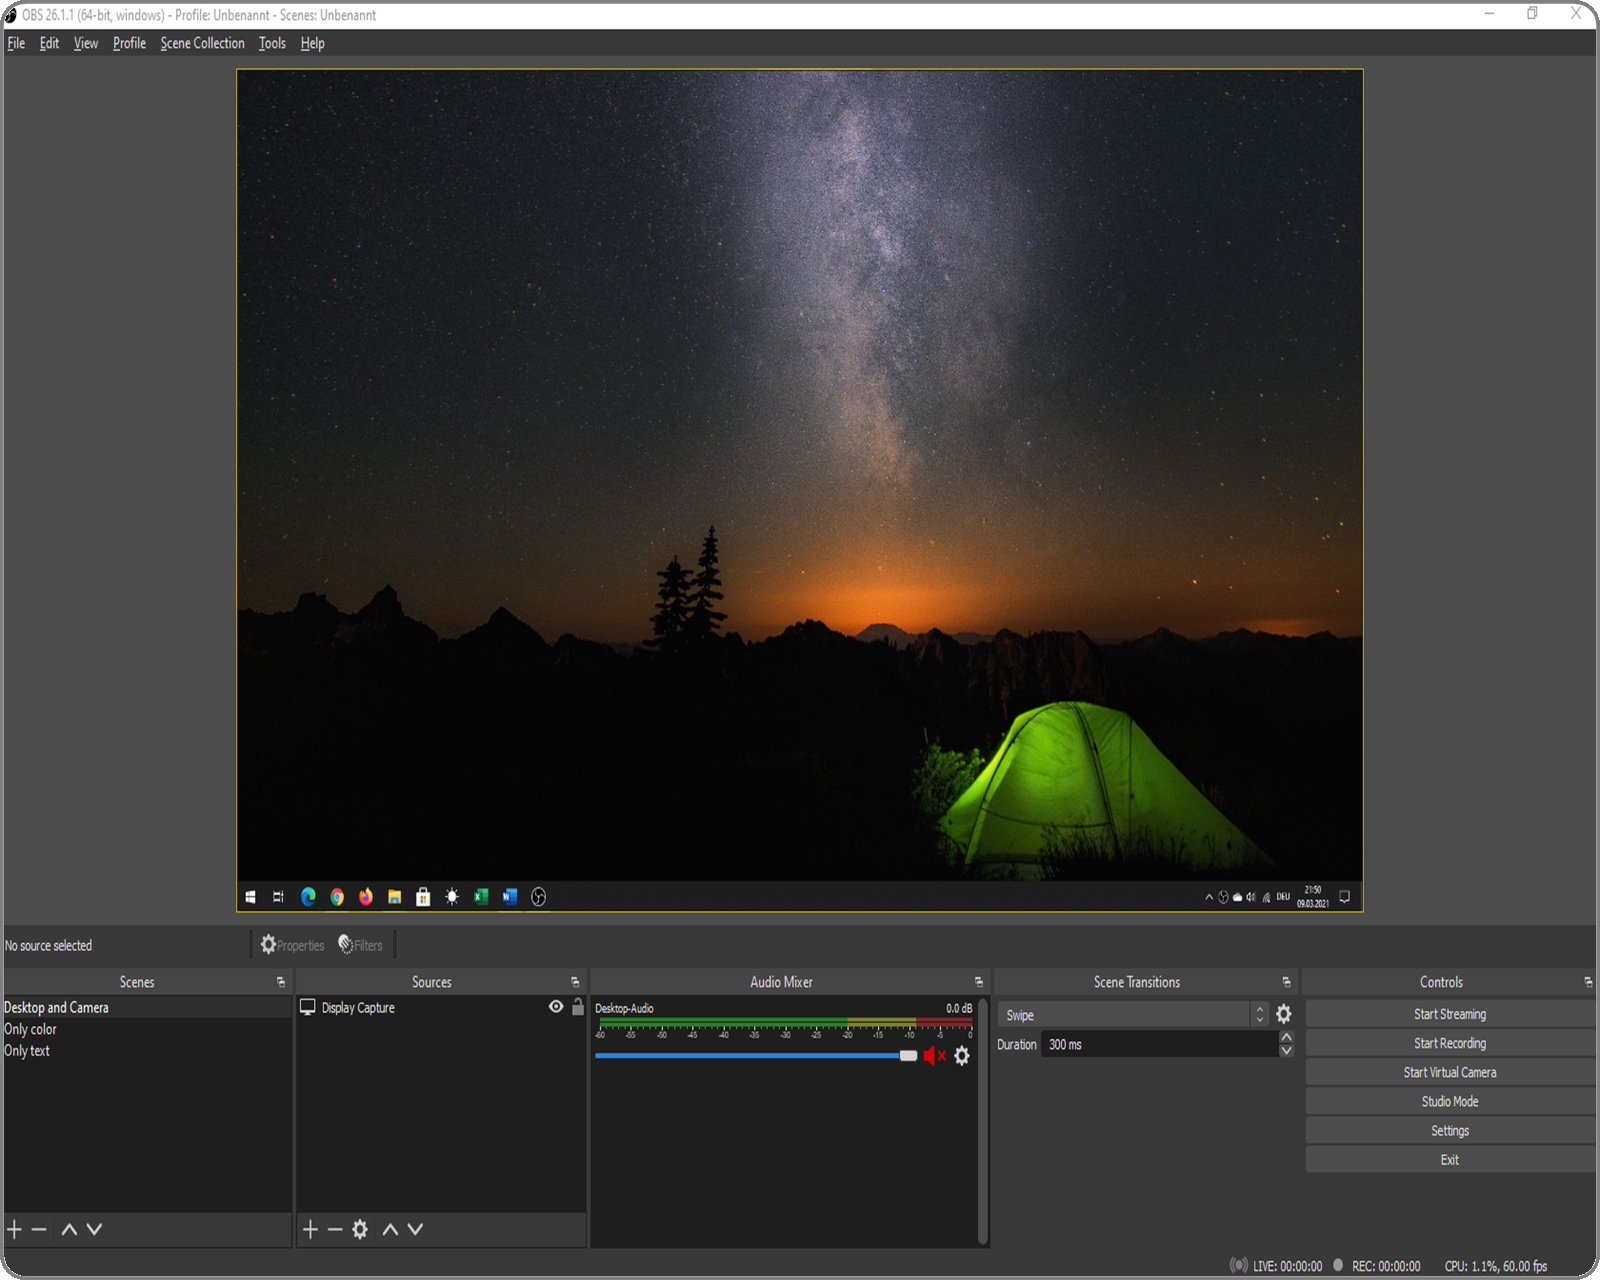
In order to record something, you need to configure the output and the video settings first. The layout consists of different panels like:
- Captured content
- Capture sources
- Control panel
- Audio
- and so on
In the previous articles the Scenes and Scene Transitions panels were not discussed - they will be discussed here.
You can find more details about
- the OBS basics in Part 1 – desktop recording
- the camera usage in Part 2 – show yourself with the camera
Prerequisites
Since this article shows how to use some functions and apply some effects in OBS, there are no prerequisites necessary – just OBS. 😀
Capture Sources
A capture source is, in my opinion, the most important component in OBS – it lets you capture something, that is recorded or streamed – without this source, there is nothing to show or play.
Capture sources are stacked and the one on the top is completely visible and covers all other below. Reordering the sources changes the “captured content”.
Once added, all capture sources can be resized with the mouse. Normally both width and height are scaled together. If you want to resize only the width or the height of a source, press and hold the ALT key and resize the desired side with the mouse.
So far 5 different capture sources have been shown and used in this series:
- Display Capture – the complete desktop
- Window Capture – a selected application window
- Video Capture Device – camera (video input)
- Audio Input Capture – microphone (audio input)
- Media Source – local video or audio file or remote stream
There are a lot more capture sources in OBS:
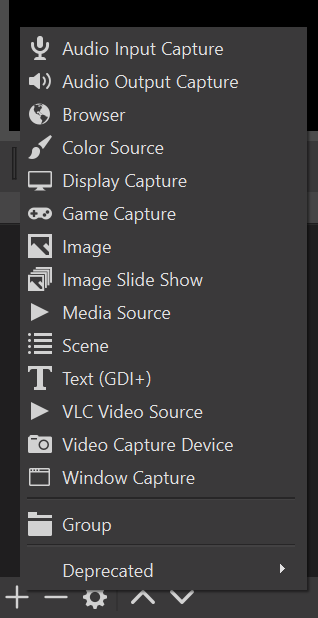
The following sources are presented in this article:
- Color Source – rectangle area filled with a color
- Image – a static image
- Image Slide Show – a slide show (often known as “carousel”)
- Media Source – video or audio as input
- Text (GDI+) – a static text
Almost any effect can be achieved with a combination of these five sources (and the previous ones). Let’s take a closer look at them.
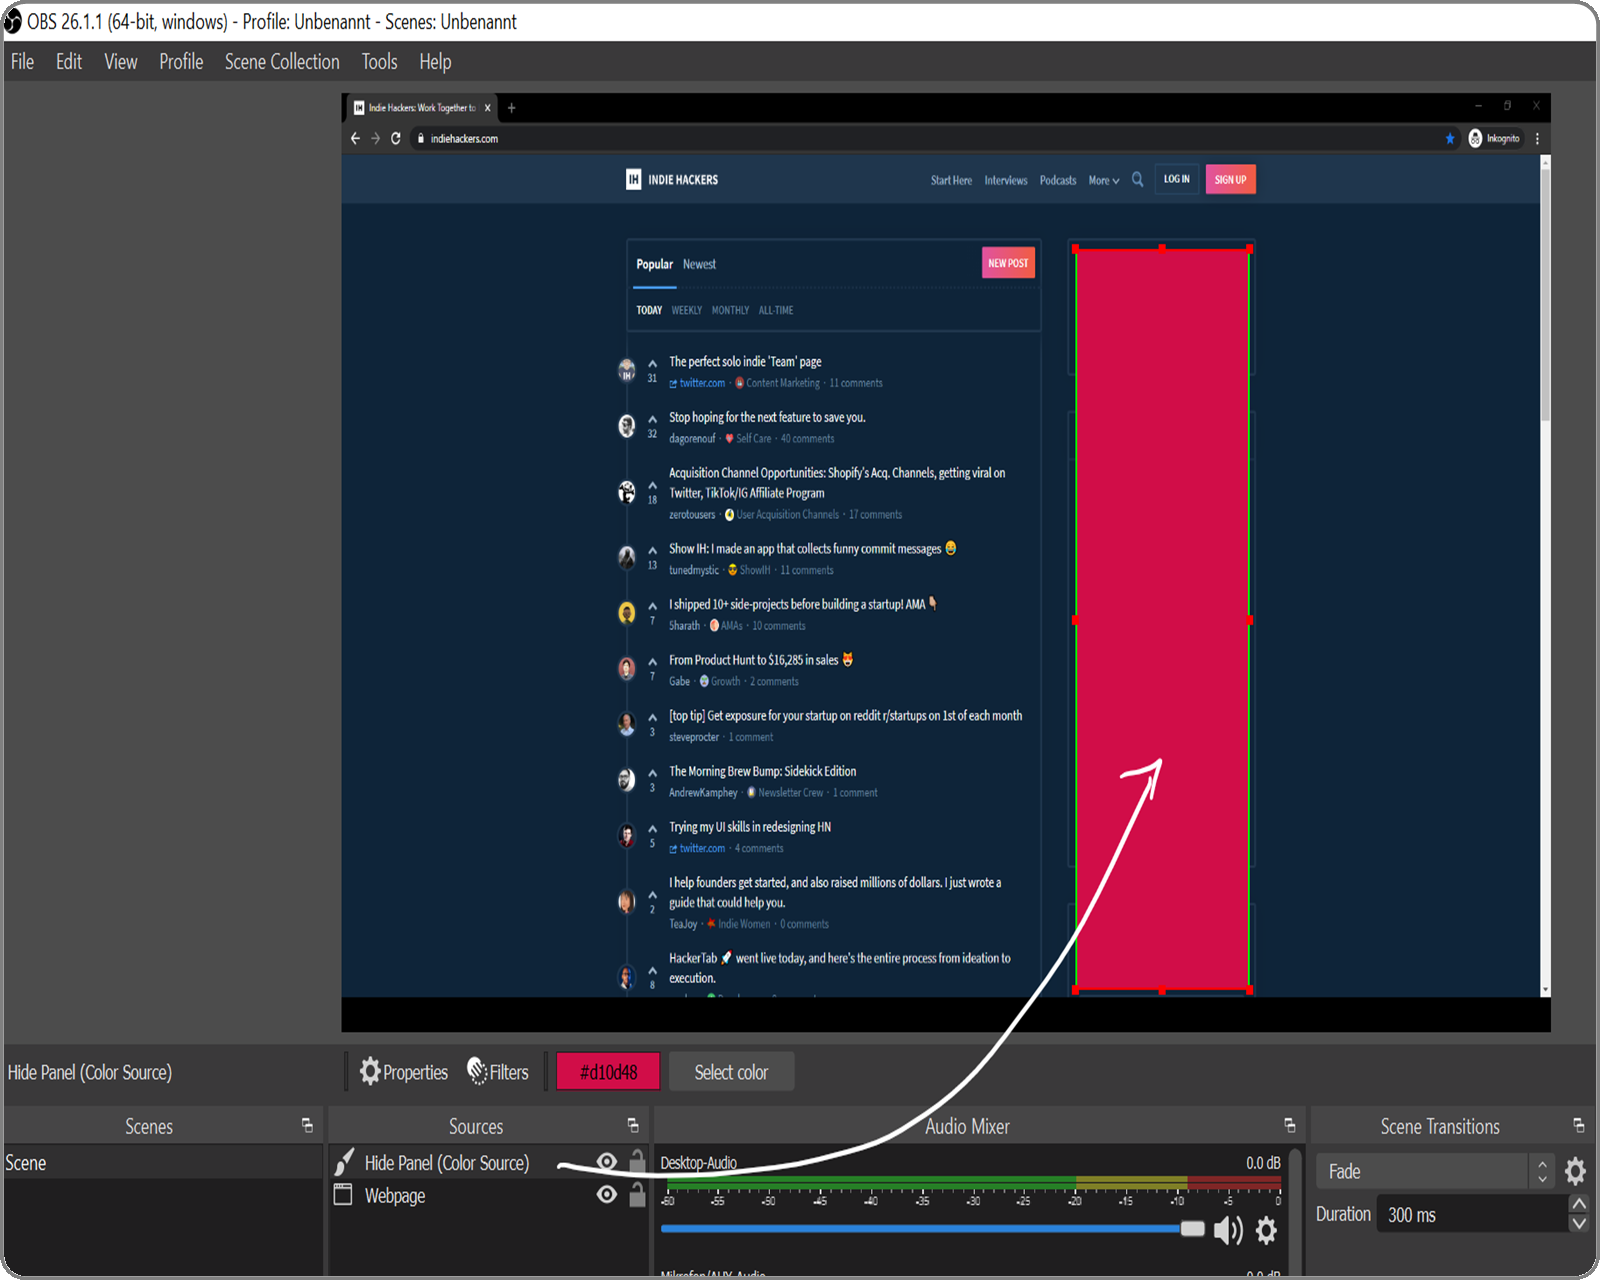
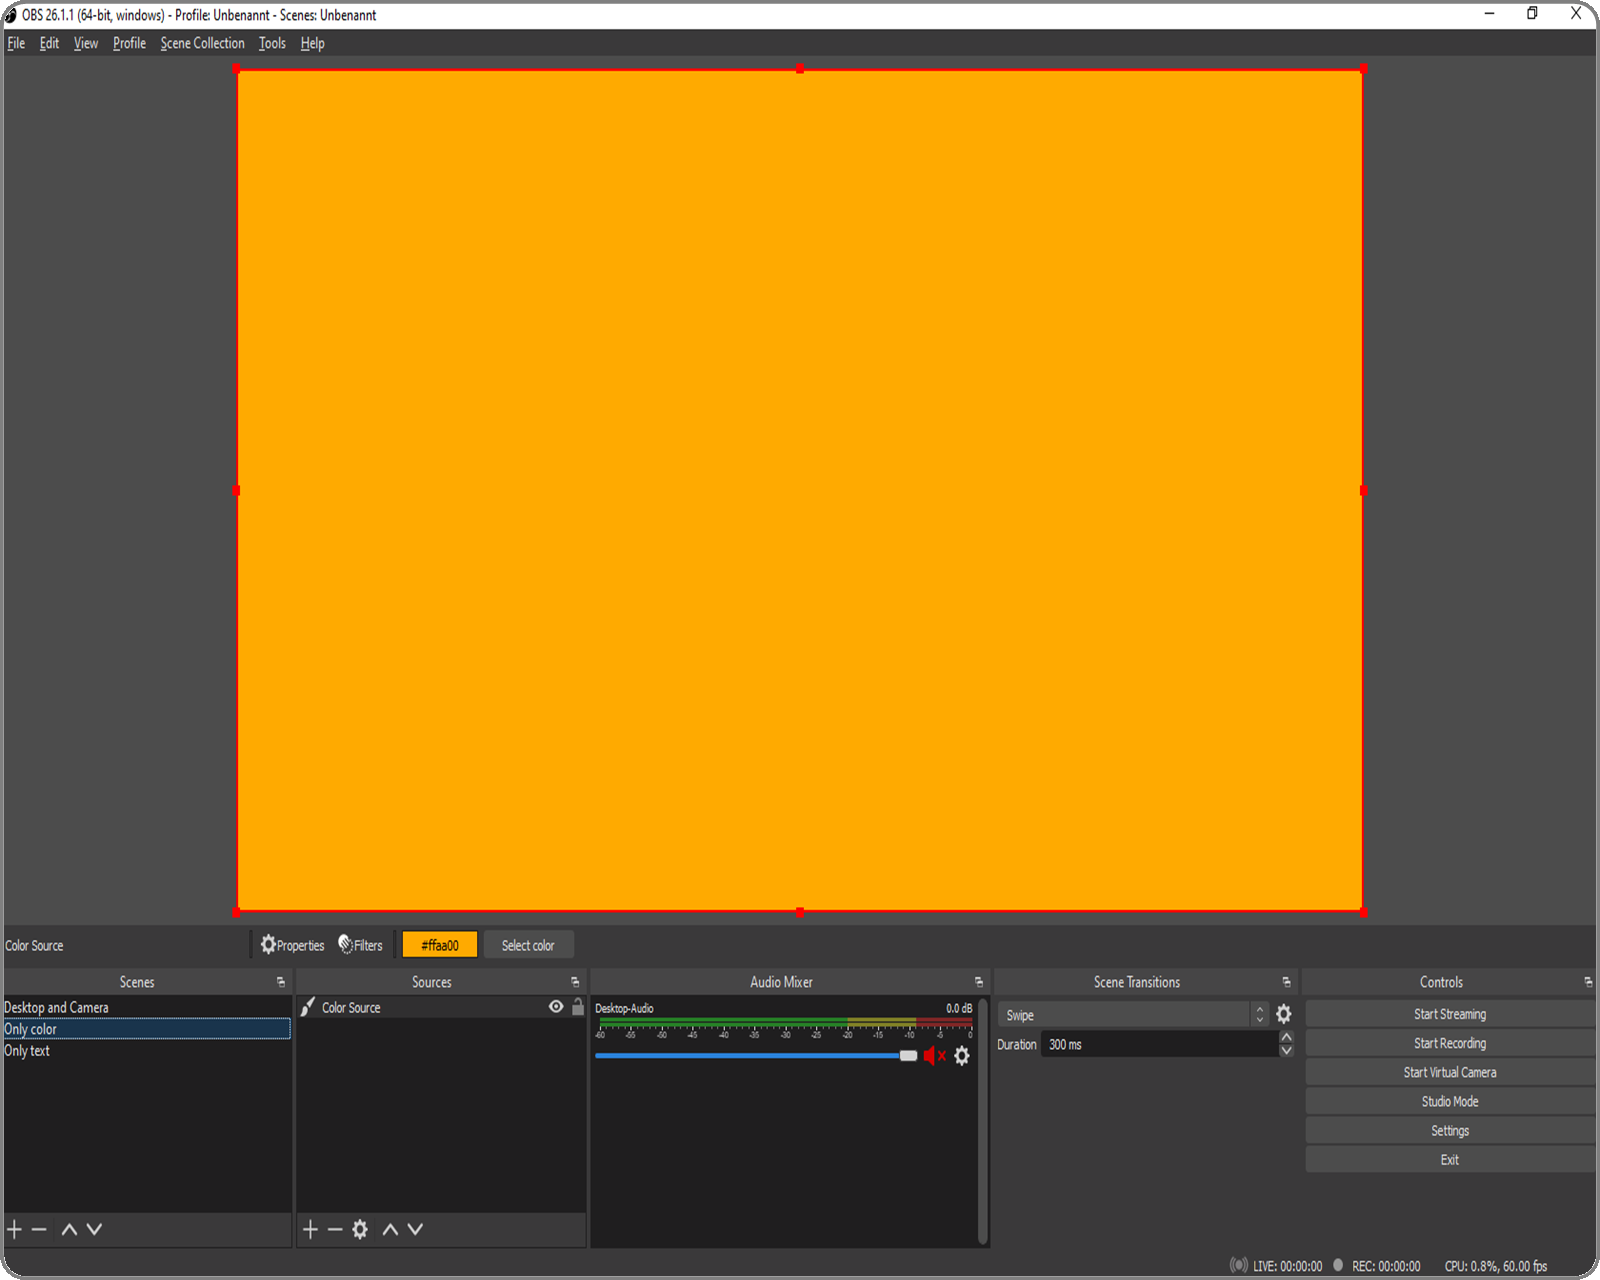
Color Source
The color source is a rectangular area with a configurable background color.
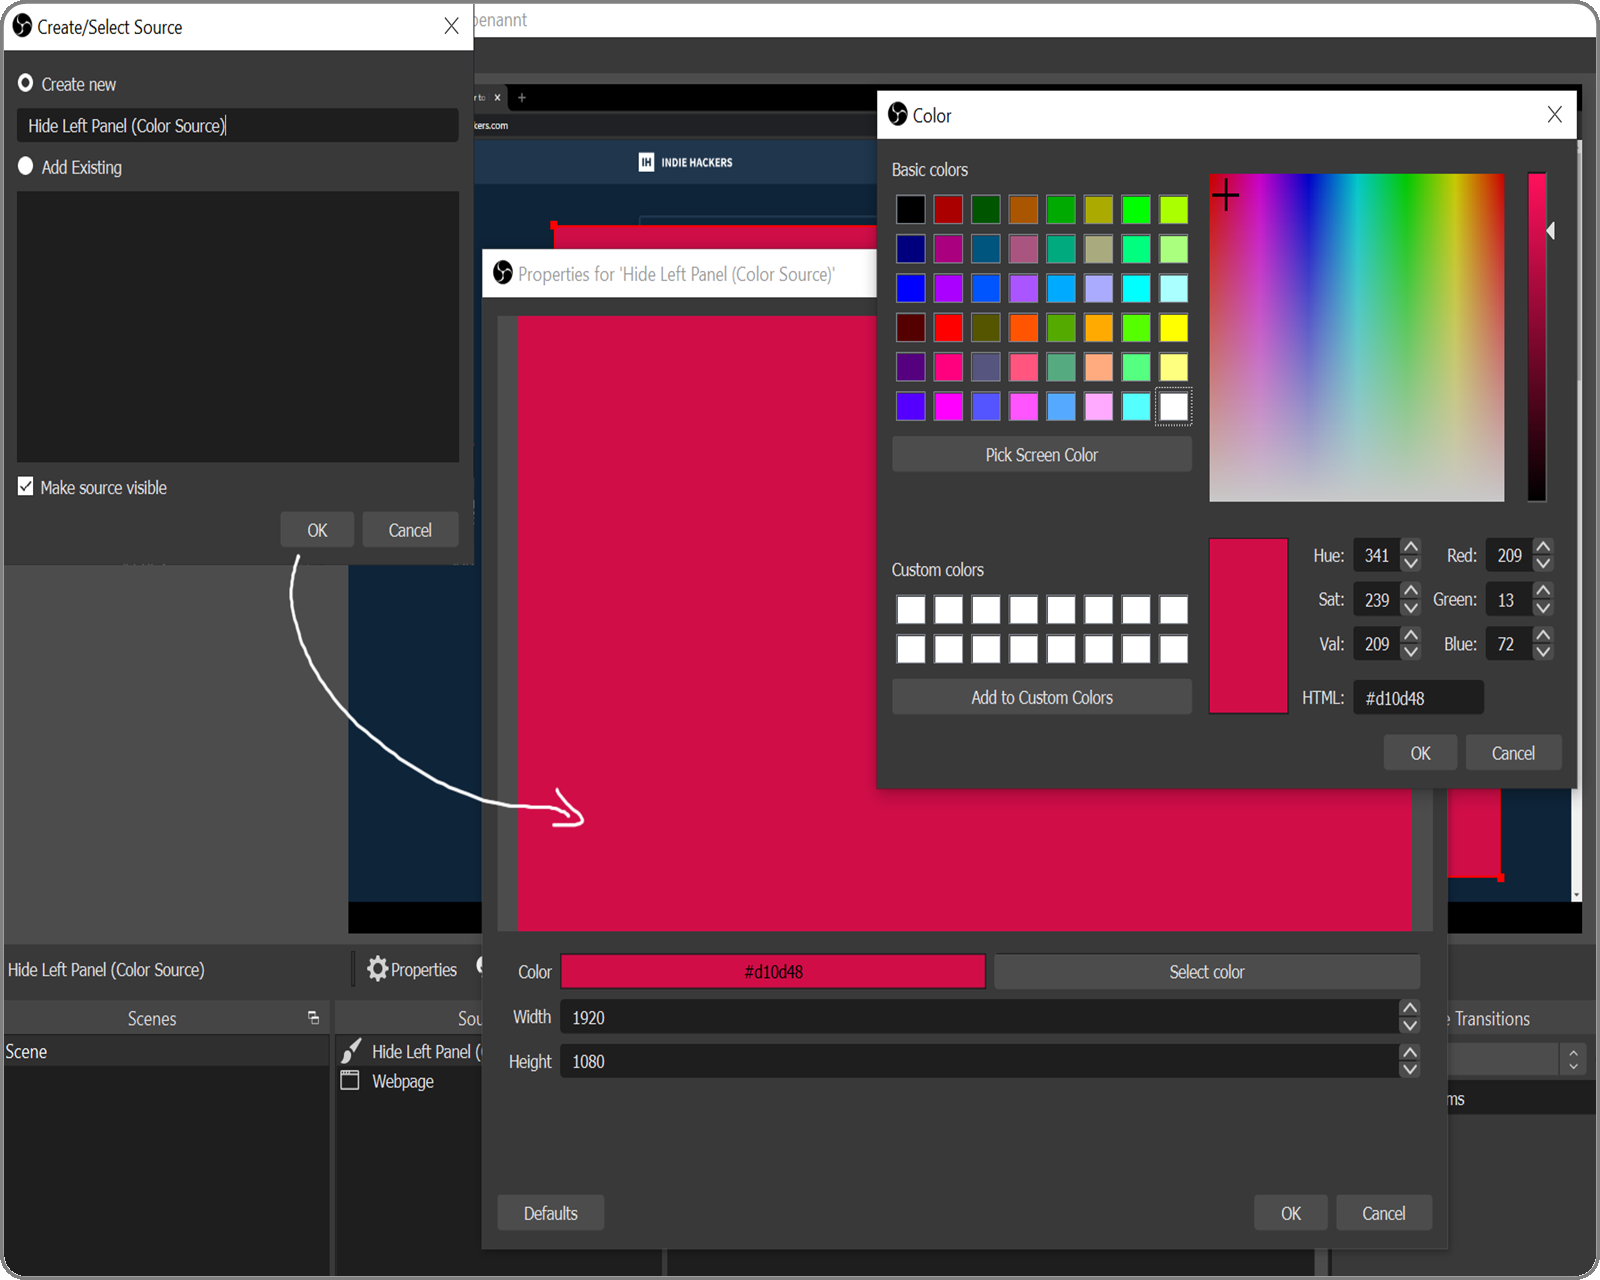
It can be used as a background or to fill a gap or to cover other sources or as a panel (for example in combination with a Text source).
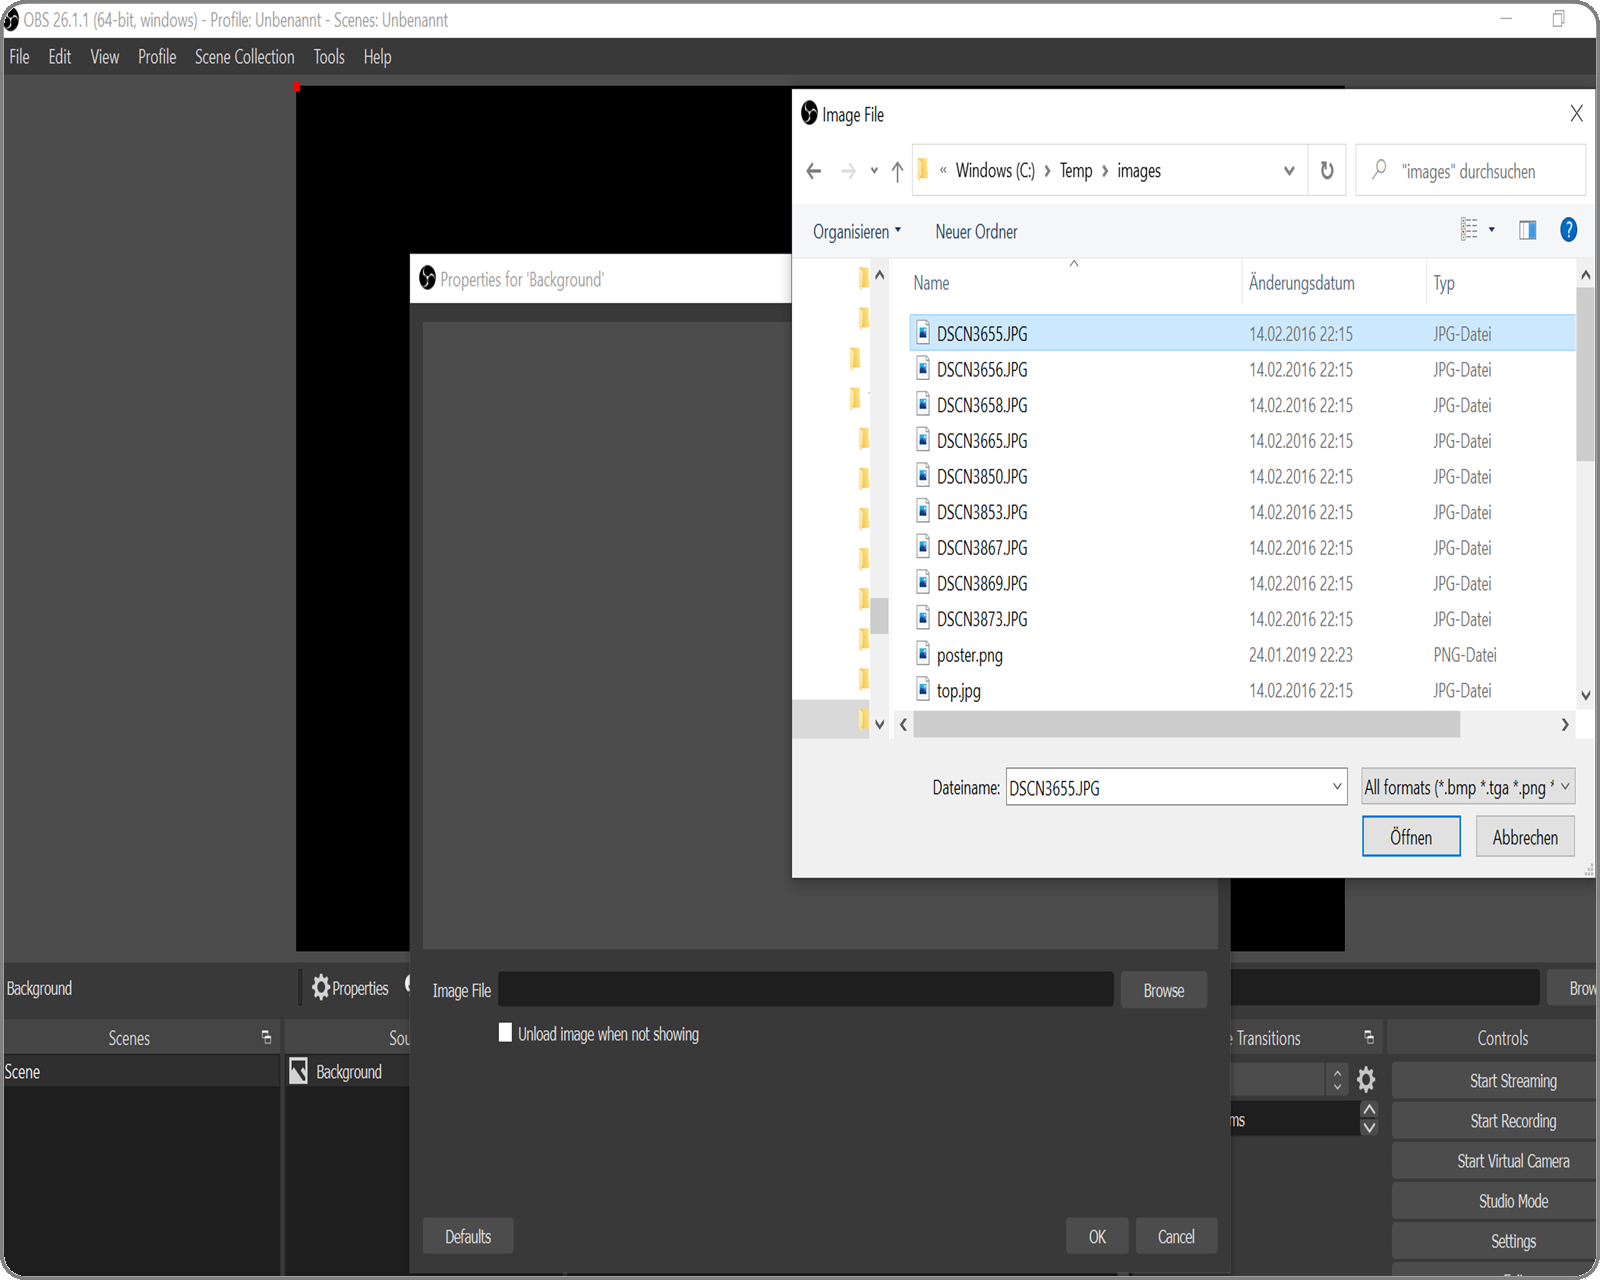
Image
The image source displays an image, that can be selected from the local drives. It can be used exactly as the color source - background or cover other sources and so on.
Add an image source:
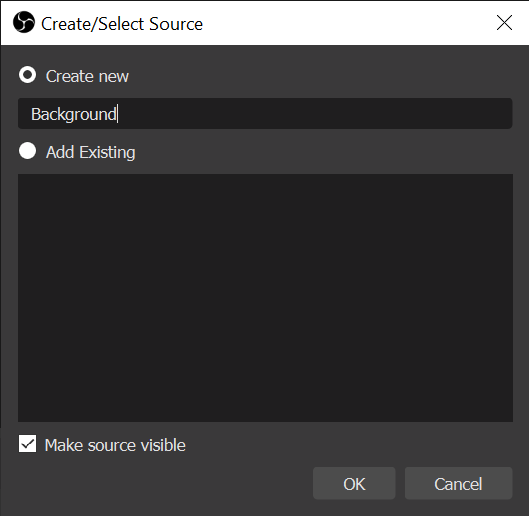
Select an image to display:
Confirm the changes and ...:
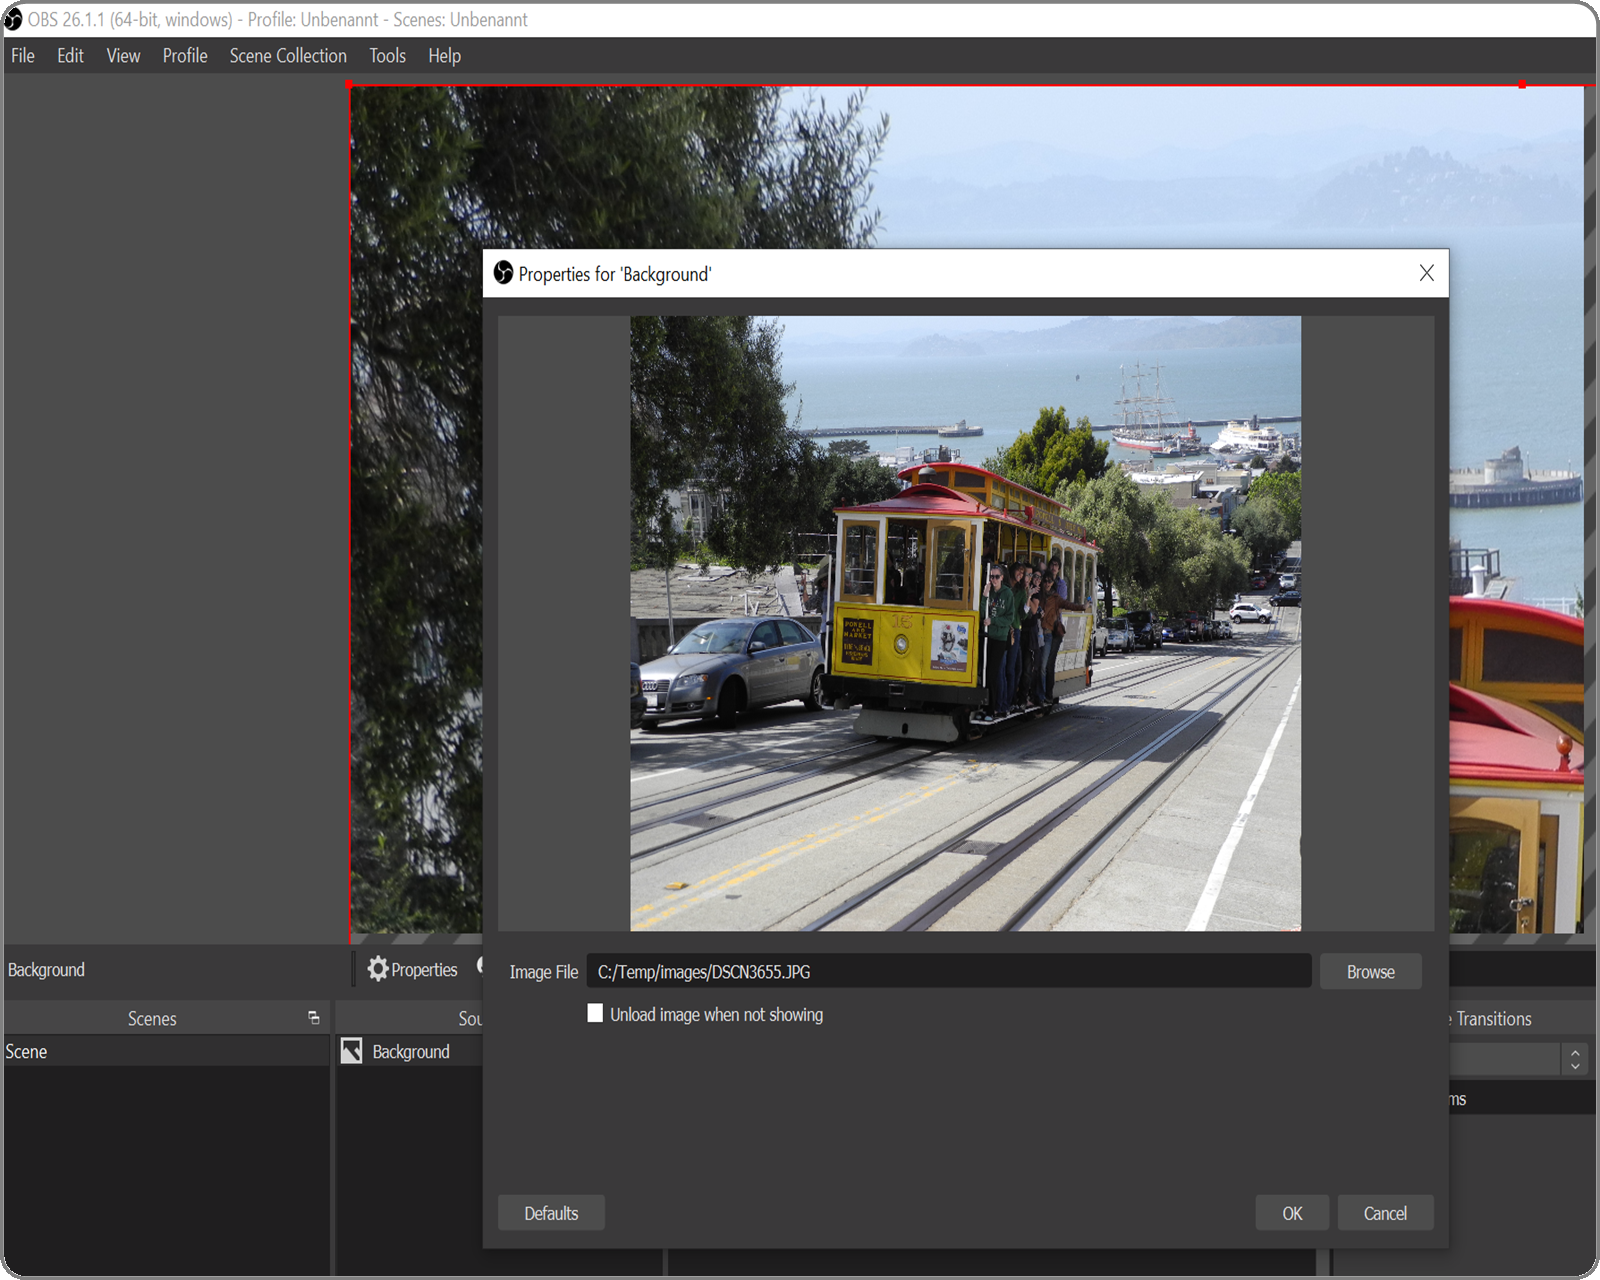
Use the image source:
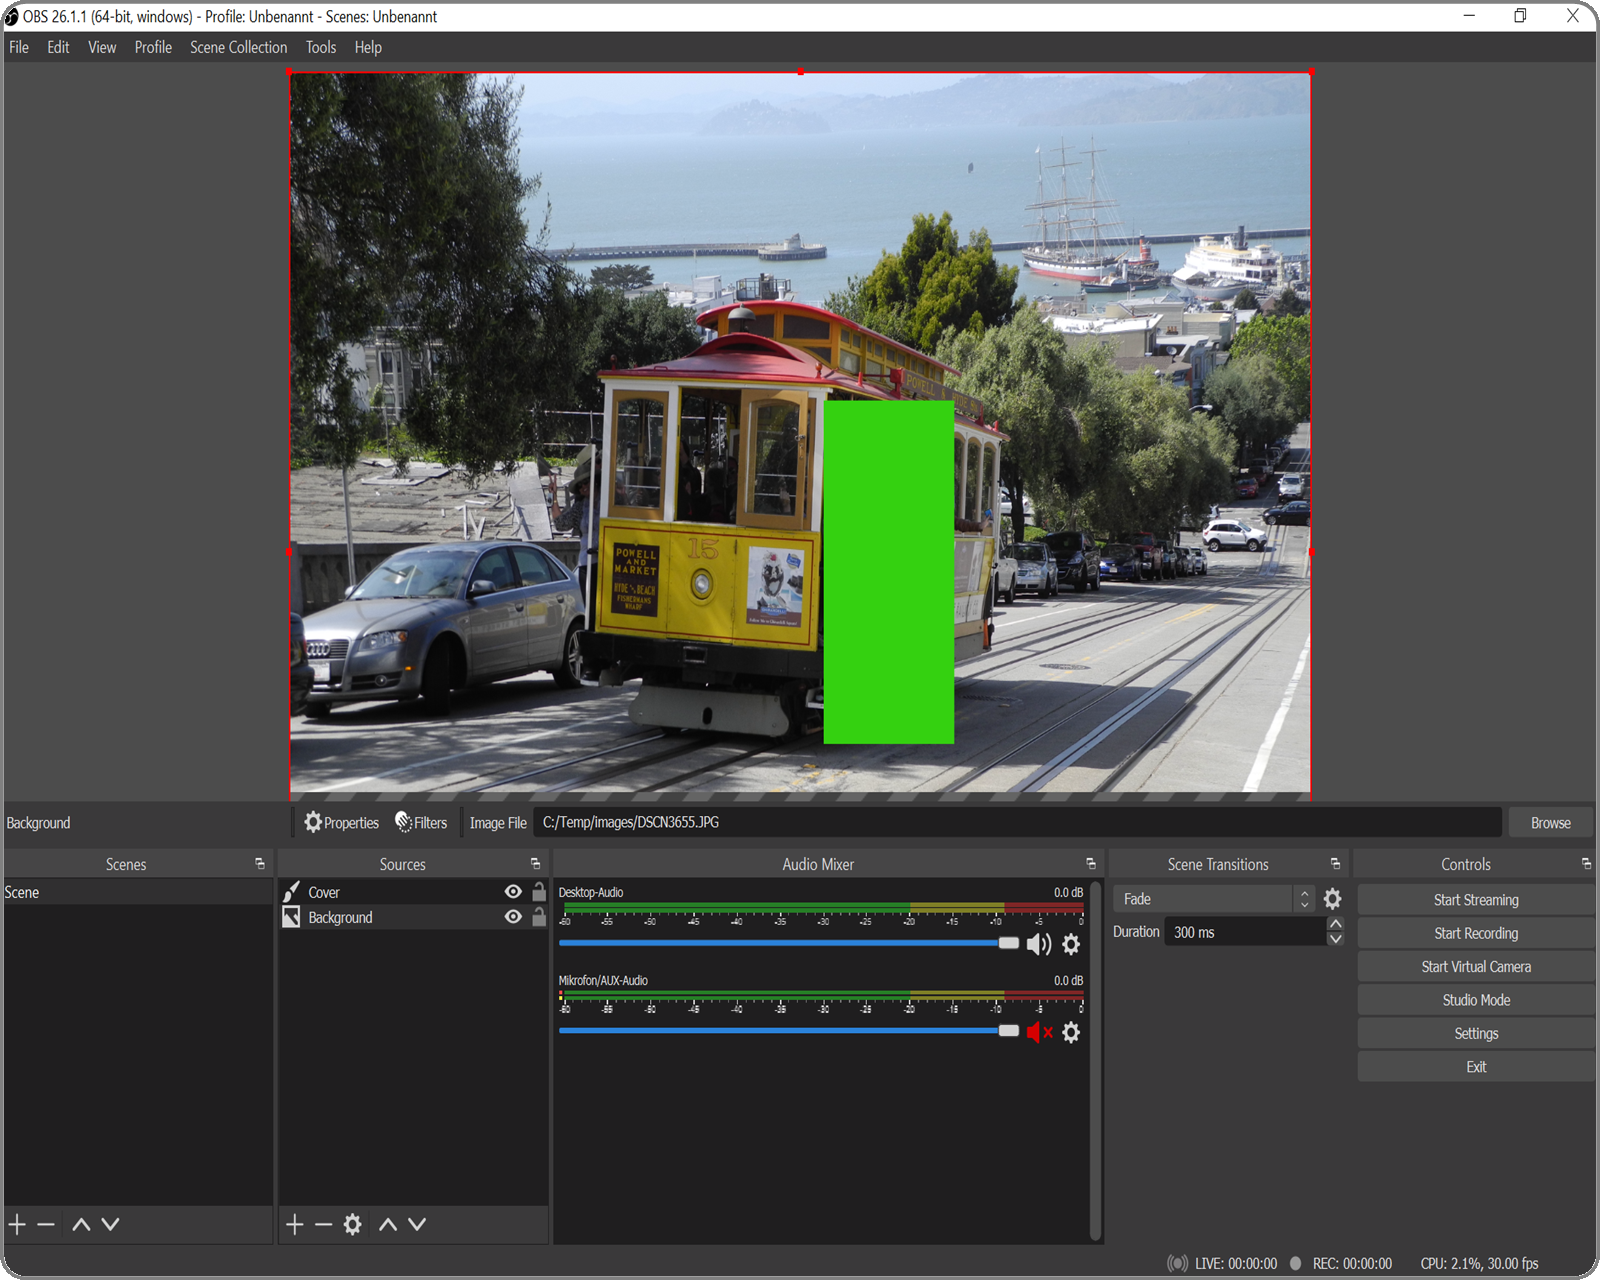
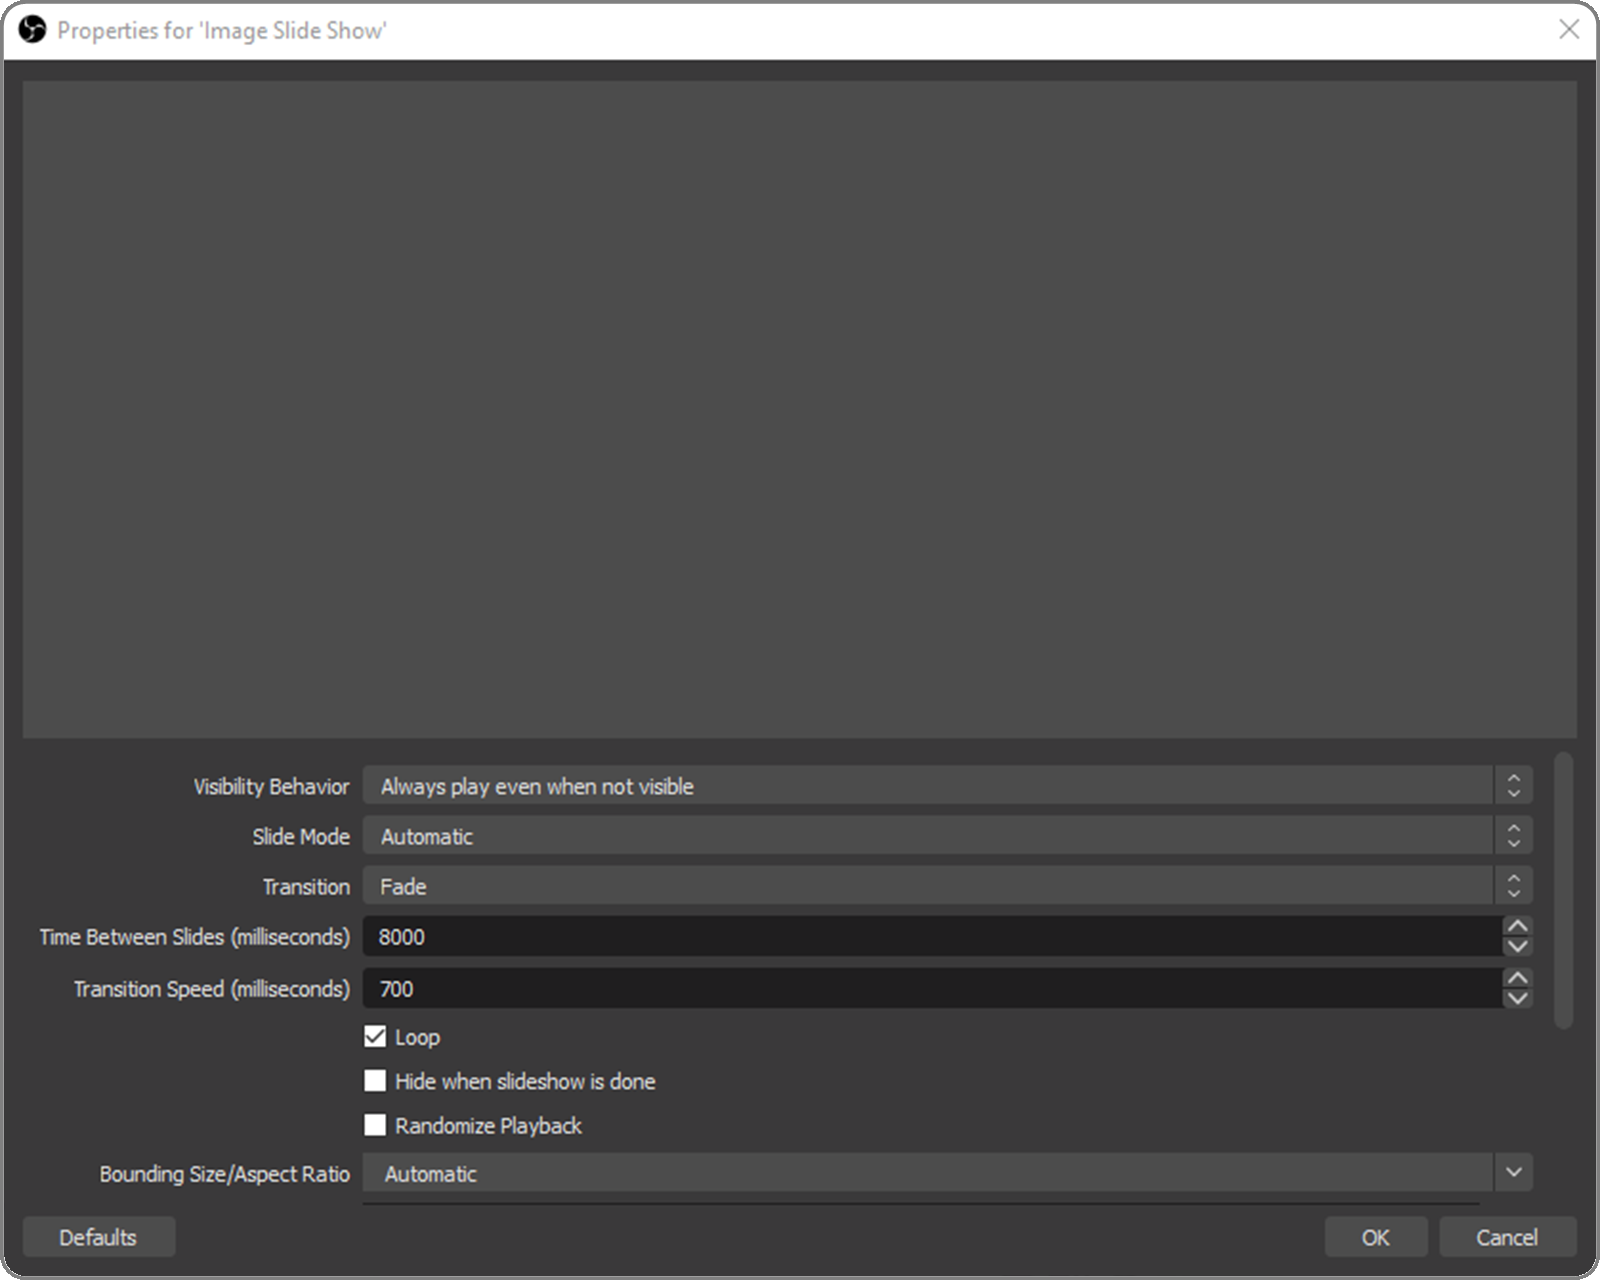
Image Slide Show
This source shows and rotates a list of images. Images can be added either one by one or there is also the option to add a complete directory. Once images are added, this source component shows them in the specified order one after another.
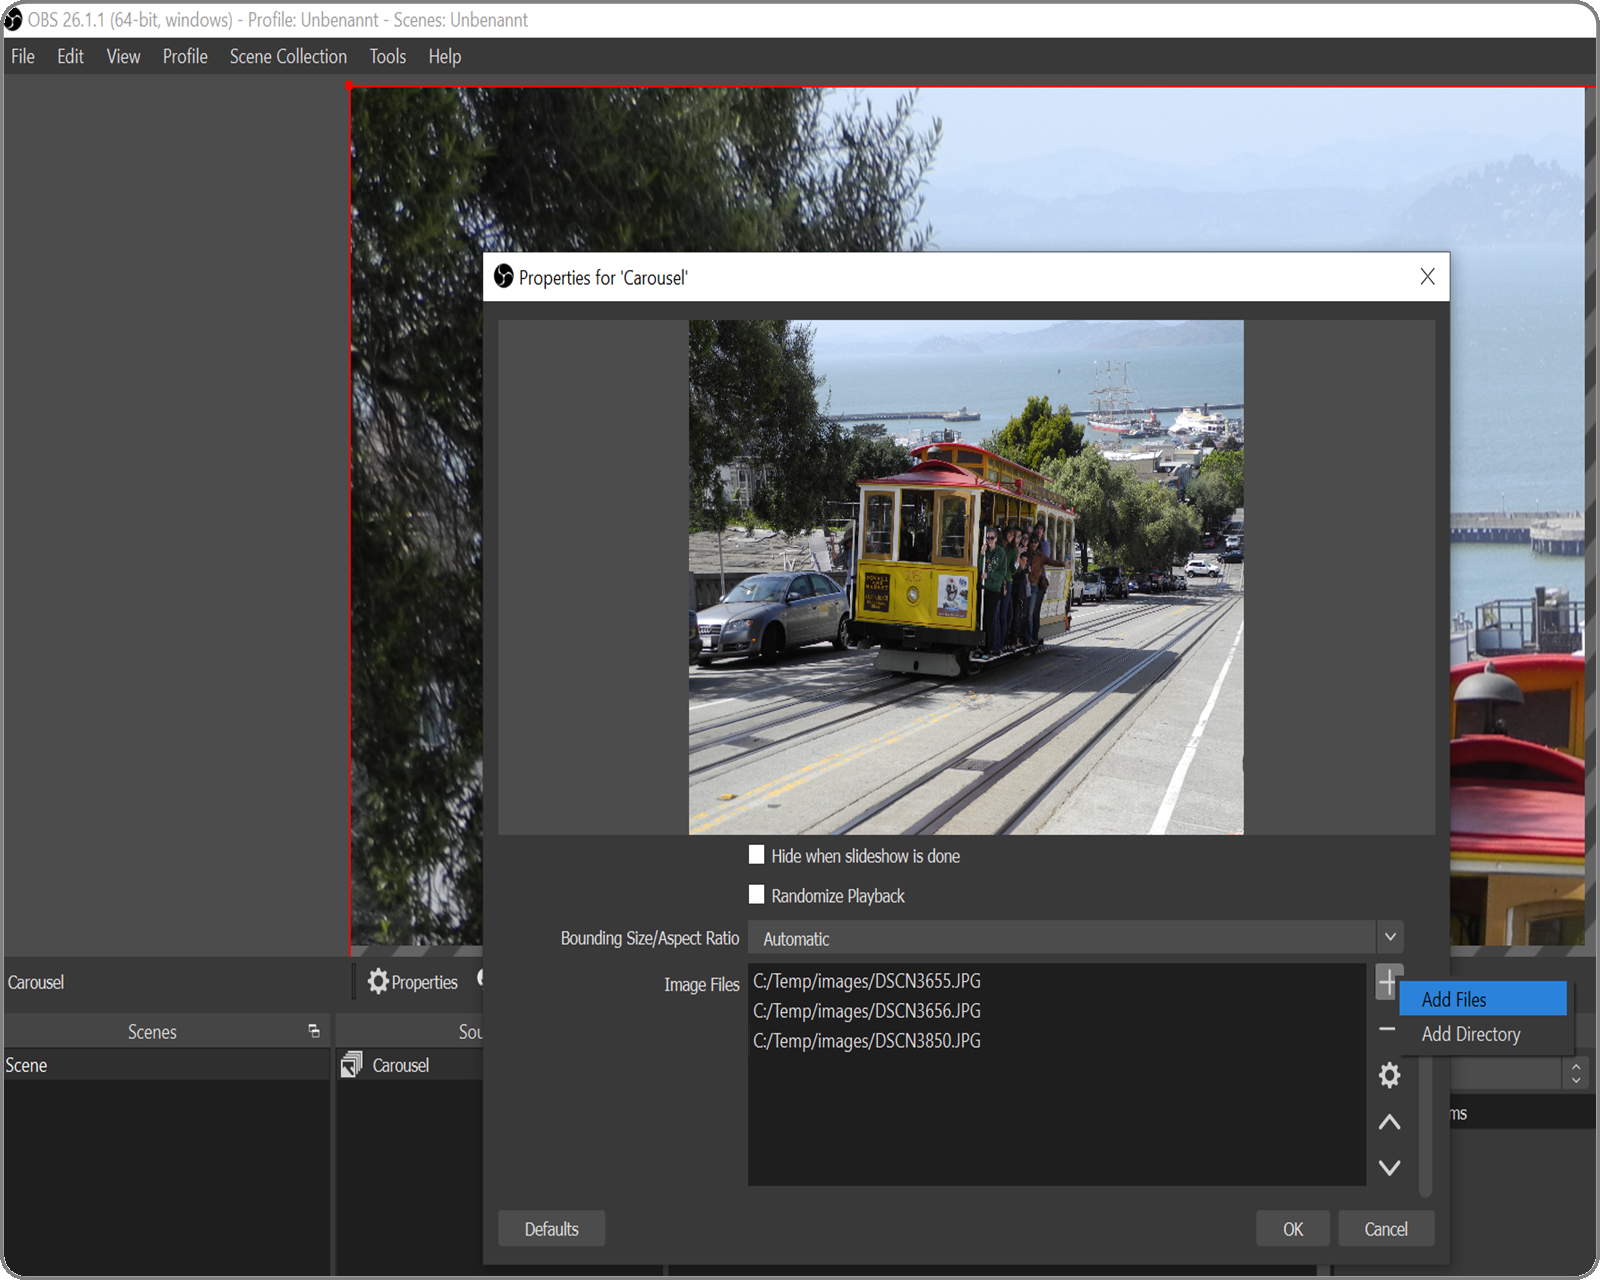
The configuration allows you to set the transition type and time.
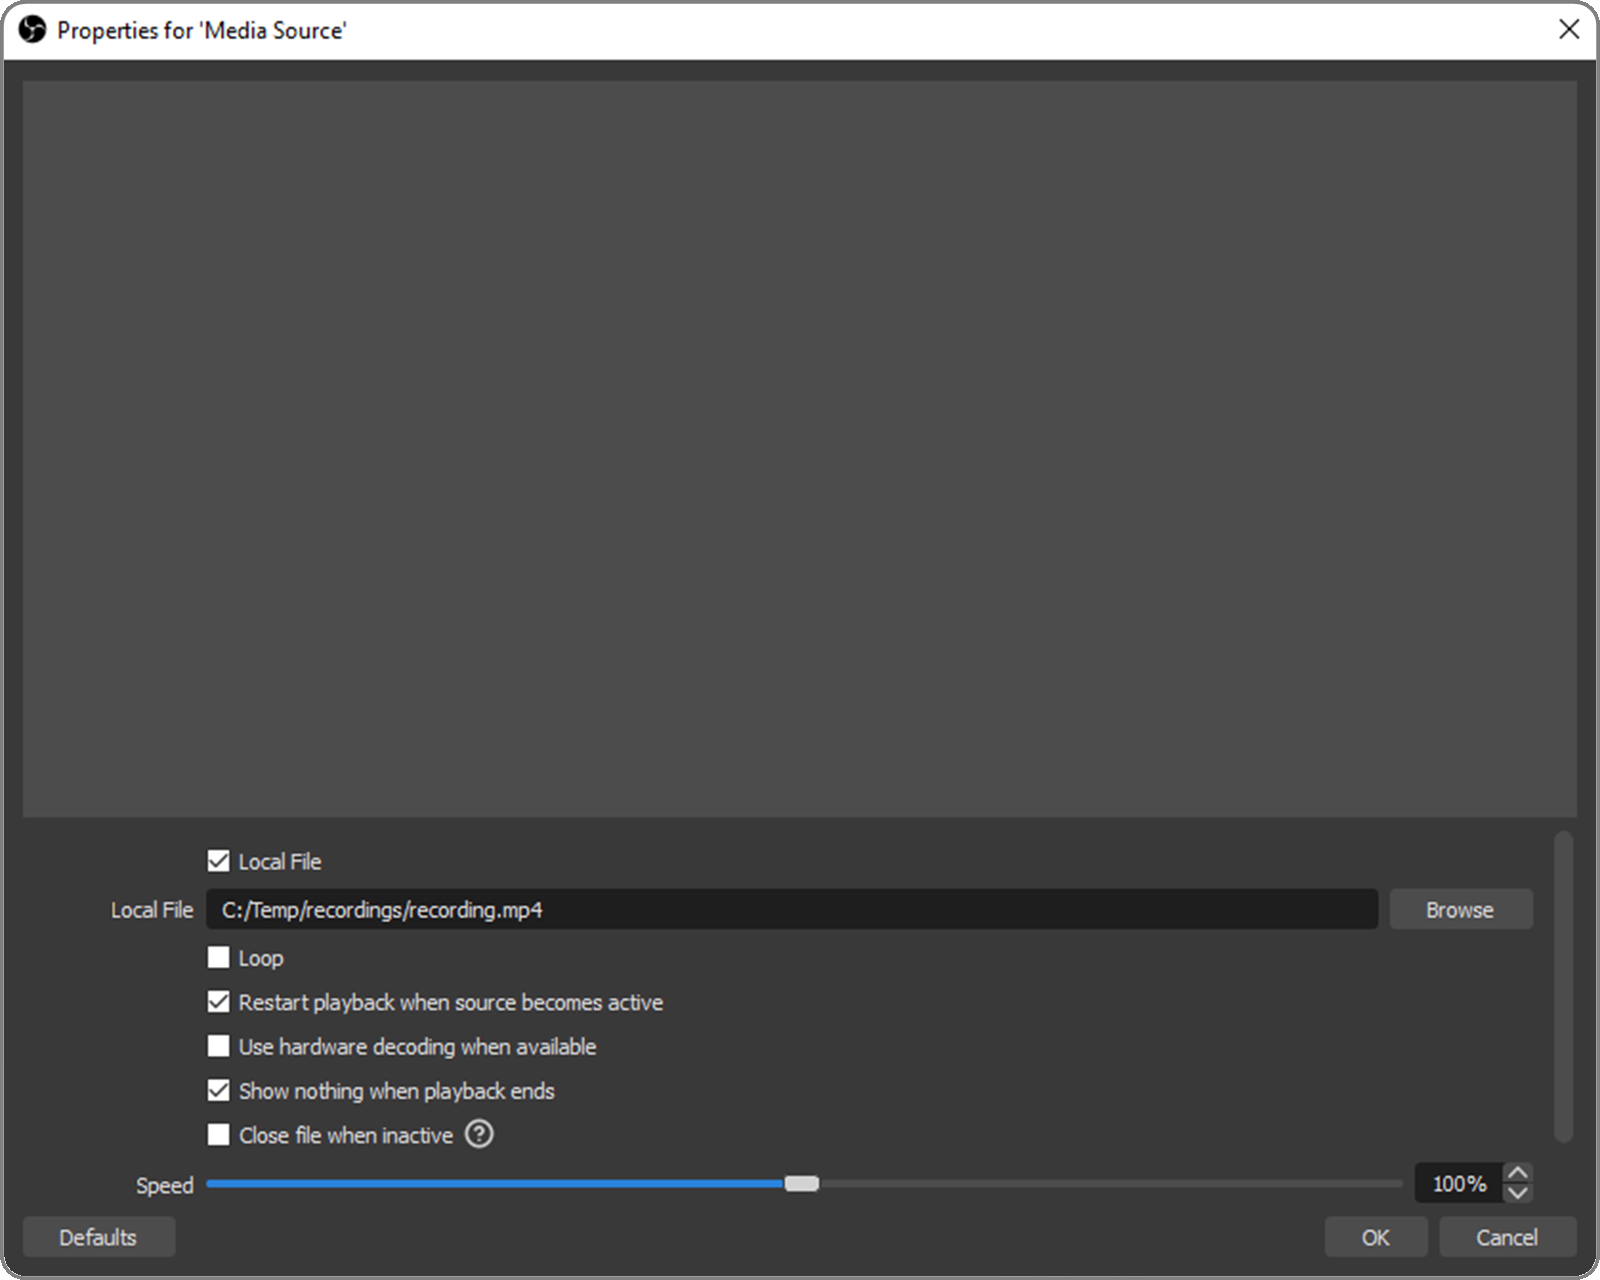
Media Source
This source can play video and audio files. It can also render streamed data. This option was used to connect the mobile phone as a webcam.
How to enable and use both options?
Play from local file
This is the default configuration. When adding a new media source, the option Local File is already checked. Just select a video or an audio file, add the source and it will be played.
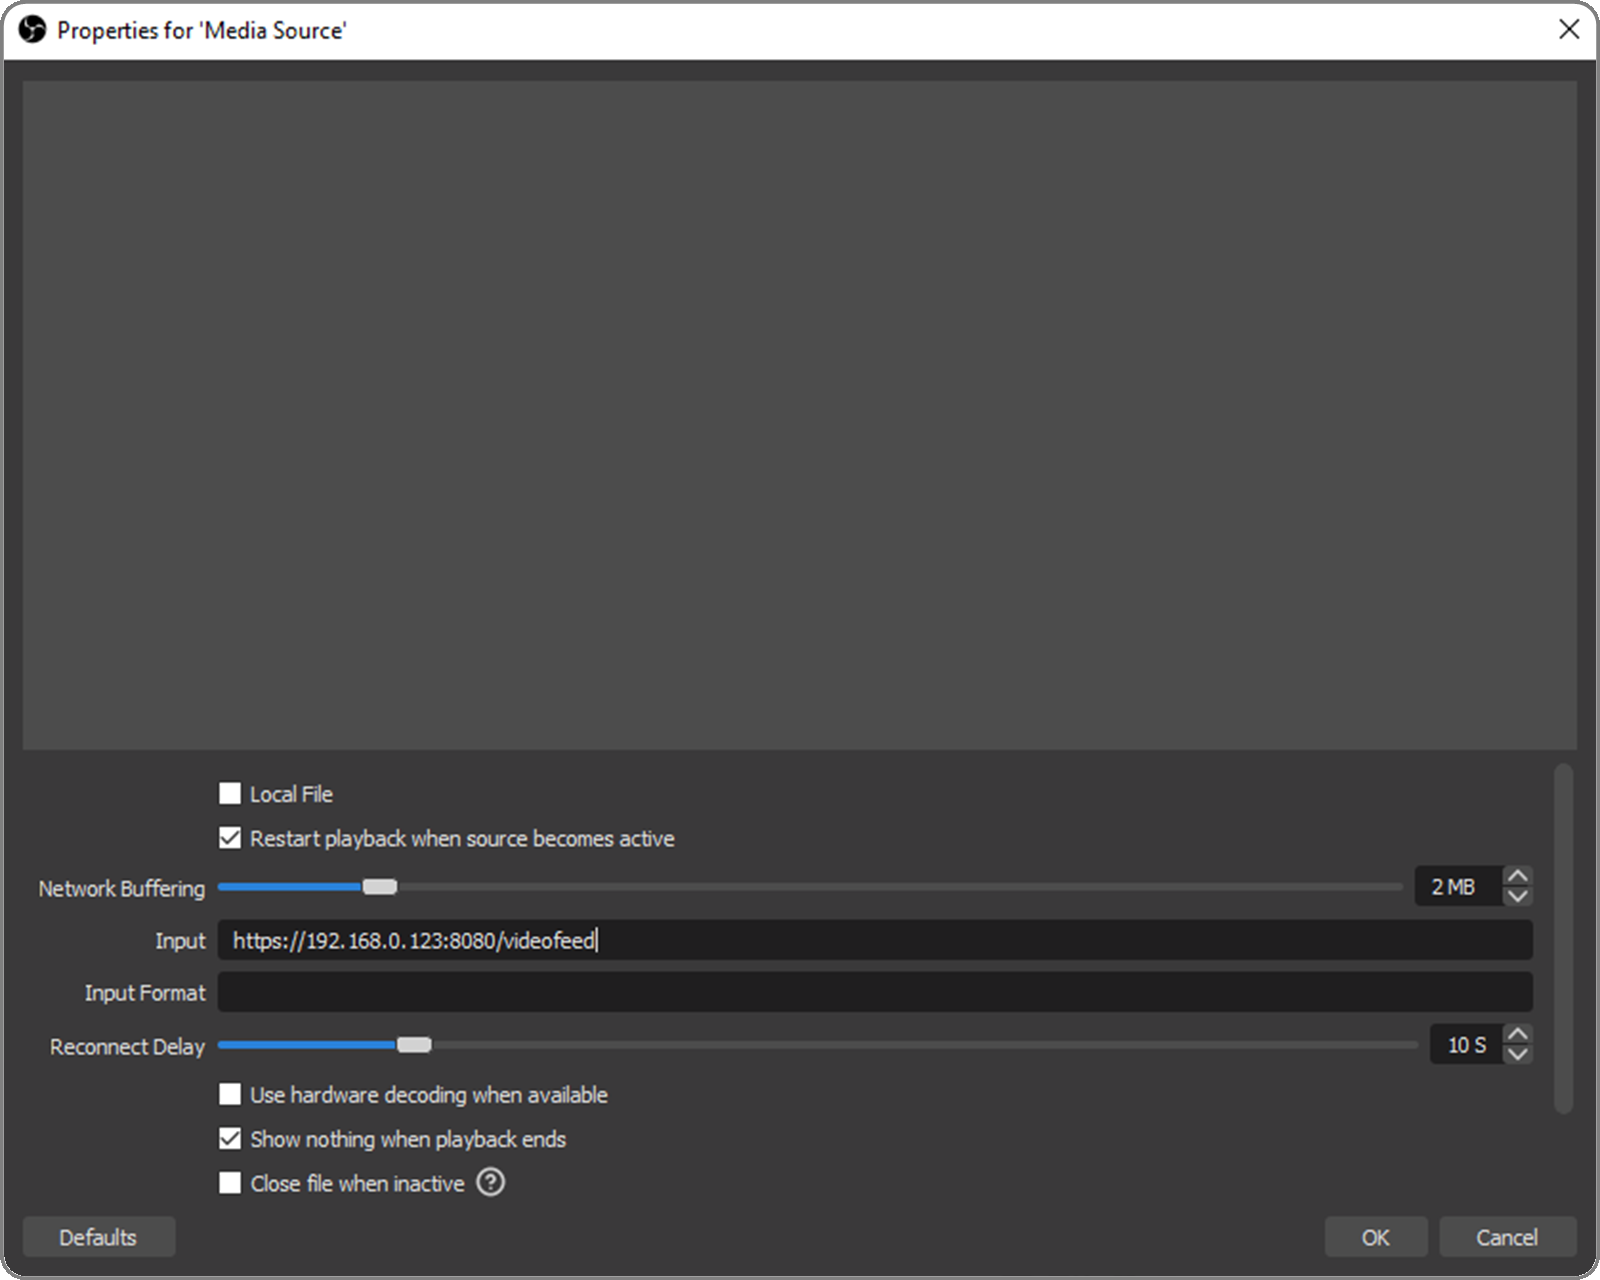
Play from stream
Check the Local File option off to configure a stream. Enter the address of the stream in the Input field:
A usage with stream can be seen in Part 2.
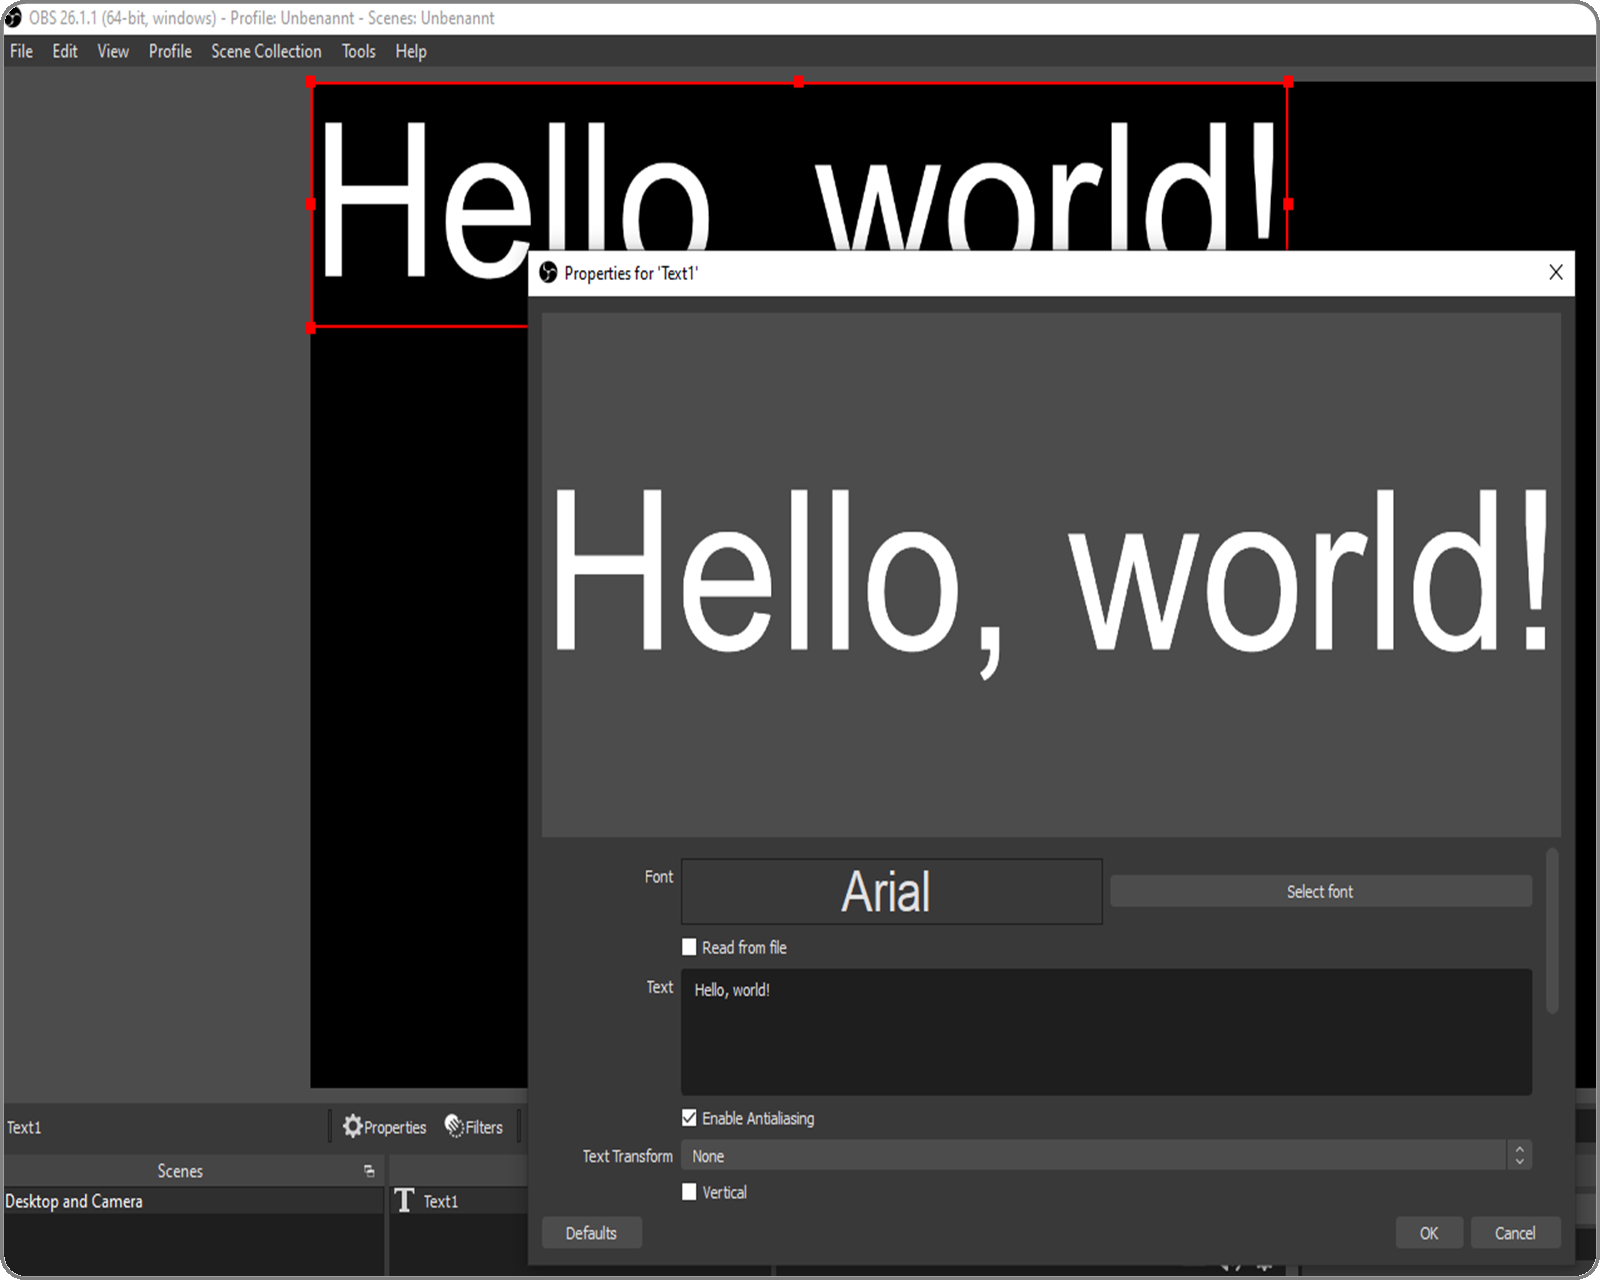
Text (GDI+)
Last but not least, some static texts are always required. Enter the desired text in the Text field:
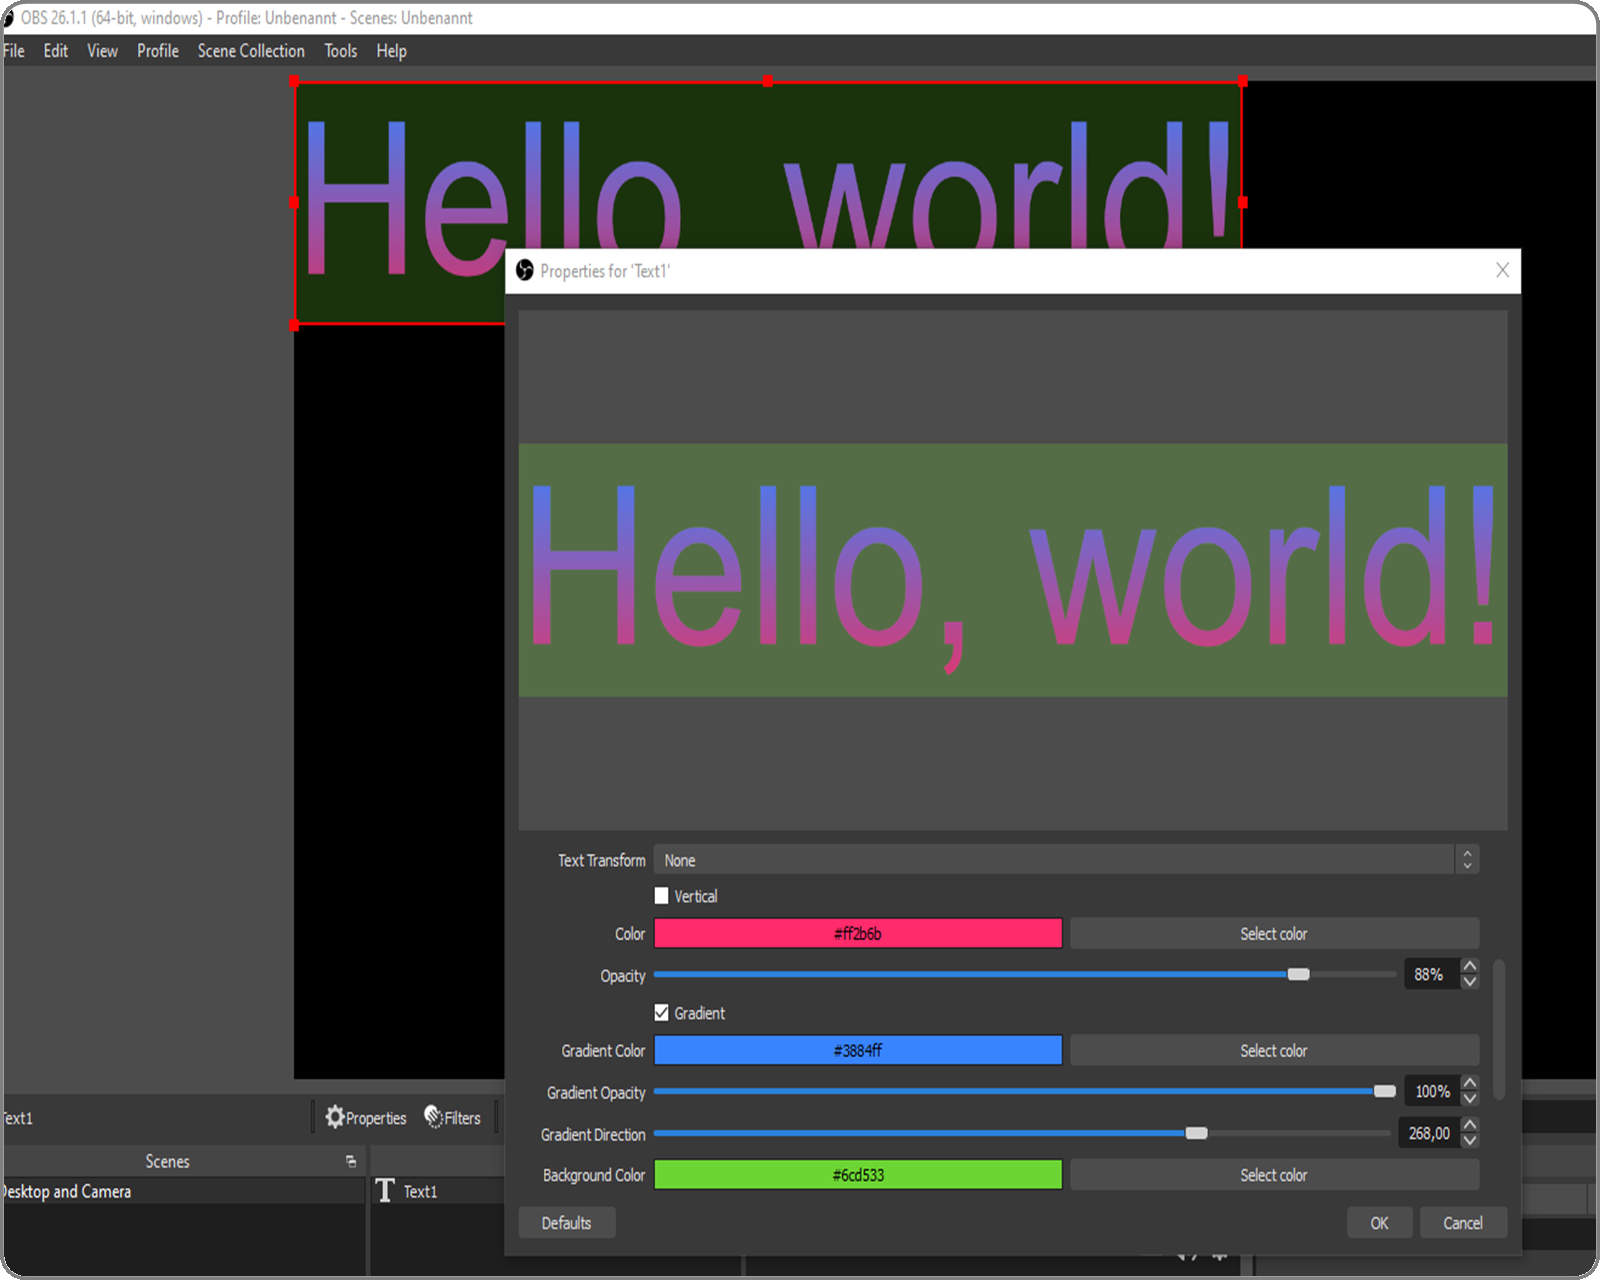
This source has a lot of useful options, like:
- changing the font type
- reading the input from a file
- defining background and foreground colors that support transparency and gradient
- alignment
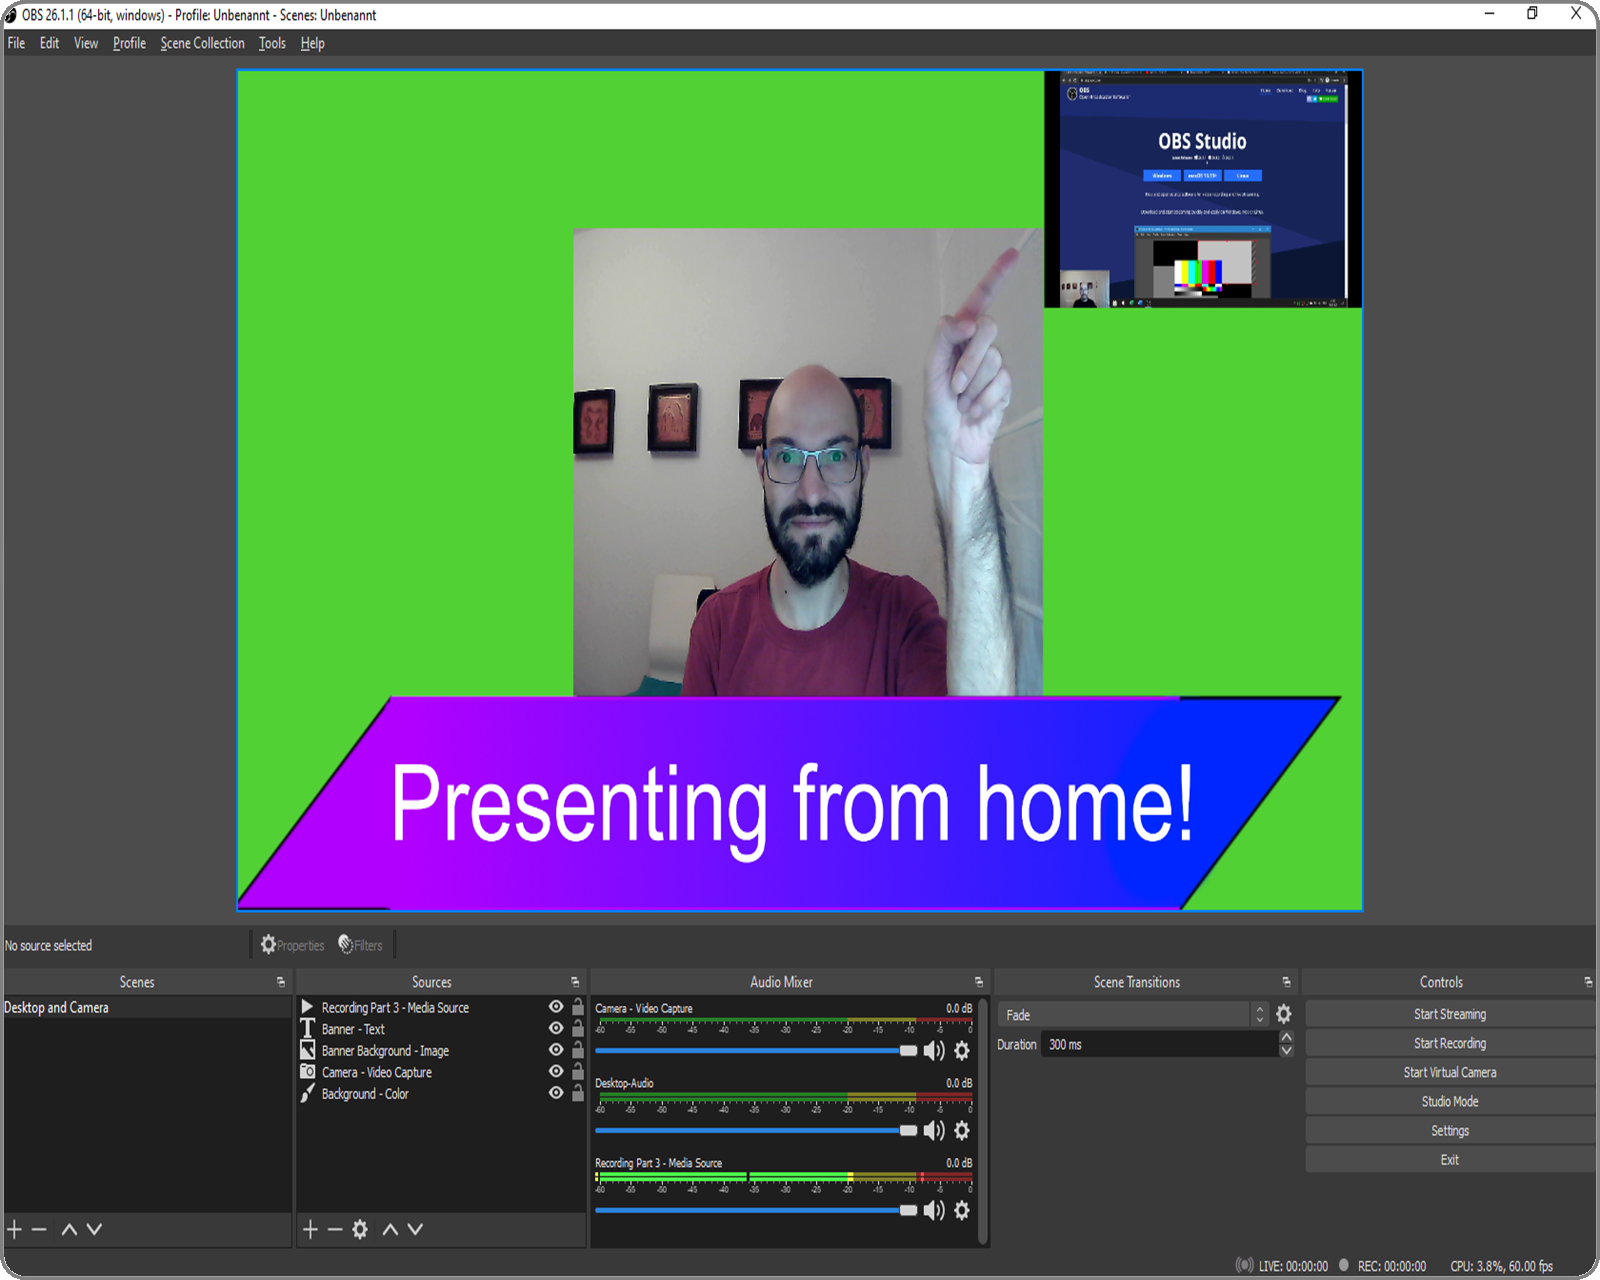
Combinations
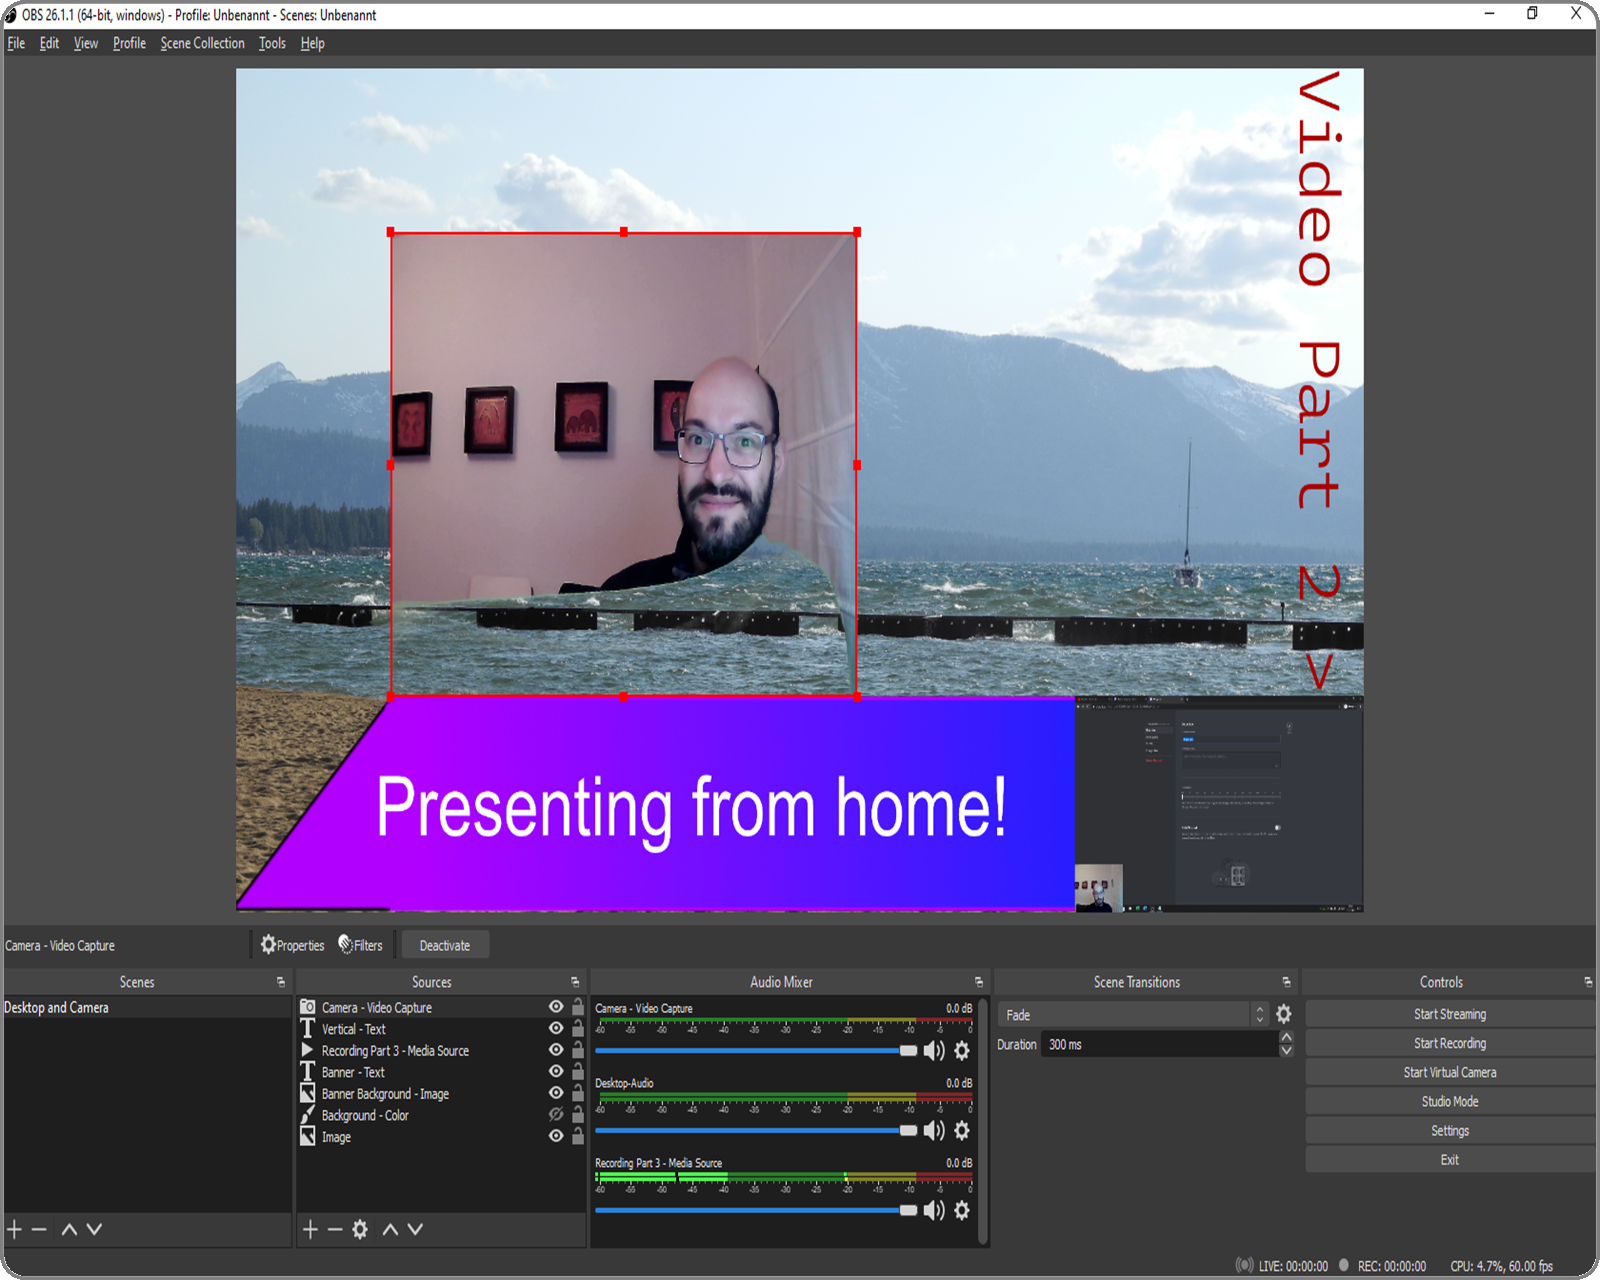
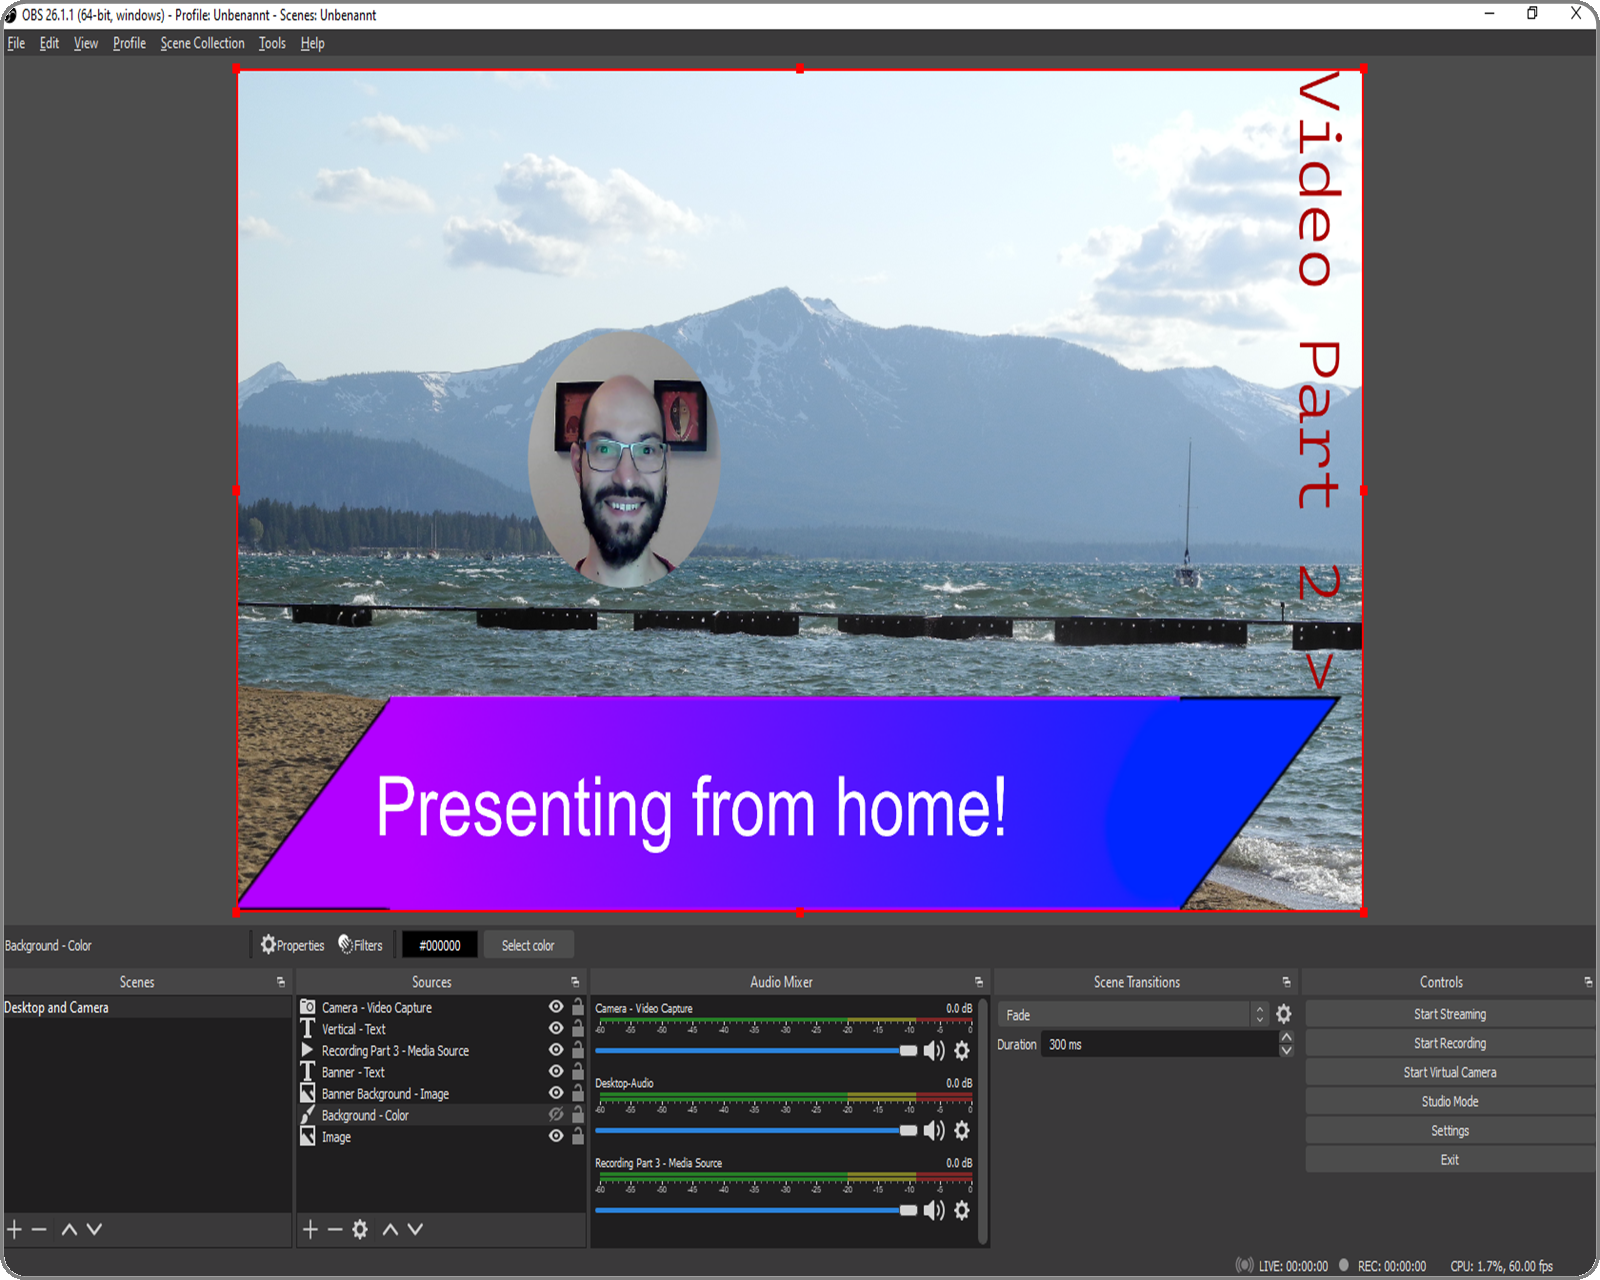
Now that you know a few options, you can use them in combination to create extensive setups using different capture sources at once. The next image shows the use of 5 sources – text, video, media, color, image:
Filters and effects on sources
OBS doesn't stop at combining different sources. It also offers filters for some sources. These can be used to create really professional looking effects. A particularly useful filter is the “Chroma Key”, when it is applied to a video capture source. It filters a selected color from the captured area, so that all spots that are with the selected color can be made transparent.
Filters are applied as follows:
1.select the capture source and press the Filters button above the panel
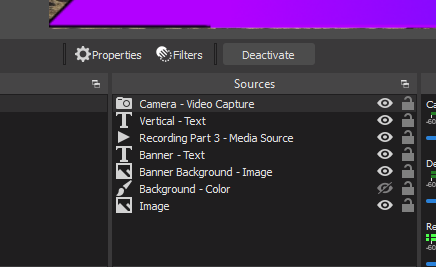
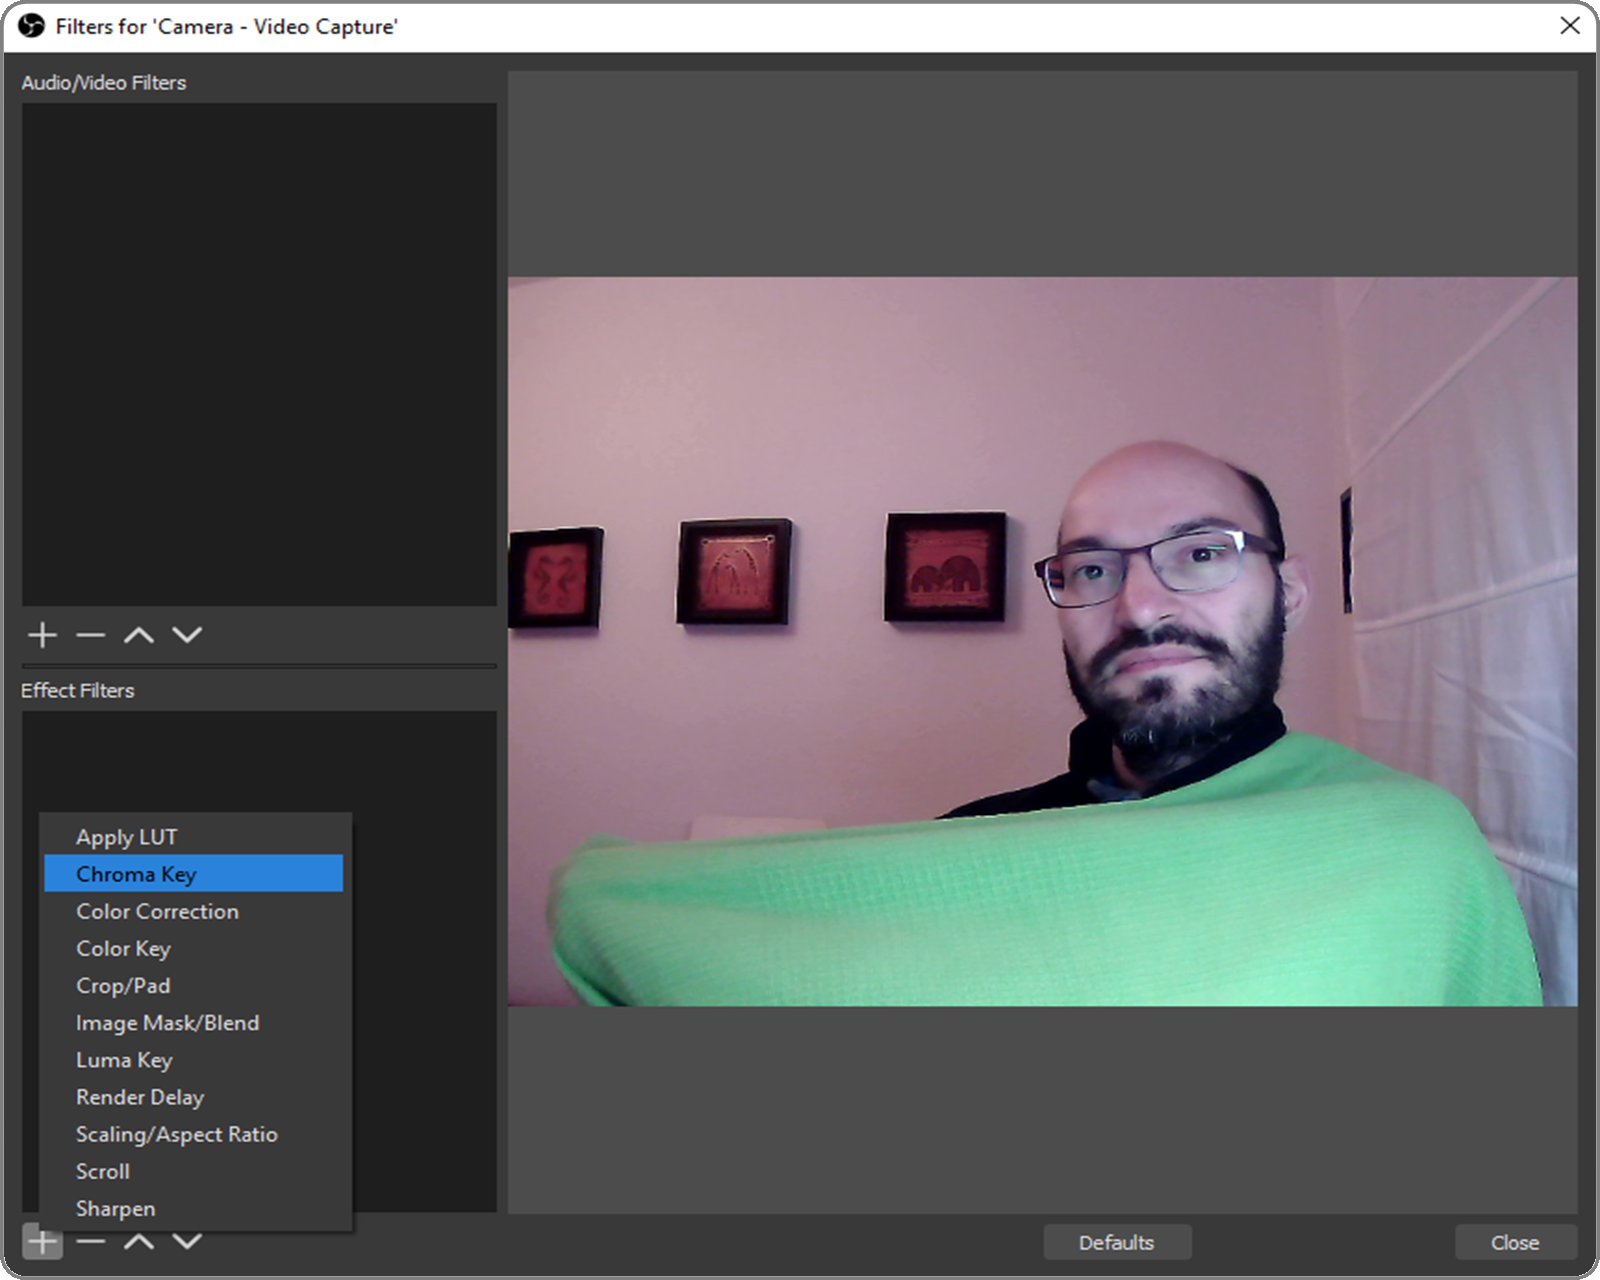
2.Open the Effect Filters menu and select the Chroma Key entry
3.If you have a green screen (https://en.wikipedia.org/wiki/Chroma_key) leave the defaults or choose a different color. I happen to own a green blanket that can be used as a green screen
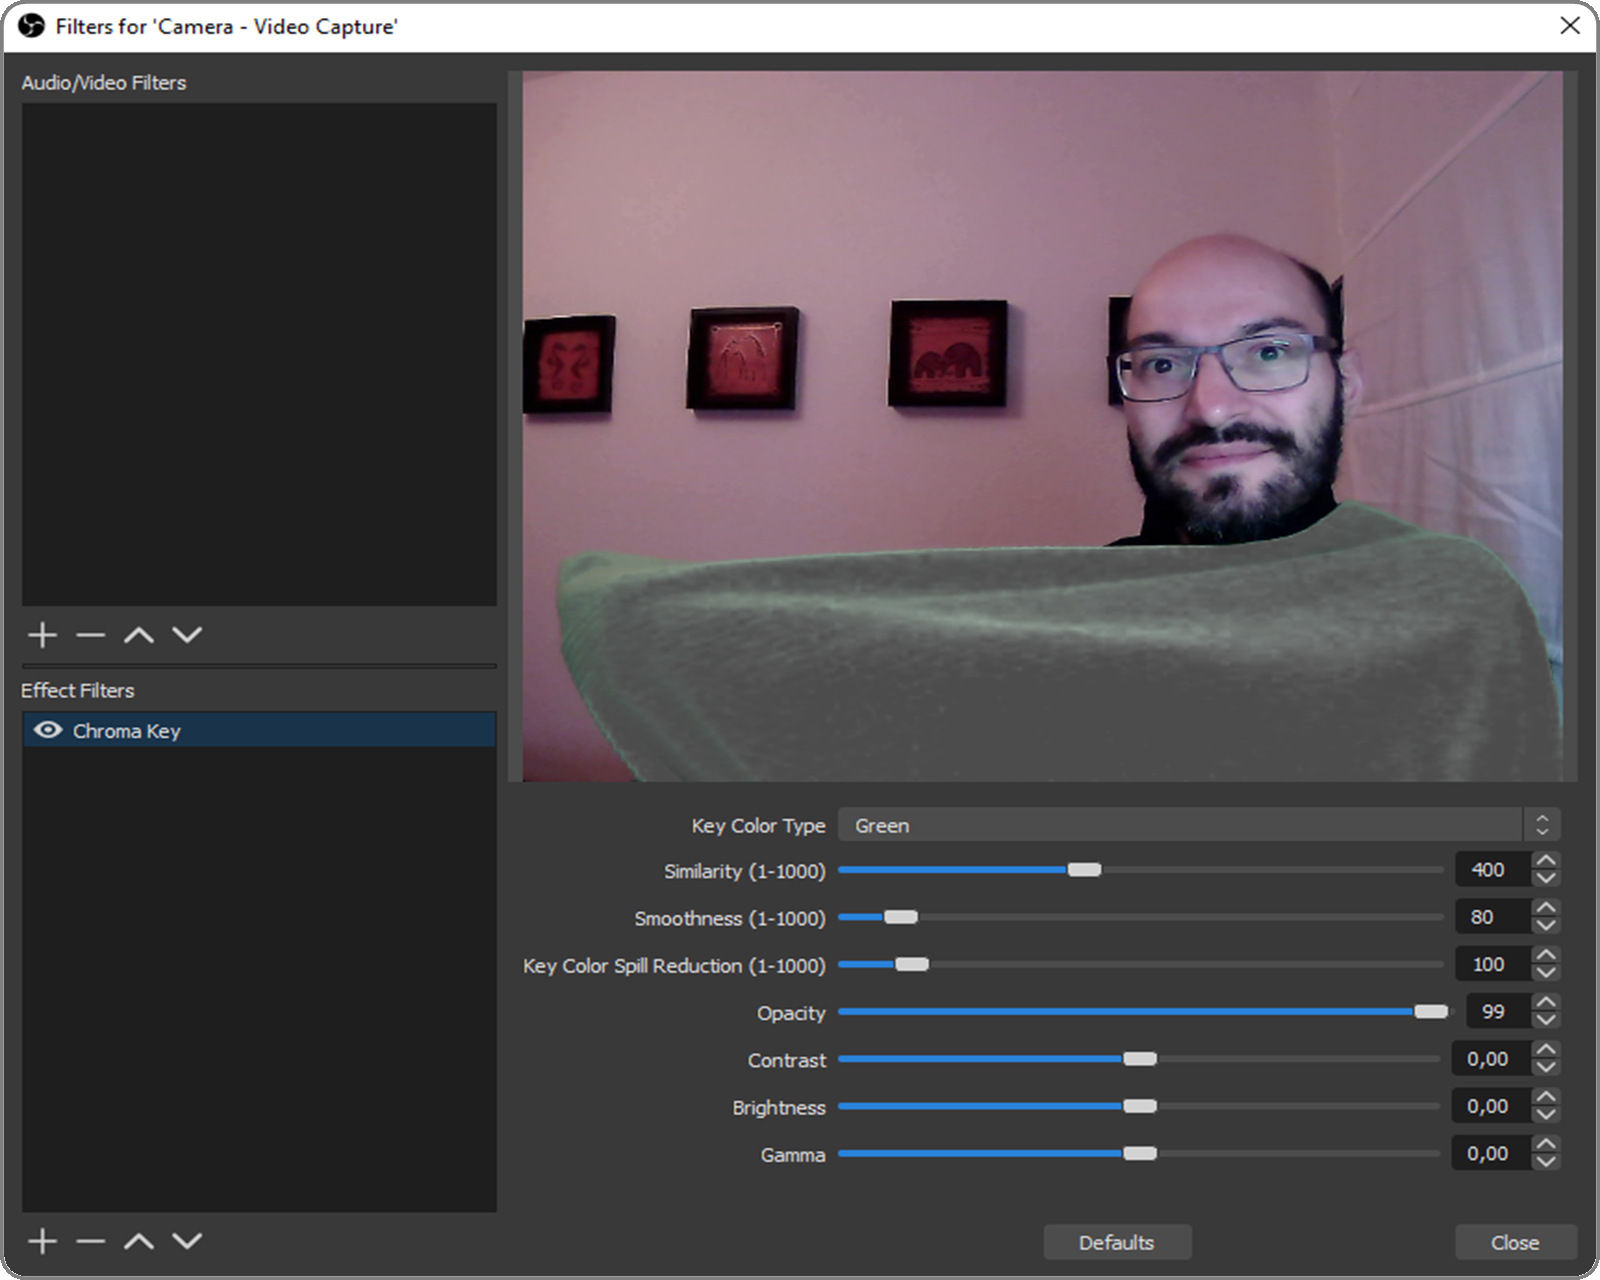
4.The blanket is now transparent.
Another very useful filter is the Image Mask/Blend. It can be used to give a source a specific shape. An example would be to make the video round instead of rectangular.
For this effect you will need to have the mask image. In this case it is a simple image with black background and white circle in the middle:

In OBS choose the video source and press Filters. Add Image Mask/Blend from the Effect Filters panel and select the mask image:
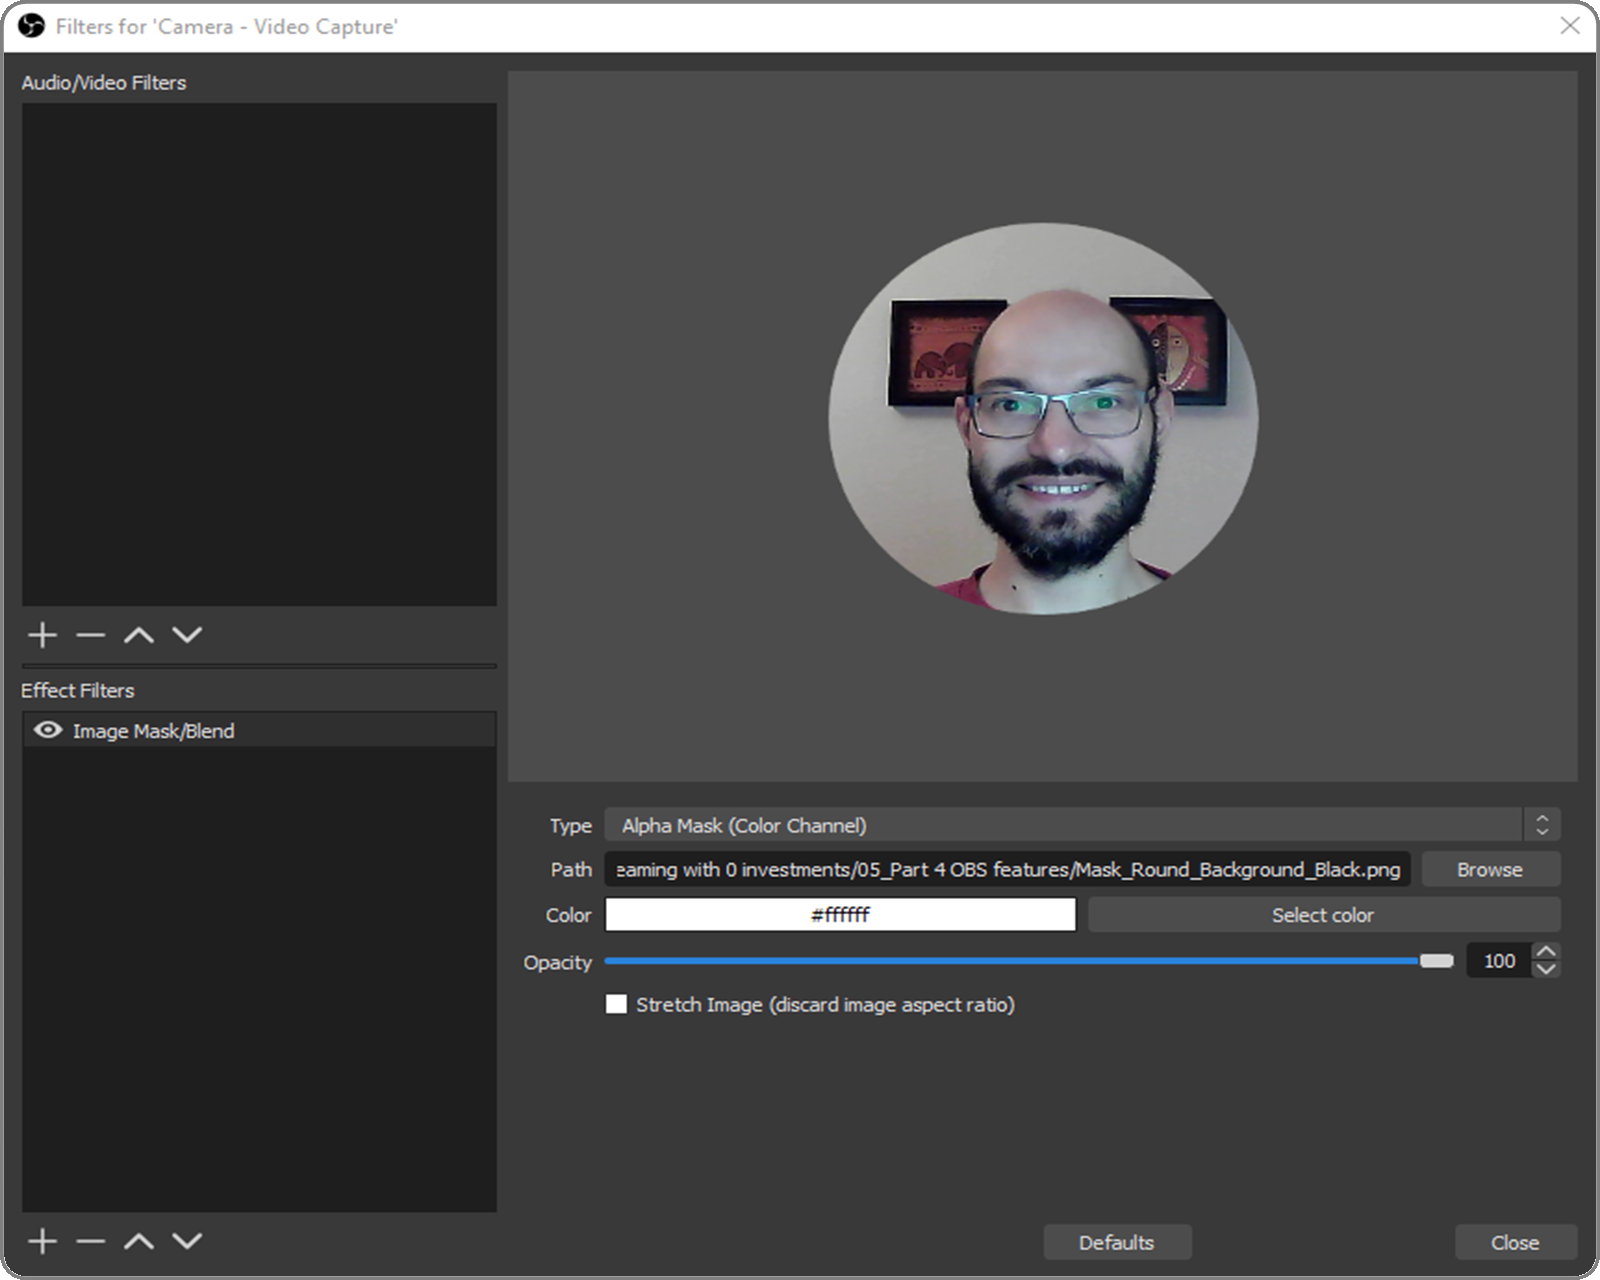
Now the video capture is in a circle and no longer in a rectangle.
One last filter that might be useful is the Apply LUT effect. LUT is an abbreviation for Lookup Table*. LUTs are used to filter a range of specific colors in an image.
If you want to make your recording black and white, OBS comes with predefined LUTs found in the OBS installation directory.
- Select the video source and press the Filters button above
- Add Apply LUT from the Effect Filters panel
- Press the Browse button after the Path input
- select the black_and_white.png image and press Open
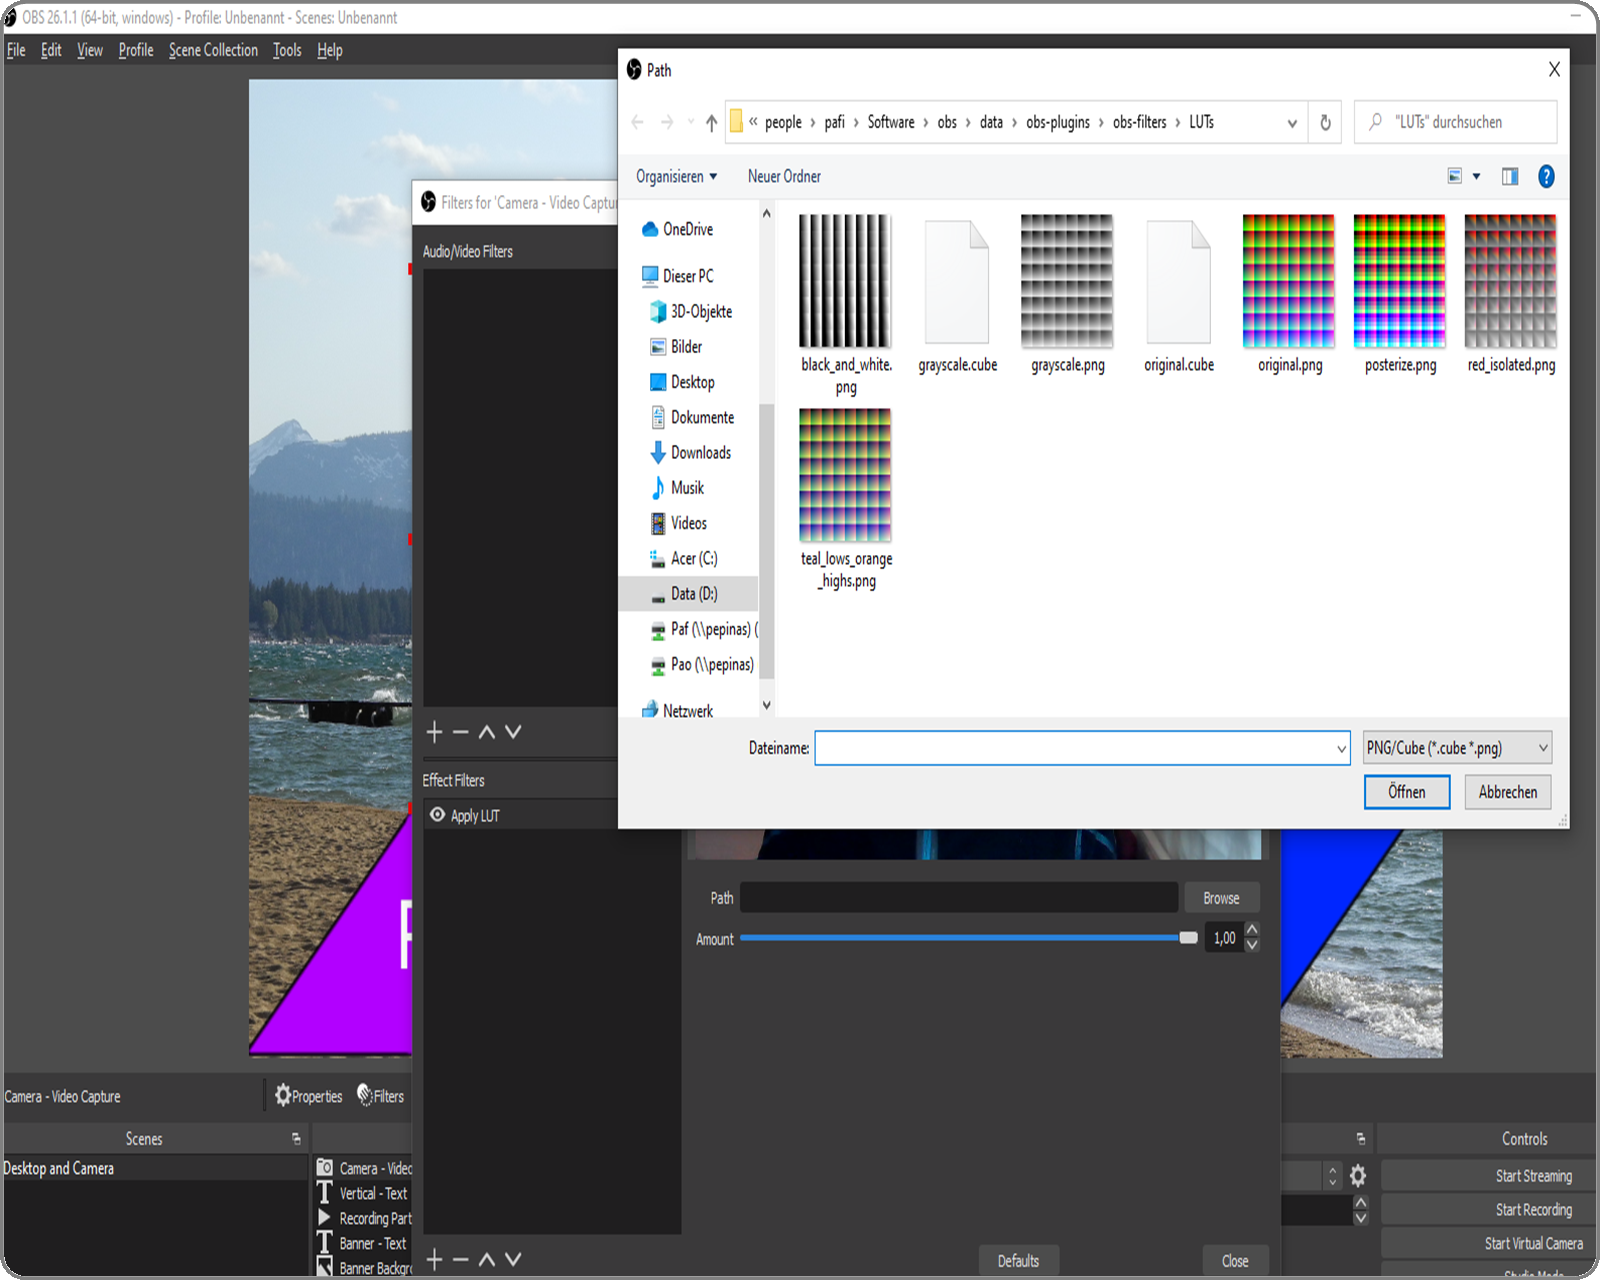
The video is now black and white.
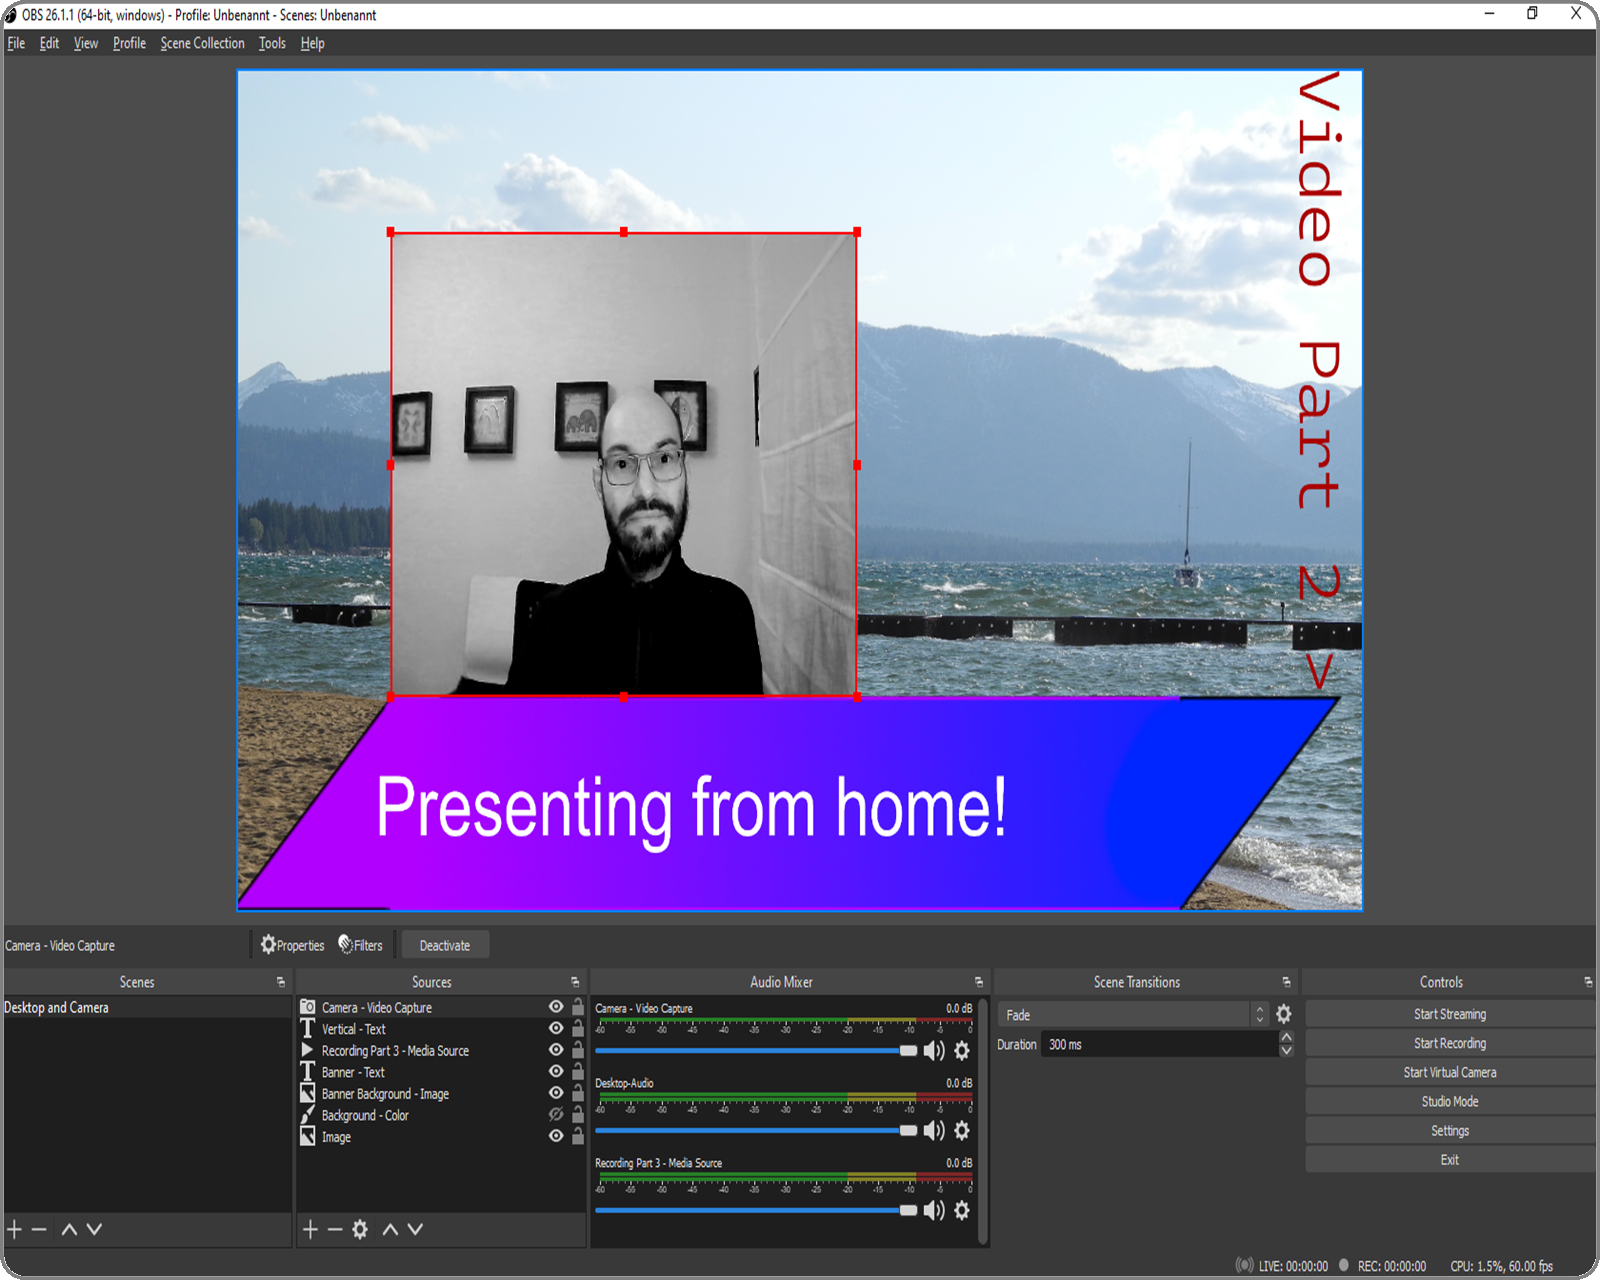
The effects can also be combined and the order is also important.
Scenes
Scene in OBS is a named collection of capture sources. OBS allows you to have multiple scenes. There is always one active scene – this means, that this and only this scene is visible to the viewers.
You can create more than two scenes in the Scenes panel. Selecting a scene in the Scenes panel, makes it immediately visible to the viewers.
Here are two different scenes 1 and 2:
Studio mode
Here is where the special layout Studio Mode comes into play. Additionally, to the live-view, it enables a preview panel, in which scenes can be edited and changed, without the viewers seeing these changes.
The additional preview panel is always on the left side, and the live-view panel is always on the right side.
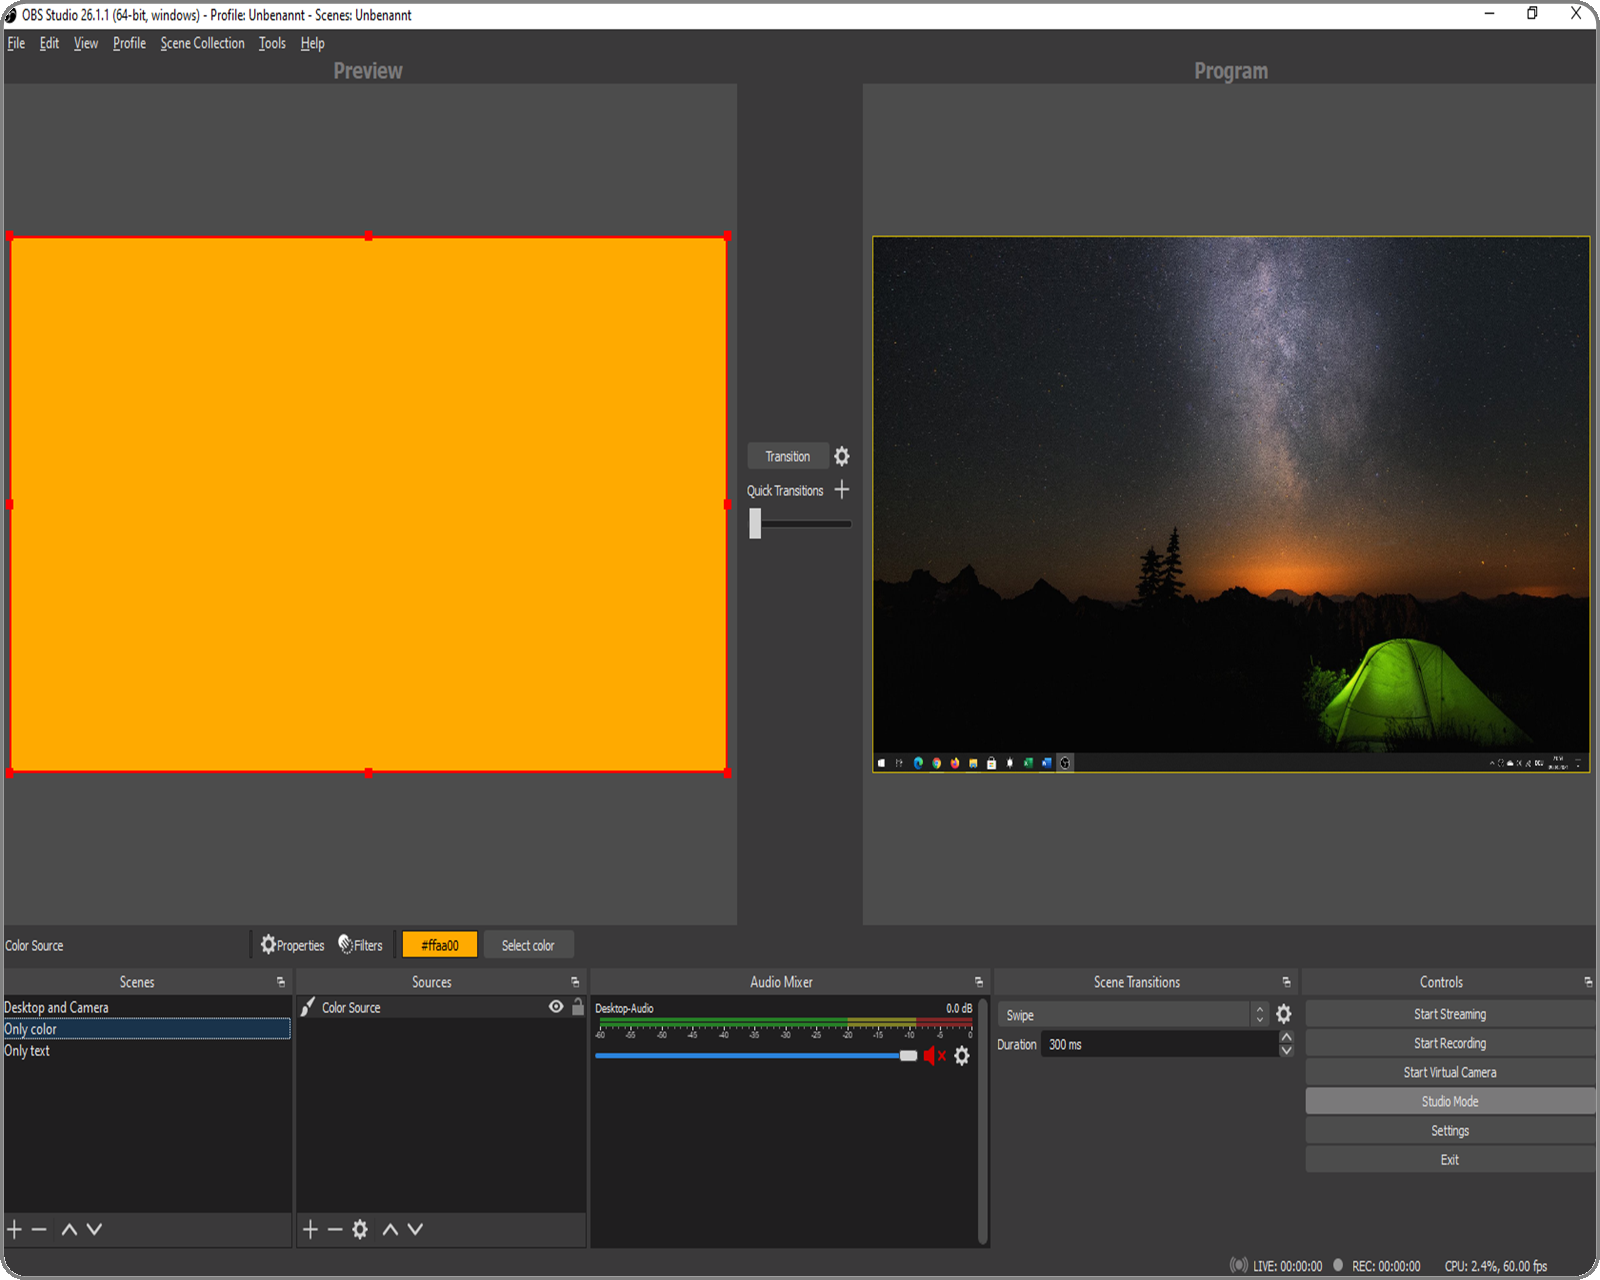
Scenes can be swapped using the Transition button in the middle between the two panels.
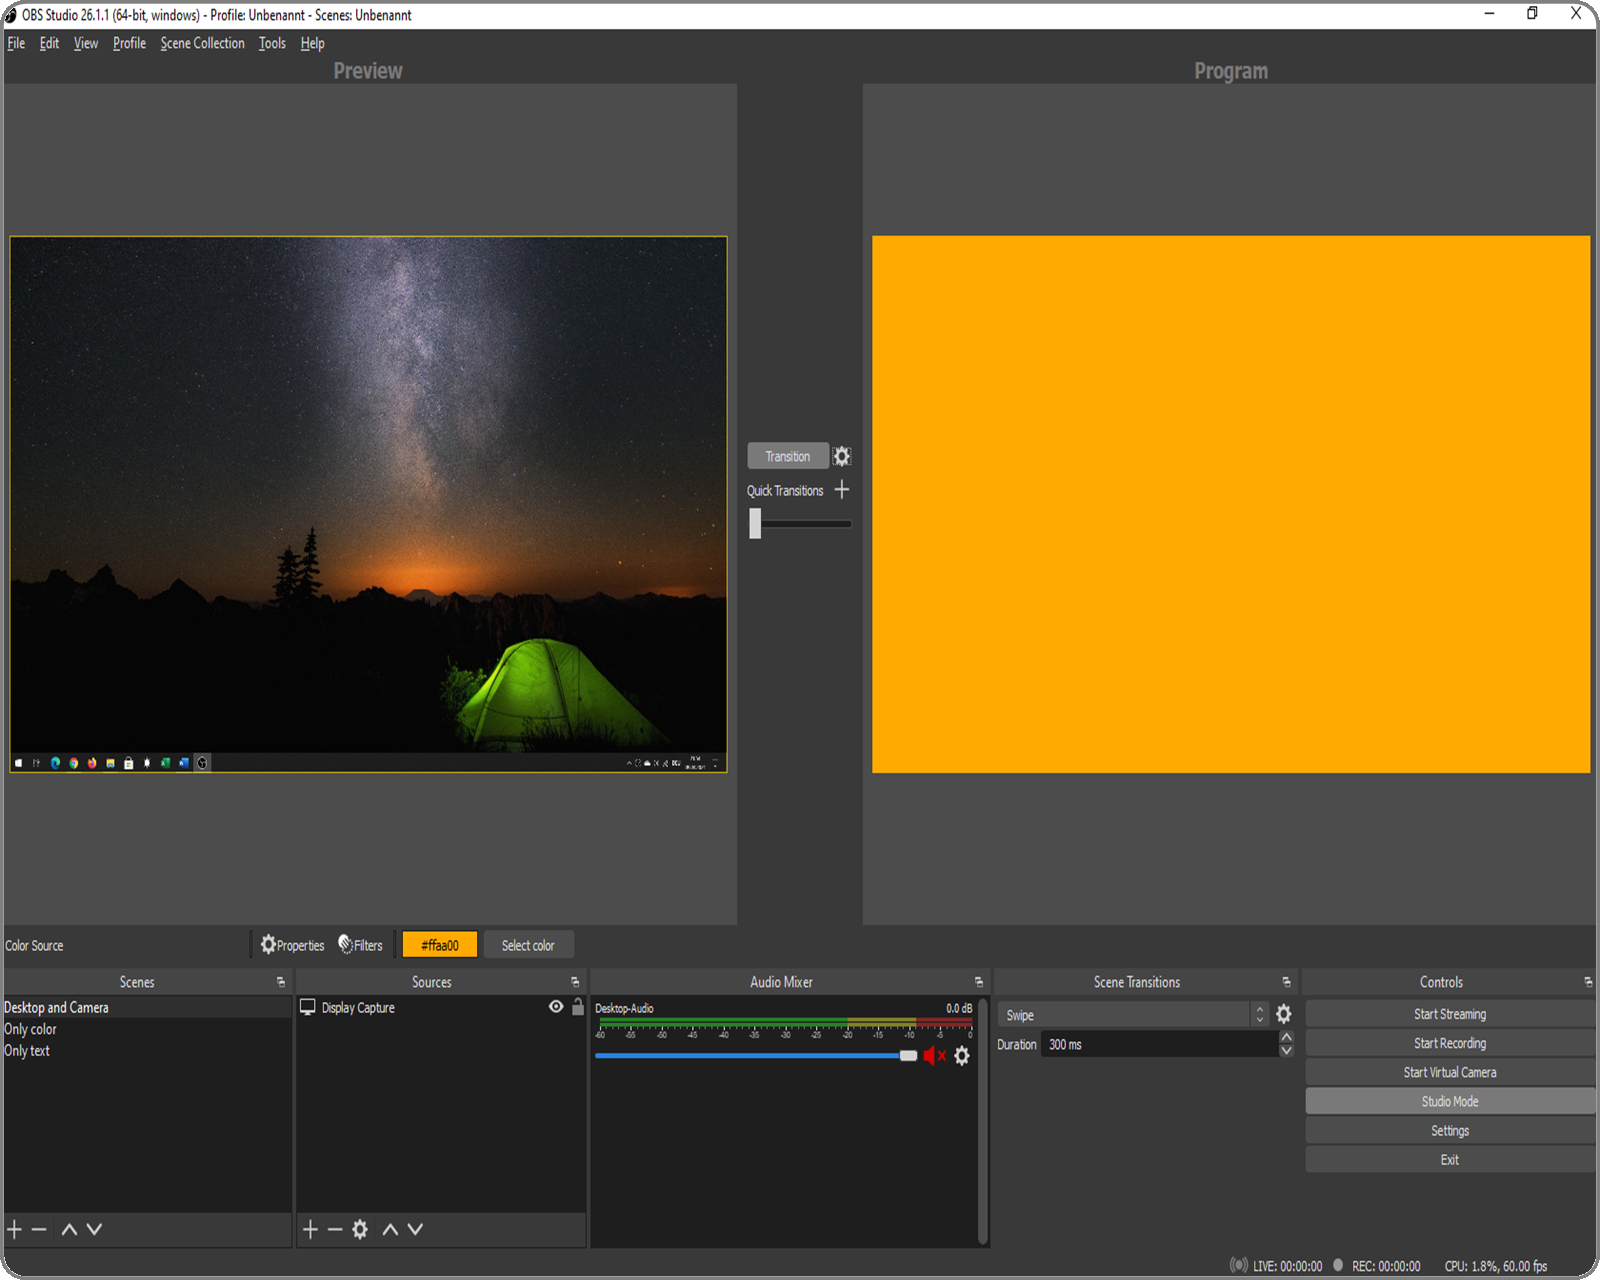
In studio mode, the currently selected scene in the Scenes panel is in preview and in case of a transition it will be swapped with the current live-scene.
There are a few different transition type effects. All of them can be selected and configured from the Scene Transitions panel.
Conclusion
That was the fourth and the last part from the series Video recording and streaming with 0 investments.
In this article, you learned how to take full advantage of OBS. Detailed information about OBS can be found in the project’s wiki: https://obsproject.com/wiki/
If at any point you get stuck and need help or you have any questions in general or you have a suggestion for an article on a specific topic - don’t hesitate to reach out - leave a comment and I'll help gladly.
In this series you saw and learned what OBS is, how to record and stream your desktop and show yourself with the camera on YouTube, Twitch and Discord. All of this for free and possible with 0 investments!
I hope you liked the series.
I had a lot of fun writing the articles and recording the videos and learned a lot in the process.
Have fun recording and streaming with OBS. 😊